- REVIEWS
Displays Electronics 
Speakers Sources Other Gear Software - HOW TO
How To Buy How To Use Tech 101
DIY Reader Home Theater: Starry Night

For several years, my wife and I talked about buying or building a new house in Pinecrest, Florida, near the house that I grew up in. As luck would have it, the house next door to the one I grew up in came up for sale at a very reasonable price, so we purchased it, tore it down, and began planning our new home. I knew from the start that a dedicated home theater would be included, but I had no experience in designing or building one. Fortunately, there is a universe of information available on the Internet. I found a fantastic resource, www.avsforum.com, where a mixture of amateurs and professionals share their audio/video/theater-building expertise free of charge.
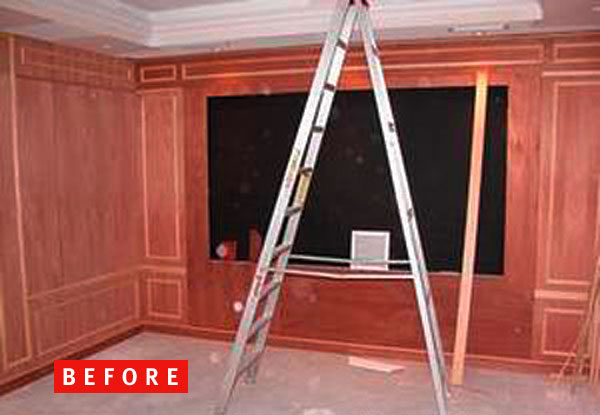
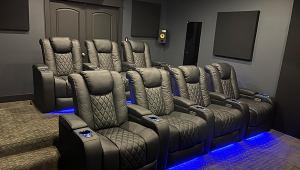
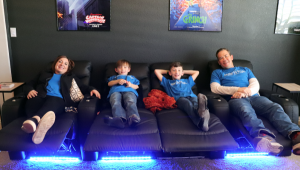
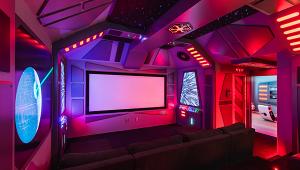
Building my home theater began with a concept I remembered from my favorite restaurant in Coral Gables, Florida. One of the dining areas in that restaurant is an elegant mahogany-paneled space. I knew that the simple elegance of that look would blend well with the interior décor we planned for the rest of the house. During the earliest stages of designing the theater, I decided that we would need enough space to accommodate at least eight guests. This meant building a room with two levels (with four theater loungers on each level). The room dimensions are 15 by 18.5 feet, which allows for a comfortable viewing distance for both rows and an adequate aisle between the side wall and the chairs.
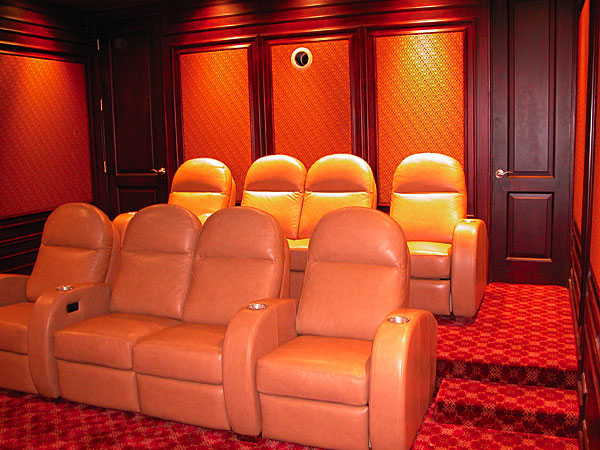
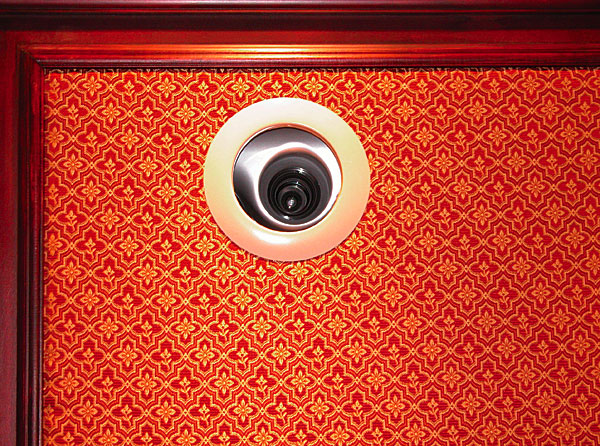
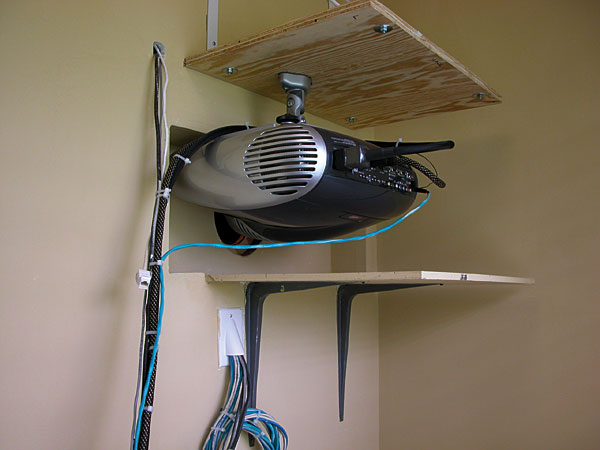
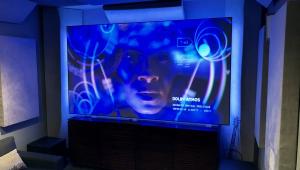
We decided that the look of this room would be simple, elegant, and completely clear of any audio or video equipment. So, we built a separate room behind the theater to house all of the equipment, including the projector. We designed the front wall of the theater so that we could build the front speakers (right, left, center channel, and subwoofer) into the wall around the 123-inch Stewart Studiotek 130 screen. We then completely hid the speakers behind a large grille constructed of plywood and black speaker cloth. Next, we hid four more speakers in the soffits surrounding the two rows of chairs for 7.1 sound.
Plush designer carpet and upholstered fabric between the mahogany wall panels provide good sound control and room acoustics. To help keep the cost down, I did the fabric upholstering myself. It really wasn't too difficult, but it was very time consuming. I used more than a thousand staples. Thank goodness for the electric staple gun. One design element that my wife insisted upon was the fiberoptic ceiling. We had seen a number of high-end theaters with this starry-sky look, and we were very impressed. I had no idea how to create this effect until I did a little homework on the Internet. I found that the equipment I needed was relatively inexpensive, and the information describing the installation of a fiberoptic ceiling was readily available. A good source for purchasing the fiberoptic cable and the light box (referred to as an illuminator) is eBay.
One of the most important things to consider in building and designing a home theater (and probably the easiest to overlook) is the theater's air-conditioning and heating requirements. (See HVAC tips on page 109.) Nobody is going to sit in an uncomfortable room to watch a movie, no matter how beautiful the theater is. Some errors in planning are inevitable and usually result in the waste of a small amount of time and money, but failing to properly plan for HVAC shouldn't be one of them. That was my expensive lesson on this project. After I'd called a dozen companies, we finally found only one that was willing to install a system in the tiny, cramped attic space above the theater. But it all turned out well, and the theater temperature is controlled by a wireless remote thermostat. We use an RTI T3 touchscreen remote to control the rest of the theater. Here, a special thanks goes out to the RTI programming genius Bruce Powell (screen name Glackowitz) who generously donated his time to assist me with programming this remote. It really pulled the project together.
When it came time to make a decision about seating, we were lucky to find Bass Industries, a great company right here in Miami with an extensive home theater showroom. The salespeople at Bass Industries were very knowledgeable and accommodating. In addition to great theater seating, they sell poster light boxes, concession and movie signs, and numerous products to help create that special theater experience at home. After we'd purchased eight motorized theater loungers, we couldn't resist a custom movie-poster light box to go over the bar adjacent to the theater. It has been a great conversation piece and helps to create a movie-theater experience.
One more person I must thank is my neighbor and friend, Alberto Villarreal. An electrical engineer by trade, he is a master of all things mechanical and electrical. He installed the Lutron GRAFIK Eye, illuminated the poster, and helped me invert and hang the projector. A project like this requires someone like Alberto.
Overall, building our first theater was a lot of fun. The end result was even better than I expected. Our Starlight Theater is by far the most interesting and enjoyable room in the house.
Equipment List:
SIM2 C3X projector
Stewart Studiotek 130 123-inch diagonal 16:9 screen
Monster HT UPS 1000 uninterruptible power supply
DirecTV HR 10-250 with TiVo
Denon DVD-756 DVD player
Integra DTR-7.6 receiver
Triad in-wall subwoofer
ADS in-wall speakers (6)
RTI T3 touchscreen remote
Lutron GRAFIK Eye 3000 Series
Cost to build the theater was approximately $28,000, including the HVAC system and eight motorized theater chairs.
Equipment cost was approximately $25,000.


| Displays Electronics Speakers | Sources Other Gear Software | Top Picks of the Year Top Picks | Custom Install How To Buy How To Use |
Tech 101
|
Latest News Features Blogs | Resources Subscriptions |
WHERE TECHNOLOGY BECOMES ENTERTAINMENT
 © 2025 Sound&Vision
AVTech Media Americas Inc., USA
All rights reserved

