- REVIEWS
Displays Electronics 
Speakers Sources Other Gear Software - HOW TO
How To Buy How To Use Tech 101
The Balancing Act

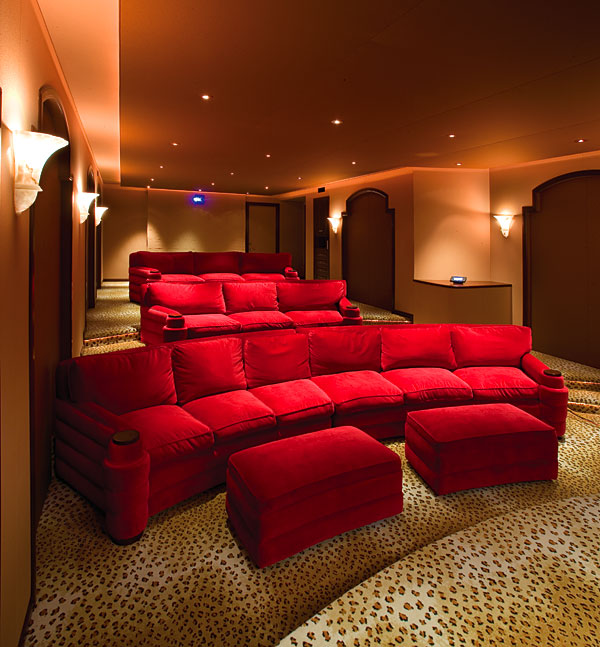
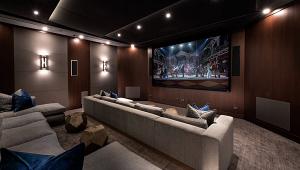
Building a home theater is a balancing act. It could be interior design and A/V equipment going head to head, or acoustics and building materials, or the desired number of seats versus available space. It could be all of the above, but, in the end, something's got to give. In this California project, the opposing forces were optimum acoustics, along with excellent A/V, gorgeous interior design, and ample living space. The homeowner wanted to eke out as much elbow room for entertaining while giving up nothing on sound quality—all under the watchful eye of a discerning interior designer.
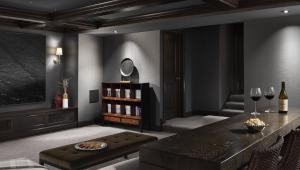
The long, narrow concrete room is the basement of the home, which had served as a storage bunker before being converted into a combination home theater/wine cellar. According to Jeff Wetzel, vice president of Manhattan Integrated Solutions, who installed this theater, the first decision in any theater is to determine on which wall the screen will be located. "After that, you know how the room will be oriented," he says.
In any theater, acoustics should be a consideration, but here, the homeowner emphasized the importance of perfect sound, so MIS brought in Performance Media Industries from Fairfax, California, to handle technical aspects of the acoustic design. PMI's goal was to recreate the same volume levels and overall experience a film's sound mixers heard when they mixed the soundtrack—and that required using acoustic treatments, careful seat and speaker location, and equalization to ensure a 105-decibel peak level from every speaker at every seat in the room. "These design specs aren't opinion," says PMI chief engineer Evan Reiley. "They're well-established industry standards from film studios."
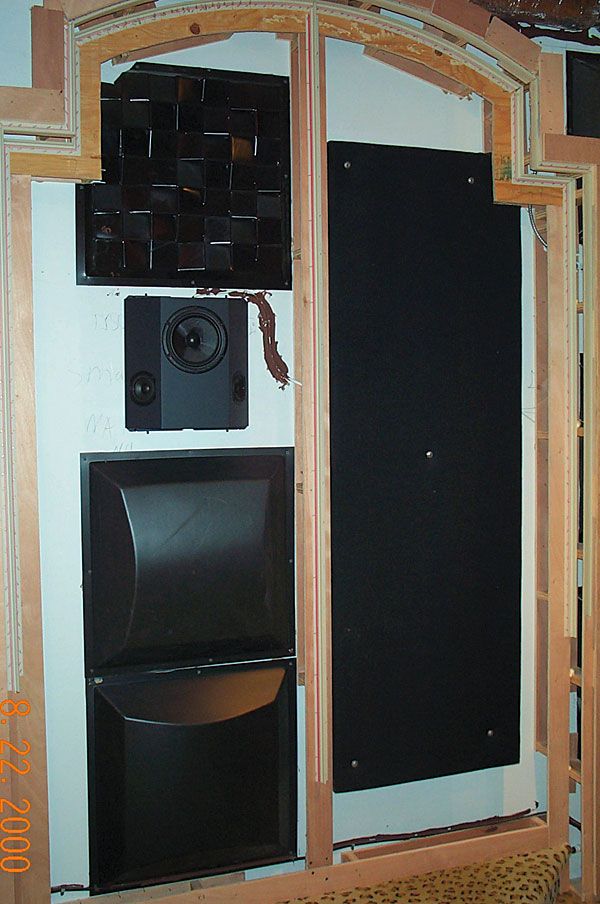
Before PMI could begin its room-treatment plan, the room itself had to be isolated from its concrete shell. "Concrete is an acoustical nightmare because it's reflective," says Wetzel, "so Baldwin Construction had to build a room-within-a-room that was isolated from the rest of the house." Step one for building a room-within-a-room is to attach a hat channel to the concrete wall. Here, industrial-strength strips of sheet metal provided a surface to attach particleboard for the interior isolation wall. MIS installers ran all cabling and conduit for speaker wires on top of the isolation wall, which also accommodates speakers, acoustic treatments, and wire chases. At this stage, you (or your general contractor) should coordinate with your electrical contractor to install wiring, A/V equipment, wall sconces, lighting cans, and junction boxes before the fabric wall goes up. MIS specified dedicated circuits for A/V equipment and plugged the gear into a Panamax AC regenerator for surge protection. "You run the risk of a power surge from an appliance inside the house or from the power company, which could burn up your components," says Wetzel. "The Panamax stabilizes the house current for the surround sound processor and other pricey components." The subs are exempt from the Panamax and plug directly into house current instead. "When the bass hits hard at a particular point in a soundtrack, that could trip the circuit breaker within the regenerator," he adds.
PMI acoustical engineers determined everything from seat and speaker placement to acoustic treatments and projector location. They use proprietary computer models to crunch the numbers. Most of us putting in a home theater don't have the luxury of choosing our room's dimensions. PMI was likewise stuck with room dimensions that weren't created with a home theater in mind. The room's unwieldy length created acoustical challenges, particularly at the lower frequencies.
"We didn't have the option of resizing the space to reduce bass resonances from its geometry," says Reiley. "We designed the room with resiliently suspended walls, floor, and ceiling," he says. A rubber bushing with a metal clip that's used to screw the drywall to the stud face provides resilience. The result is a springy surface, rather than a rigid one, that's suspended on the framing. The springiness has two benefits. First, sound striking the surface doesn't re-radiate on the other side of the wall. Second, it minimizes sound reflections. This not only radically improved sound isolation but also damped the room's bass resonances, establishing smooth bass response over the entire seating area. See the sidebar, "PMI's Acoustical Strategy," for more on the acoustic design of the room.
On the installation side, Wetzel of MIS, had to juggle subwoofer placement with the architect's and homeowner's desire to have more usable space in the room. Typically, an installer has between 6 and 12 inches of depth between an isolation wall and the fabric wall where they can easily place subwoofers. Here, they had to minimize the space between walls to preserve more interior room space, and that required cutting into each of the four isolation walls to accommodate the quartet of subs. It also required custom-made 12-inch subs and amplifiers, which Triad provided according to PMI specs for depth and volume.
Spacing the four 12-inch subs at the midpoint of each wall limits the amount of low-frequency dead spots throughout the room. "If you put the sub in one or two corners of the room, then the guy who's writing the check for the theater—the guy in the money seat—experiences very little bass because of the way low frequencies travel in a room," Wetzel says. "To eliminate that, you put the subs at the midpoint on four walls and then figure out how much power you need to eliminate the dead spots and even out the bass."
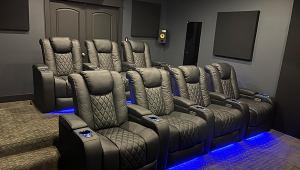
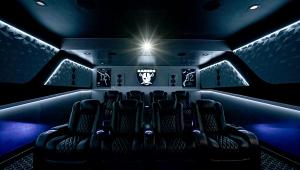
The 39-foot-long theater space required three sets of surround speakers, supplemented with two pairs of in-ceiling rear-channel speakers. The extra speaker coverage compensated for differing delay times. "The rows in this theater were so far apart that time delays wouldn't correspond between rows and you wouldn't get enough sound pressure from the speakers," Reiley says.
The equipment room behind the screen is big enough to hold four A/V equipment racks, which allows for plenty of system expansion. The fan is programmed for enough air changes per hour to prevent the equipment, particularly the amplifiers, from overheating and to keep the room at a comfortable temperature.
The room behind the screen stores all the equipment, except, of course, for the InFocus 777 projector. The InFocus DLP had to be mounted in the wine cellar opposite the screen to clear three rows of theater seating plus an informal sitting area in front of the wine cellar. MIS tapped the InFocus for its exceptionally long throw distance and vertical shift capability. "We could throw the image 42 feet and still have high def," Wetzel says.
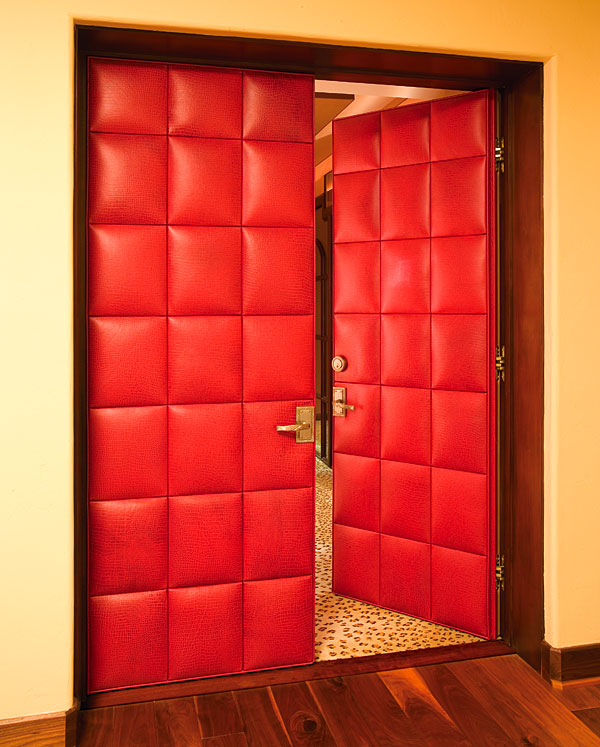
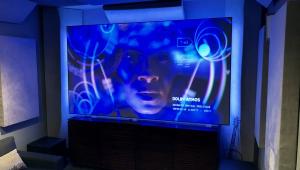
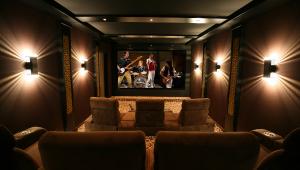
The finishing touch is the fabric wall that puts the pretty face on the overall theater. The sonically transparent Guilford of Maine fabric from Acoustical Solutions comes in various colors to please any interior designer but also plays a role acoustically. "Sound passes through the fabric, hits the acoustic treatments on the isolation wall, and either reflects or scatters sound back into the room," says Reiley.

The theater coalesces in a symphony of beautiful interior layout and design, courtesy of interior designer Jeff Rigby of Modern Interiors, general contractor Dave Baldwin, and architect Larry Peha (for Peha's own home theater, log on to www.AudioVideoInteriors.com), gorgeous lighting design by Neil Splonskowski, PMI's acoustical expertise, and Jeff Wetzel's integration imagination. This carefully orchestrated room is a study in how various disciplines come together to create an amazing space.

Contacts: Manhattan Integrated Solutions, (310) 414-1128, PMI Ltd., (800) 497-2087; Baldwin Construction, (310) 378-4812; Neil Splonskowski Lighting Design, (310) 370-6664; Modern Interiors, (310) 886-8864; Peha & Associates, (310) 372-1755
How It Works For You
• Set a Budget and then Balance It Out. Don't spend too much on any one piece. That includes blowing $10,000 to $12,000 on that glitzy flat-screen and leaving just $100 in the budget for a DVD player. For more information on budgeting, see our "Home Theater Builder" column on page 116.
• Reserve Sufficient Funds for a top-notch surround sound processor or A/V receiver. Look for lots of video inputs and outputs to handle a wide variety of source needs for satellite receivers, DVD players, game boxes, and other gear you'll want to add in the future. Of course, pack in as much HD capability as possible. If you think an advanced control system is in your future, look for a processor or receiver with RS-232 control.
• Acoustics Are Important. If you don't have the budget to hire an acoustical engineer to treat room-acoustics problems, take on some of those duties yourself. Hat channel, soundboard, and drywall are available at home-improvement stores. Add-on treatments are also available for finished spaces. Room tuning kits like those from PMI can enhance the sound of your theater. Says Jeff Wetzel of Manhattan Integrated Solutions: "Prefab sound kits give better room acoustics than if there's nothing there at all."
• Protect Your Equipment with a surge protector. Microprocessor-controlled electronics are sensitive to power spikes.
• Ready, Aim, Fire. Front speakers should be placed so that the tweeter is as close to the center of the screen as possible. Use an acoustically transparent video screen so the center-channel speaker fires directly through it. "The sound from the talking head in the movie had better be coming from the location of the talking head, or there will be a disconnect," says Evan Reiley of PMI. "You want to be convinced that the sound you're hearing directly from the speaker correlates to the picture."
PMI's Acoustical Strategy
By Evan Reiley
As the homeowners' allocated space for the home theater was a rather long and narrow concrete basement, we had to devise a balance between audio, video, and acoustic design needs. Each required some compromise in response to the others. Additionally, the narrow space with many seats and creative aesthetic design required us to be inventive with acoustical treatment shapes and sizes. We had to maximize the front LCR speaker separation to target 45- to 60-degree subtended listener angles from left and right speakers at the three seating rows. Resulting angles were 51, 44, and 36 degrees. The rear row had an accepted compromise on front speaker imaging, while the front two rows were essentially within spec.
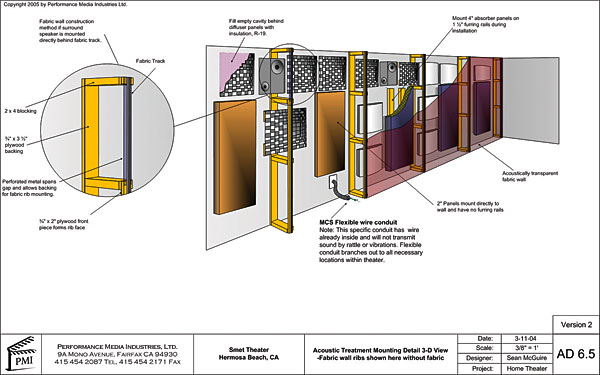
Due to the theater's length, three side surrounds were required on each sidewall, and two rows of 45-degree inclined-firing, ceiling-mounted rear-channel speakers were required to achieve even coverage and high sound-pressure level over the whole seating zone. The sightlines are pretty tight but required close study of screen height and video projector optics. Ultimately Jeff Wetzel of Manhattan Integrated Solutions selected a projector capable of optical vertical shift (rather than electronic shift, which degrades the image) to handle the offset. The large cubic volume of this room left as untreated drywall and concrete would have had approximately a two-second reflection decay time, which is totally inappropriate for home theater. We created a computer model of the room geometry and surface treatments (see illustration, below). Then we inserted acoustical absorbers, diffusers, and bass traps (from CinePanel by Media Specialty Resources) into the model until we had the correct amount of treatment to reduce the reflection decay time. We later confirmed the decay time as being on spec by measurement during audio calibration. The result is spectacular dialogue clarity and smooth soundstage imaging. While there are absorber panels in the theater, the diffusers balance those by scattering sound energy, maintaining a desired amount of reverberant ambience in the room so as not to sound too "dry."
We topped that off with optimized speaker and listener locations in our layout and judicious use of electronic equalization during audio calibration.


| Displays Electronics Speakers | Sources Other Gear Software | Top Picks of the Year Top Picks | Custom Install How To Buy How To Use |
Tech 101
|
Latest News Features Blogs | Resources Subscriptions |
WHERE TECHNOLOGY BECOMES ENTERTAINMENT
 © 2026 Sound&Vision
AVTech Media Americas Inc., USA
All rights reserved

