- REVIEWS
Displays Electronics 
Speakers Sources Other Gear Software - HOW TO
How To Buy How To Use Tech 101
Money for Nothing and Your Tweaks for Free
Unless you have really expensive tastes, it’s easy to see how spending several thousand dollars on your home theater system can make some very noticeable improvements. That kind of cash could buy a bigger TV, a larger projection screen, a brighter projector, a beefier amp, or a stouter subwoofer. Any of these would put some extra kick in an already kick-butt system. But maybe—like me—you don’t have piles of cash sitting around begging to be stuffed into a store’s cash register. Perhaps you just bought your first HTIB, recently added to your existing system, or (again, like me) you’re simply a classic cheapskate. Whichever it is, let’s say you’ve maxed out your A/V budget for the year. Now what?
I’m not going to tell you to stop dreaming and drooling. I will say that no matter how big or small your A/V system is, there are a number of tweaks you can make to squeeze a little extra performance, entertainment, and enjoyment out of your current system, without spending very much money—or even any money at all. (Translation: “It’s free, dude!”) As a public service, we put some of the best minds behind the ink at this magazine—Shane Buettner, Tom Norton, Mark Fleischmann, and yours truly—on the task of turning up the top tricks that’ll get the most out of your system with the least amount of swiping the stripe on your credit card. The result is a list that includes some obvious-but-often-overlooked, some not-so-obvious, some not-free-but-really-worth-the-money, and a few esoteric things you can do to make your home theater tweakin’ awesome.
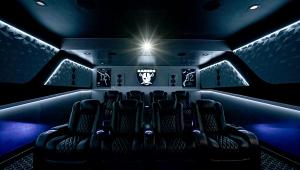
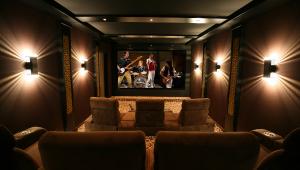
The Screen’s the Thing
There’s no better place to start tweaking around than at your TV. Tom Norton’s basic TV advice (in other words, the thing to address first) is to remember that TVs always look best in a dimly lit room, with no direct light on the screen. Sure, sunlight may make a room look bright and cheerful, but it’s absolutely devastating to picture quality. If your setup includes a front projector with a screen, the more you can turn your theater room into a bat cave, the better—at least while you’re watching TV (and without bat guano all over the floor). With that in mind, here are some additional TV tweaks you should consider.
1. Be a Clean Tweak
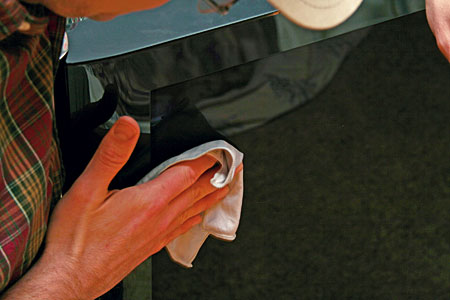
Flat-panel and CRT TVs attract dust like flies on, well, you know what I mean. Although they won’t event-ually produce maggots, these specks, along with the occasional cat hair, can build up and get between you and your set’s resolution and con-trast ratio. Warning! Don’t break out the Windex and a paper towel—plasma and LCD TV screens are easy to scratch. Instead, use a micro-fiber cleaning cloth or something similar, such as an eyeglass cleaning cloth. (Samsung plasma TVs come with their own cleaning cloths, but we don’t recommend buying the TV just to get the cloth. Although Samsung makes some great TVs, there are cheaper ways to get one.) Use a dry cloth or try it with a non-alcohol, non-ammonia-based screen cleaner. I’ve had good results with cleaning fluid from both PixelClean and Monster, and others are also available. Whichever cleaner you use, always spray it on the cloth and not the screen. This will eliminate the possibility of fluid running down the screen and dripping onto the circuitry below. (Definitely not a cheap tweak.) But before you apply anything to the screen, always check the owner’s manual; it will almost always have recommendations (and cautions) for cleaning the screen.
Cost: Free to $15
2. Try a New Angle
It’s not always possible to completely darken your home theater room. If a particular light source is causing reflections on your TV’s screen, try moving the source—if it’s moveable, that is. With sunlight, it’s definitely cheaper to move the TV than it is to move the win-dow. Thick, heavy curtains will do the trick, but if you’ve ever shopped for curtains or drapes, you know there’s nothing cheap about that tweak. Try turning your TV slightly to the left or right (or up and down, if you have a flat-panel mounted on a tilting bracket). This could be enough of a change in the angle between you, the screen, and the light source to greatly reduce or completely squash the glare.
Cost: Free
3. It’s a Calibration

Fresh out of the box, most televisions are set to look great on the store shelf next to a bunch of other TVs. Since you probably don’t live in a Best Buy or Sears store, you can use a video calibration disc to get your TV as close to the ideal display standard as possible without investing in a full ISF calibration (which is worth it but can cost more than $200).
Calibration discs aren’t free (unless you borrow one from a friend), but these treasure troves of test patterns and instructions are worth the money. For example, Joe Kane’s Digital Video Essentials HD Basics (on Blu-ray and HD DVD with an NTSC version on DVD also available) provides a plethora of test patterns that will lead you through the process of setting the proper brightness, contrast, color, and tint for your display. The NTSC version of the Avia II: Guide to Home Theater calibration disc is available now, and a Blu-ray version is in the works. As an added bonus, these calibration discs also include test tones to set up the audio portion of your system.
Cost: $17 and up, unless available for rental
|
| |||||||||


| Displays Electronics Speakers | Sources Other Gear Software | Top Picks of the Year Top Picks | Custom Install How To Buy How To Use |
Tech 101
|
Latest News Features Blogs | Resources Subscriptions |
WHERE TECHNOLOGY BECOMES ENTERTAINMENT
 © 2026 Sound&Vision
AVTech Media Americas Inc., USA
All rights reserved

