- REVIEWS
Displays Electronics 
Speakers Sources Other Gear Software - HOW TO
How To Buy How To Use Tech 101
Mitsubishi HC7800D 3D DLP Projector

I remember my first exposure to a DLP front projector. It was at a trade show in the late 1990s and was not a warm and fuzzy experience. Blessedly, I don’t recall the manufacturer. But compared to CRT front projection, in which even a bargain-basement model commanded $10,000 or more, the simpler, smaller DLP, a technology developed at Texas Instruments, held out the promise of form factors and prices that would appeal to a wider range of buyers.
It took a few heady years, but digital projectors have achieved their promise. Not that they’re perfect—if they were, we reviewers would be out of a job—but in general, only the most nostalgia-obsessed among us still pine for the good old CRT days.
This little stroll through the past has been brought to you by my recent steady diet of LCD and LCOS projector reviews. But we’re now being reminded, with a new rush of models, that DLP technology was the first game in town to knock the venerable CRT off its perch. Mitsubishi has long been a proponent of DLP technology, both in the rear-projection realm (where it’s the only manufacturer still churning out such designs) and in front projection.
Inside, Outside
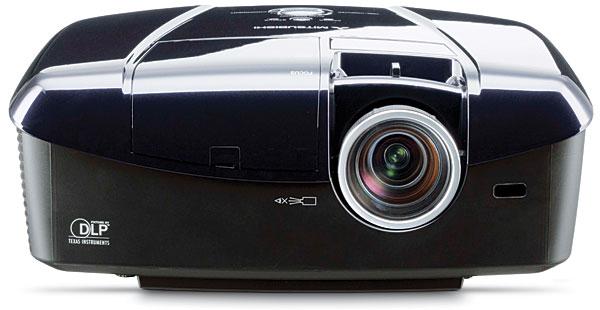
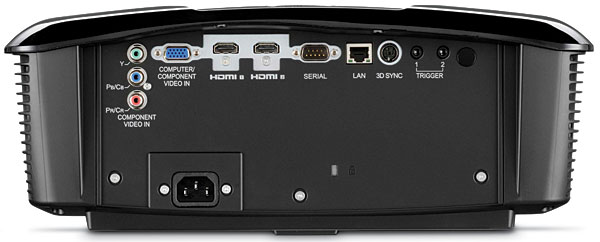
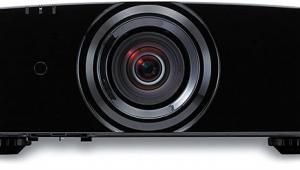
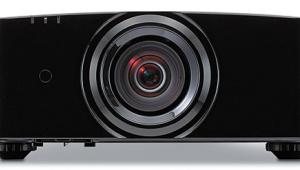
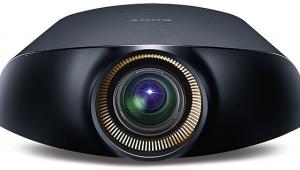
The Mitsubishi HC7800D is a relatively small, light projector compared to some of the models we’ve seen recently from Sony, JVC, and others. That’s a plus if you plan on a ceiling mount, which as we’ll see in a second or two is definitely recommended. The front-lens, side-vented, rear-terminal configuration is relatively standard stuff. There’s also a LAN Ethernet terminal—unusual in a projector—and a mini DIN port for connecting the projector to the IR 3D sync emitter. The projector comes with the emitter and one pair of 3D glasses. Extra glasses are $199 per pair.
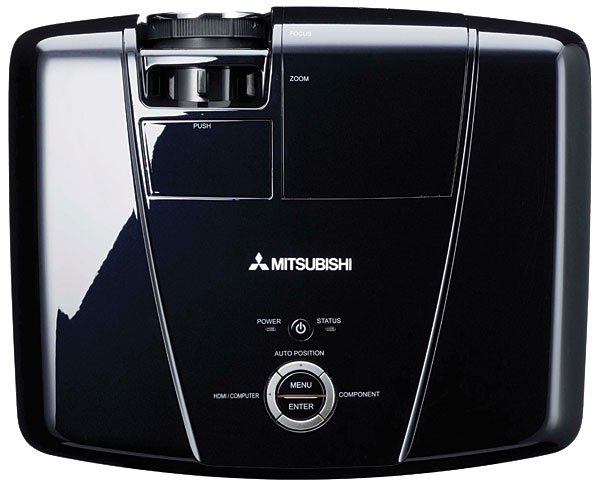
Just above the front-mounted lens are the all-manual zoom, focus, and lens shift controls. The vertical-only lens shift knob is hidden under a pop-up cover. There is no lens memory feature, which would require motorized lens adjustments. The imaging chip, or DMD (Digital Micromirror Device), is 0.65 inches, and the color wheel is a six-segment design that operates at 4x (four times the frame rate).
All projectors have built into their design some vertical offset of the image from the lens location. If they didn’t, and also had no (or insufficient) lens shift, you’d have to either position the projection lens at the same height as the center of the screen or tilt it up or down. The latter causes image distortion. Keystone correction can fix this distortion, but it reduces resolution and should be avoided at all costs in a home theater application.
The Mitsubishi’s vertical offset is more extreme than most and clearly designed with a ceiling mount in mind. You can position the inverted projector well above the top of the screen and still center the image with the help of the vertical lens shift control. But in an upright position on my projector rack, it had to be placed roughly a foot off the floor to center the picture vertically on the screen. (My screen’s lower edge is 25 inches from the floor, placing the center of the screen roughly at eye level—the arrangement I prefer.) Even then, I had to tilt the projector down slightly, although not enough to produce noticeable keystone distortion. You’ll need to ensure that this offset limitation will be compatible with your setup. You’ll also want to know that for a 100-inch-diagonal 16:9 screen, the projector can accommodate a lens-to-screen distance of between 124 and 180 inches. (To check the throw distance for your existing or planned screen, go to mitsubishielectric.com/bu/projectors/calculations/prjcalc.html.)
The operating controls are located on the top of the chassis, though you’ll likely rely on the well-configured, backlit remote control most of the time. The projector’s case allows a little light leakage from the exhaust vent, but it was never distracting. Nor was fan noise an issue; it was essentially inaudible at any reasonable distance from the projector in the Low lamp mode and only moderately audible in Standard (high). In either case, any soundtrack masked it.
There are eight picture modes, including three AV Memory modes and two ISF modes (Day and Night). The latter do not show up on the menu unless it’s unlocked and set up by an ISF calibration specialist. There are also seven gamma settings. Two of them allow for manual user setup, including overall gamma and, if desired, separate adjustments of the red, green, and blue gammas.
The color temperature control offers six options, including one for 3D and a user setting that provides Contrast (high) and Brightness (low) white balance controls for red, green, and blue. A BrilliantColor feature (trademarked by Texas Instruments) produces a little more image pop, but for 2D I preferred to leave it off.
Unlike most displays, the Mitsubishi doesn’t sense a 3D input and automatically switch into 3D mode. You must do this manually. Once you’ve set the 3D control to on, you can select several different options, though you normally won’t need to. There’s a 3D mode (typically this will be in the default, frame-packed mode), 3D Sync (actually an L/R reverse mode, rarely needed), a 2D-to-3D conversion mode (moderately effective), and, for the latter, a 3D depth adjustment.
An Advanced menu offers a bushel of additional controls. Screen Size should not be confused with Aspect, which is in a separate Feature menu with the usual selections, including an anamorphic stretch for use with an anamorphic lens (Aspect is also accessible directly via the remote control). Screen Size, rather, has two positions: 16x9 and CinemaScope (2.35:1). The latter doesn’t stretch or squeeze the image, but instead appears to simply mask off the top and bottom of the imaging chip—the areas not needed for 2.35:1 sources. It also moves the menu down so it falls completely within the 2.35:1 area. If you use a 2.35:1 screen and the zoom method to project 2.35:1 films, the masking also reduces the black level from the black bars that spill off the screen at the top and bottom. But it also blocks parts of most DVD and Blu-ray menus, which are invariably 16:9—even on a 2.35:1 film.
Changing Screen Size to CinemaScope (2.35:1) slightly degrades the image’s perfect 1:1 pixel configuration. The change is barely visible on specific test patterns, including what we tech-heads know as pixel phase. But what’s important is that it produced no visible degradation whatsoever on real program sources. Because I used a 2.35:1 screen for this review and wanted to use some familiar 16:9 and 1.85:1 material to help judge the projector’s image quality on the screen’s full width, I found this feature useful for eliminating distracting picture overspill.
The Vertical Location control moves the image up or down on the imaging chip, and thus up or down on the screen. But for a 16:9 source, this will cut off part of the picture. It may have some value for small adjustments, where you’ll only lose one or two lines of pixels at the top or bottom, but it’s not a substitute or a supplement for vertical lens shift.
When the Frame Rate Conversion control is set to True Film or off, 24-fps sources are displayed at a refresh rate of 96 hertz (48 Hz per eye for 3D). In True Video, the 2D refresh rate is 120 Hz. In the off position of Frame Rate Conversion, the added frames are simply repeated. In the True Film or True Video settings, the added frames are interpolated. The F.R.C. Level control, just below Frame Rate Conversion in the Advanced menu, offers five levels of interpolation, from minimum (1) to maximum (5). Longtime readers know I don’t usually like motion interpolation for the video-like sheen it imparts. But the interpolation on the Mitsubishi worked better than most, and with some material, even including films, I found it useful—in its lowest setting.
The Mitsubishi also has a dynamic iris feature, under the Auto Iris control, that offers three Auto selections. I used the mid setting, Auto 2, for this review. It worked splendidly, deepening the black levels without any distracting visible or audible indications of its operation.
There’s also a Noise Reduction control (on/off), a CTI control (said to “correct smeared color boundaries”—I left it off), settings for HDMI Input level (I left it on Auto), black level Setup (I left this off), Color Space (Wide/Normal—choose Normal), and a full color management system that offers gain, saturation, and hue controls for red, green, blue, yellow, magenta, and cyan.
|
|
| ||||||||||


| Displays Electronics Speakers | Sources Other Gear Software | Top Picks of the Year Top Picks | Custom Install How To Buy How To Use |
Tech 101
|
Latest News Features Blogs | Resources Subscriptions |
WHERE TECHNOLOGY BECOMES ENTERTAINMENT
 © 2025 Sound&Vision
AVTech Media Americas Inc., USA
All rights reserved

