DIY Reader Home Theater: Kern

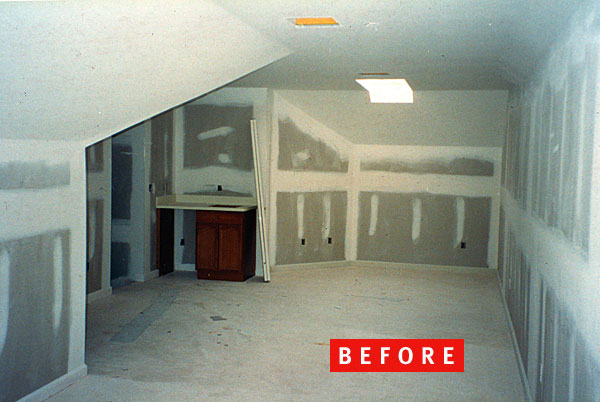
The space I chose for my theater was a 14- by 38-foot upstairs bonus room that I'd designed into our house when my wife, Patricia, and I built it in 1993. The room had an alcove at one end, and we realized later that it would be perfect for a home theater stage and screen.
I began doing research immediately, searching the Internet for information on all aspects of home theater design and equipment. I read back issues of Home Theater and any similar pubs I could find. I visited A/V dealers and pestered them with technical questions about types of projection systems, acoustics issues, construction, and so on. The more I learned, the more I didn't know. In some cases, I got conflicting information, which just confused me more.
Getting that '50s Look
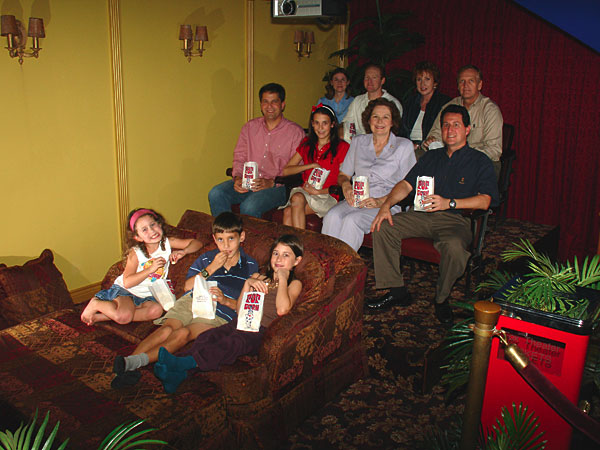
I'd been unable to locate examples of 1950s style home theaters. I saw either very modern or simple earth-toned, sedate rooms. But I wanted the gaudy, over-the-top, outrageous look of the old movie palaces. By this time, I had acquired many reference books on the history, construction, renovation, and preservation of the grand movie houses, and I began to develop my own vision for a theater. I also found a couple of theater owners' equipment catalogs from the 1930s and '40s, so I knew exactly what the various vintage theater items looked like. But where was I to find them?
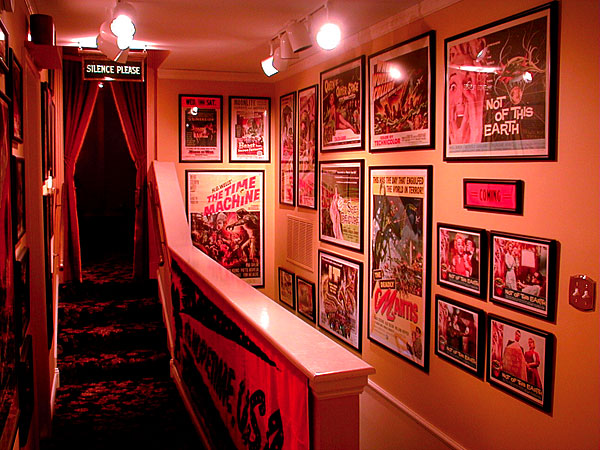
Looking in antique shops for theater items wasn't getting me anywhere, and I was getting discouraged. I wanted my theater lobby to have original movie posters from my favorite 1950s science-fiction and horror films, and these posters were hard to find, as well. I tried eBay again. I set up searches for posters and vintage theater items that I ran every day for almost three years! I really had to persevere, because these types of vintage theater items are getting harder to find as time goes by. Sometimes, I would search for weeks and find only one item. The hardest items to find were the wall sconces. I had no trouble finding two or three, but I needed six! Finally, after almost three years of searching, I saw a listing for two 1930s sconces from a theater in Ontario, Canada. I e-mailed the seller to see if there were any more. To my amazement, she replied that she had eight altogether, six with their original parchment shades!
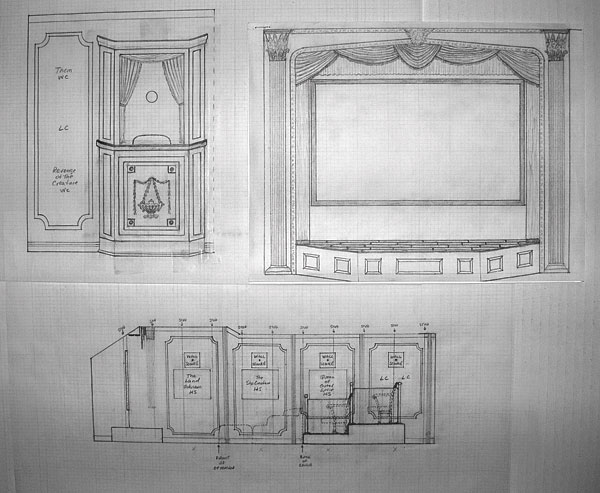
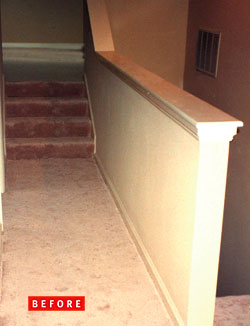 Up to this point, I'd spent two years researching home theaters. One day, I was telling my son, Tom Jr., that I was still analyzing my theater design, and he said, "Dad, you've got analysis paralysis! You need to start building something!" He was right. Although I have good working knowledge of A/V components and systems, I had never tried to build anything like this, and I had become consumed by the fear that I would do something wrong that could not be corrected.
Using my drawings, I made an initial list of building materials and supplies I would need and headed to the nearest Home Depot. During the course of the project, I visited Home Depot so often that I came to be known as "that theater dude." I don't have a formal workshop, so I cleared out my garage, set up a few tables, and went to work. I worked carefully, frequently referring to my drawings. I religiously followed the carpenter's adage: "Measure twice, cut once."
First, I painted the ceiling a very dark blue to simulate the night sky. I used a tinted primer and was surprised to find that it took four additional coats to completely cover the previously white ceiling. I also painted the theater and lobby walls using a warm gold color. Meanwhile, I ordered my projector and screen, having settled on the Sanyo PLV-Z2 LCD projector and the Da-Lite Cinema Vision Da-Snap 45- by 80-inch screen.
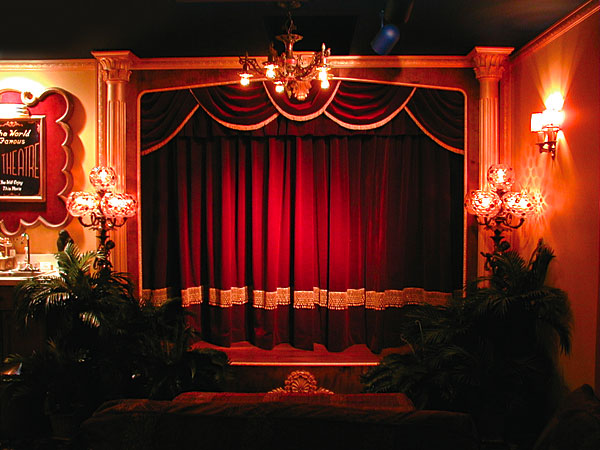
I used two-by-four studs to build the screen wall, painted them flat black and mounted the screen. I also painted the wall behind the screen flat black to eliminate any reflections and stapled black Acoustone speaker-grille cloth around the perimeter of the screen to allow maximum sound transmissibility from the speakers, which would be located near the screen. Then, working with the projected image and the manufacturer's recommendations, I determined the optimal location for the projector, seats, and seating platform. I also used two-by-fours for the stage foundation and added a subfloor made of two sheets of plywood interleaved with 30-pound roofing felt and a top layer of Pergo laminated wood flooring. The roofing felt helps eliminate rattles caused by low-frequency sounds. I recommend using wood glue and deck screws for all joints. Predrill holes for the screws, apply the glue, and fasten with deck screws, and you will have tight, solid joints and no rattles. I used the same technique for the seating platform. Always lay the beams on the floor at the hardware store before you buy them to make sure they aren't warped. I didn't pay attention with my first batch and made the mistake of trying to screw together warped beams.
I get the most compliments on the columns flanking the stage. They are pine with resin capitals, available by special order from Home Depot. I had been experimenting with a variety of gold paints and didn't like anything I tried. A decorator told me that the only paint that looked like real gold was Ralph Lauren Duchesse Satin Ballroom Gold, which had been discontinued because it streaked badly when people used it to paint entire walls. After calling all over the country to find some, I checked eBay, where I bought two quarts for $100. The paint is very thin, almost like a glaze, so, when I painted a test piece of molding, I was very disappointed with the result. Then, I noticed that the flat paint I had put on the walls was about the same gold hue as the Ballroom Gold, so I primed a piece of molding with it and then painted the Ballroom Gold over it. It looked dull at first, but, when it dried, it shone with the most gorgeous, vibrant gold color I've ever seen!
I have 2,000 laserdiscs, so I located a preowned Pioneer Elite CLD-99 laserdisc player. I also purchased a Samsung DVD-HD931 DVD player and a Monster Power HTS2600 power conditioner. The final component I bought was a DVDO iScan HD processor, which provides high-resolution video scaling of standard-definition video content. The receiver (the Yamaha RX-V2090 with an external Yamaha DDP-1 AC-3 decoder), B&W speakers (DM602s and CC6 center channel), and a Velodyne 10-inch sub were from my previous system. For the time being, I decided to ignore all of the information on acoustic treatments, and I think the sound in the theater is excellent. At some point, I will engage a sound engineer to properly calibrate my system.
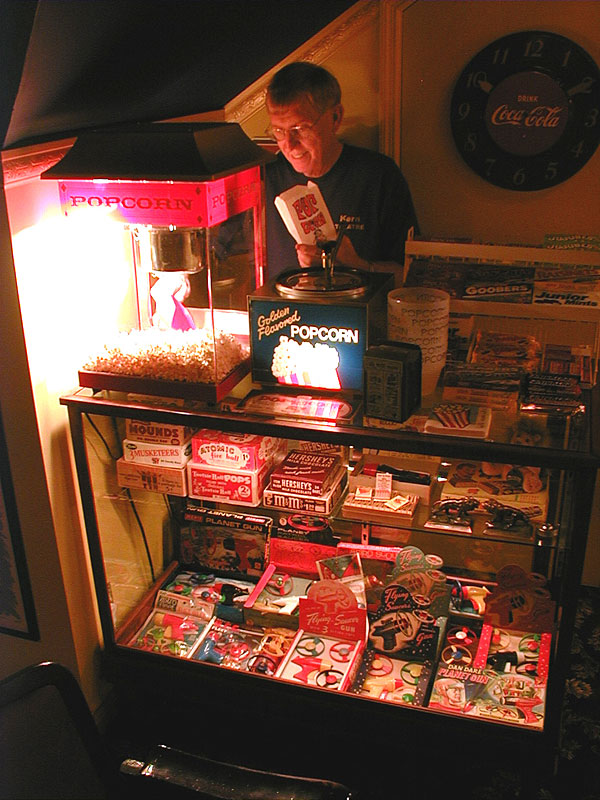
My original goal was to faithfully recreate the nostalgia and charm of the fabulous movie palaces of the 1950s, and I think I have accomplished that. When it's show time in the Kern Theatre, the chandeliers and wall sconces gradually dim, and the main curtains slowly open, revealing a gold curtain behind them. Sound fills the room as the gold curtain slowly rises from the stage floor. At that moment Patricia and I are eight years old again, and it's Saturday morning at the movies!
My Budget
Building Materials & Supplies $1,500
Electrical Work $1,100
Carpet $4,500
Curtains & Motorized Curtain Rods $4,100
Palms, Ferns & Stage Columns $1,350
Slipcovers for Chair $600
Vintage Movie Theater Seats (8) $550
Vintage Lamps, Chandeliers & Wall Sconces $1,150
Vintage Movie Theater Items $6,000
Antique Concession Area Display Cases $1,000
Star Antique Design Popcorn Machine $350
Archival Movie Poster Frames $2,800
Sanyo PLV-Z2 LCD Projector & Ceiling Mount $2,250
Da-Lite Cinema Vision Da-Snap 45- by 80-inch Screen $1,000
DVDO iScan HD Video Scaling Processor $1,700
Pioneer Elite CLD-99 Laserdisc Player (used) $550
Samsung DVD-HD931 DVD Player $300
Power Conditioner, Equipment Rack & Cables $1,050
Total $31,850
How It Works For You
• Persevere If You Want Vintage. If you like the idea of doing a vintage theater, the stuff is out there, but be prepared to spend a lot of time and money finding it. It took Thomas Kern three years and $6,000 to acquire all the vintage items for his theater.
• Don't Reinvent the Wheel. Learn the tricks from the ones who have done it. Avoid warped lumber—always check boards by laying them on the floor before you buy. Avoid rattles by using wood glue and deck screws for all joints and roofing felt between plywood sheets. Measure twice, cut once.
- Log in or register to post comments
