- REVIEWS
Displays Electronics 
Speakers Sources Other Gear Software - HOW TO
How To Buy How To Use Tech 101
Runco D-73d 3D Projector Page 2
SETUP
Installation of the 3Dimension processor is quite simple. For explanation’s sake, I’ll refer to the three processors as primary, red, and green. All inputs are made to the primary DHD4 processor, with the system accommodating up to four HDMI sources, along with component-video/SCART and composite-video. The primary processor’s red and green color-coded outputs link to inputs on the red and green DHD4s, each of which connects to a projector.
The processors communicate with each other and with their respective projectors via RS232. HDMI outputs on both the red and green processors are used to send audio out to your audio system. By first routing audio signals through the D-73d’s video processing chain, Runco maintains that lip-sync and timing errors are greatly minimized and the potential for A/V processor-generated video artifacts is also eliminated.
The next step is to align the two projectors on the screen, a process that is similar to — but a greatly simplified version of — converging an old CRT projector. And by “greatly simplified” I mean that I did it by myself the first time in about 10 minutes. Once the primary lens is correctly dialed in for size and focus, the secondary projector is aligned to the image using a process that Runco calls Digital Compass.
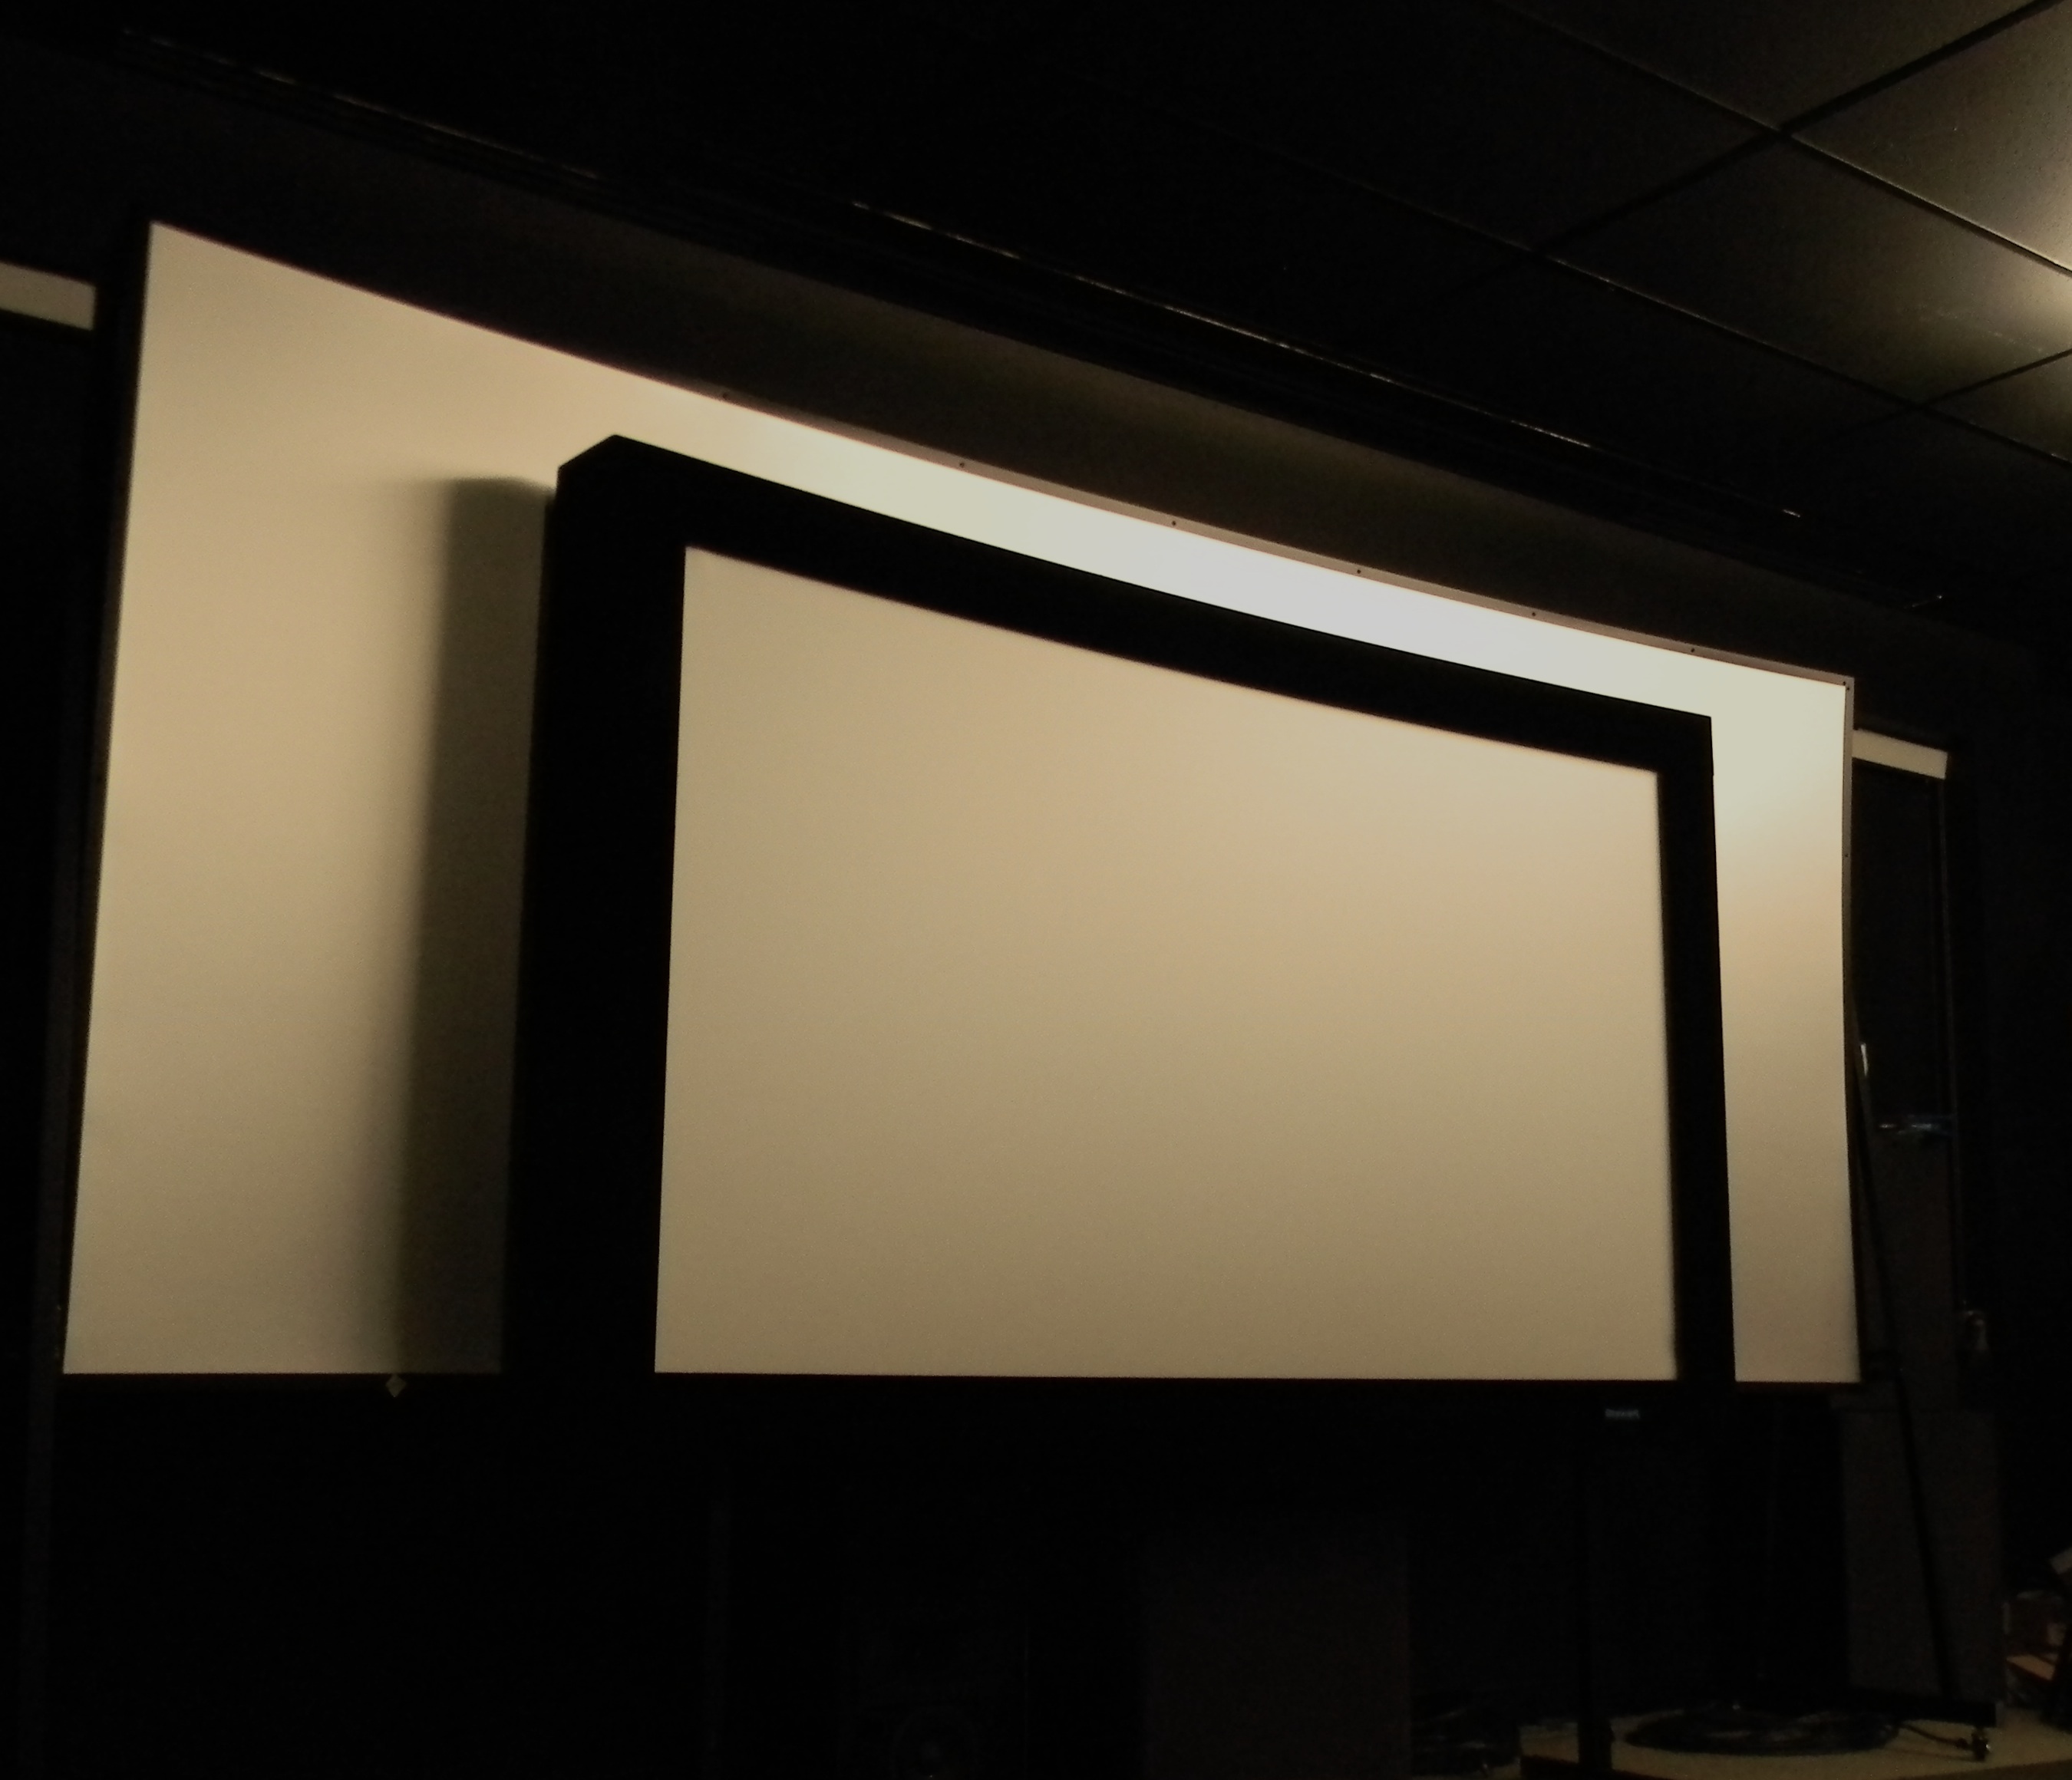
The D-73d’s case, which features Runco’s new Copenhagen industrial design, places the lenses a mere eight inches apart. (The closer the lenses are, the less adjustment required to align them.) Multiple physical and digital adjustments allow installers to converge the secondary image onto the primary one within a +/- one-half pixel tolerance anywhere on the screen. In practice, the images looked perfectly aligned, with only a single-pixel multiburst test pattern revealing slight moiré artifacts. Once the lens lock screws are tightened, the images remain in perfect alignment.
Because of the linear polarization filters placed in front of the D-73d’s dual projectors, it must be used with a special “polarization preservation” screen. I initially viewed images on a 12-foot wide, 2.35:1 aspect ratio Mocom Tech Power Screen MTS-160 with an ultra-high gain of 20. I also used a 100-inch, 16x9 Stewart 5D screen, a new material with a gain of approximately 2 that is said to be optimized for both 2D and 3D viewing. (The Stewart screen is the one more likely to be used for residential applications.) One potential drawback to linear polarization is that your head must remain relatively vertical while viewing; leaning sidewise causes the image to blur and darken and lose the 3D effect. In reality, unless you plan on watching while lying down on a couch, I don’t find head positioning to be an issue.
|
| |||||||||


| Displays Electronics Speakers | Sources Other Gear Software | Top Picks of the Year Top Picks | Custom Install How To Buy How To Use |
Tech 101
|
Latest News Features Blogs | Resources Subscriptions |
WHERE TECHNOLOGY BECOMES ENTERTAINMENT
 © 2025 Sound&Vision
AVTech Media Americas Inc., USA
All rights reserved

