- REVIEWS
Displays Electronics 
Speakers Sources Other Gear Software - HOW TO
How To Buy How To Use Tech 101
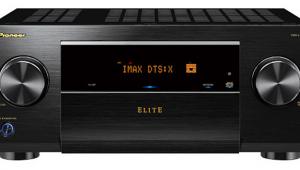
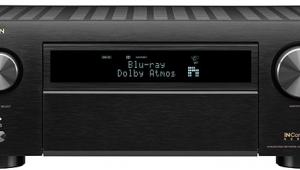
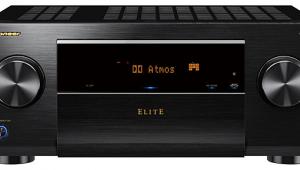
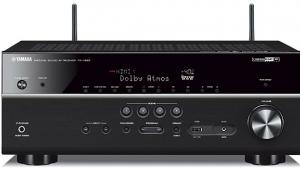
Pioneer Elite VSX-74TXVi THX Select2 AV Receiver

And the sound? Well, that's pretty darn remarkable, too.
Construction and Architecture
The all-important power supply is less massive than I've come to expect from a receiver rated to deliver 140-watts into seven channels (20 Hz – 20 kHz, 8 ohms,
I was surprised to see that the heat sinks are not machined from a solid block of aluminum, as is de rigueur on high-end amps. Instead, the power transistors dissipate their heat into thick aluminum plates, which in turn have bonded-on fins consisting of thin aluminum sheets folded in a squared-off zigzag pattern.
Even more surprising than the heat sink construction is the absence of the cooling fan common to seven-channel designs. There is a mounting bracket for a fan, however, so perhaps the engineers assumed that a fan was necessary in the design phase and then changed their minds during testing of the actual product. Or maybe they simply reused a chassis from another model that does require a fan. Either way you'll hear no complaints from me – the 74 never gets excessively hot, and there are already way too many fans whirring away in my system, including those in my DVR, Mitsubishi DLP monitor, and PC.
As you'd expect from a receiver at this price point, the digital processing suite is top notch. The core DSP engine is a 48-bit Motorola Sharc-EX+. Digital-to-analog conversion is handled by highly regarded Burr Brown 24-bit/192 kHz DACs, and analog-to-digital conversion is 24 bit/96 kHz.
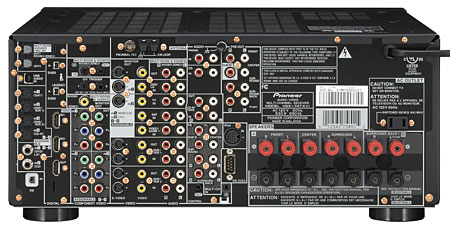
Input/Output Suite
Any analog video signal fed into the composite, S-Video, or component video inputs is transcoded (i.e., converted to another format) and sent out of the component and HDMI outputs. The 74's transcoder properly converts 480i, 480p, 720p or 1080i signals at their native resolution. This is a huge improvement over the Sony STR-DA7100ES ($1999.99), which only accepts 480i signals for HDMI conversion. With the Pioneer, you can make a true single-cable connection to the video display using your choice of component video or HDMI, greatly simplifying system operation. Note that no upconversion takes place—if the signal is 480i in, you get 480i out. The transcoder can be turned off, though I found that doing so only affects the component video output; the HDMI output continues to show a picture from all of the input sources no matter what.
This is the first receiver I've reviewed that has built-in iPod connectivity. Simply attach the included accessory to the multipin jack on the Pioneer's rear panel and plug the other end into your iPod's dock connector. As soon as you switch the receiver to its iPod input, your iPod will automatically download its library data into the 74's memory. Once this has been accomplished, the song titles and menu information appear on the Pioneer's front panel display and the iPod's screens are reproduced on your video display. From this point on, you operate the iPod using the 74's remote. The cable even charges the battery. The sound quality is only as good as the source file, which means it varies from excellent to dismal. (In my case the sound is often downright awful, as I use my iPod to learn old time banjo tunes from scratchy old mono field recordings.) Nevertheless, if you love your iPod, I guarantee you'll love this feature.
The 74 is also the first "XM-Ready" receiver to grace my studio. In order to activate this satellite radio service, you need to purchase an accessory "Connect and Play Integrated XM Tuner and Antenna" such as the Audiovox CNP1000 (about $40 online) and subscribe to the XM service. I was not provided with a Tuner/Antenna for this review, so I can't tell you how it sounds. The functionality appears to be similar to the iPod hookup: you can see the information on the receiver's front panel and on your monitor, and you can operate the XM tuner from the receiver's remote control.
One final note: If you're not using Surround Back speakers, those two amplifier channels can be configured to bi-amp your front speakers or power speakers in a second room. In my room (and in my opinion, in general) bi-amping is infinitely more useful than running superfluous Surround Back speakers.
Setup & Calibration
Pioneer's awkwardly named Advanced Multichannel Acoustic Calibration Circuit (MCACC) is the real deal. You simply connect the supplied microphone to a front-panel jack and place it at your listening location. (A tripod is useful, but not required.) Auto MCACC then steps through a lengthy series of test tones that allow the receiver to determine correct speaker sizes (bass management), adjust the channel levels and delays, reduce standing waves, and equalize each speaker to produce flat response. You can even create and store up to six different MCACC settings to accommodate different listening positions. And yes, you can manually tweak the MCACC results to your heart's content using "Fine" controls that adjust in 0.5dB increments.
You can run Advanced MCACC in full Auto mode, or tailor its operation using a number of options. For example, the "Keep SPsetting" option runs MCACC but leaves your speaker settings unchanged. The Front Align option "sets all speakers in accordance with the front speaker settings (no equalization is applied to the front left and right channels)," says the manual. Engaging the Multi-Point option causes the system to prompt you to move the microphone so that measurements can be taken at several locations. According to the manual, this provides "two or more reference points for which test tones will be analyzed for standing waves, useful if you want to get a balanced 'flat' calibration for several seating positions in your listening area."
Finally, the Professional Acoustic Calibration EQ option "minimizes the unwanted effects of room reverberation by allowing you to calibrate your system based on the direct sound coming from the speakers." This can be run automatically or manually, with the results graphically displayed on a PC connected to the 74 using an RS-232 serial cable and running software that can be downloaded from Pioneer's web site. Although the manual does a good of explaining the process, I know of only a handful of highly talented custom home theater designers that I'd trust with such a tool – unless you know exactly what you're doing, messing with reverb parameters can only harm the sound. In any event, I certainly did not feel any need to go beyond the settings provided by the standard Acoustic Calibration function.
(While conventional equalization of varying degrees of sophistication is included in many receivers and pre-pros, separating out the room reverb from a speaker's direct sound requires sophisticated gating software such as the LMS system we use for our speaker measurements. Is the Pioneer fully capable of this? An in-depth look at Pioneer's Professional Acoustic Calibration EQ option is beyond the scope of this review, but Pioneer willing I plan to have a look at it in more detail in a future Take Two. Stay tuned.—TJN).
Advanced MCACC worked beautifully in my room, and although I tweaked a level or two, I didn't really need to. When you consider how many consumers never manage to correctly adjust speaker sizes and channel levels, let alone such subtleties as EQ parameters, MCACC must be acknowledged as a significant advance in AV receiver design.
User Interface
The 74's preprogrammed/learning universal remote is intimidating, to say the least, and not backlit (boo, hiss!). It reminds me of a scientific calculator, with a lot of buttons, most of which bear multiple labels in different colors. But you do get used to it over time, and the layout eventually does begin to make sense. At least there are dedicated buttons for input source selection—I hate it when these are buried in a submenu or must be scrolled through one by one.
As is my practice for all receiver reviews, I removed the top panel to have a quick look-see before installing the unit in my equipment rack. The 74's top panel is firmly attached by 22 screws (a new record!) and eight of them are jewel-like solid copper fasteners. Inside, the basic architecture is conventional, with multiple interconnected circuit boards rather than a PC-like motherboard design like that of the
The 74's strong suit is connectivity, and its input/output suite is as flexible as it is complete. Video inputs include two HDMI, three component video, five S-Video, and seven composite video. The HDMI and component inputs can be freely assigned to any of the regular AV inputs – heck, even the S-Video inputs can be reassigned, a first in my experience.
Over the years I've seen many AV receivers and processors that attempt to automate the speaker setup and channel level calibration process. Until now, none has been able to produce usable results; I've always ended up balancing the system manually using a test tone and sound pressure level meter.
In many ways the 74 reminds me of a modern high-end camera: you can adjust the aperture and shutter speed manually for maximum control, or you can engage auto mode and simply point and shoot. I've already discussed the Auto MCACC, which can be adjusted manually or allowed to do its thing with a single button push. Similarly, you can select from the many possible surround modes manually, or engage the Auto Surround feature and let the receiver select the surround mode based on the input signal format, your speaker setup, and, of course, the judgment of Pioneer's programmers.


| Displays Electronics Speakers | Sources Other Gear Software | Top Picks of the Year Top Picks | Custom Install How To Buy How To Use |
Tech 101
|
Latest News Features Blogs | Resources Subscriptions |
WHERE TECHNOLOGY BECOMES ENTERTAINMENT
 © 2026 Sound&Vision
AVTech Media Americas Inc., USA
All rights reserved

