- REVIEWS
Displays Electronics 
Speakers Sources Other Gear Software - HOW TO
How To Buy How To Use Tech 101
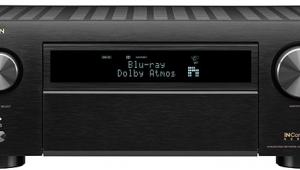
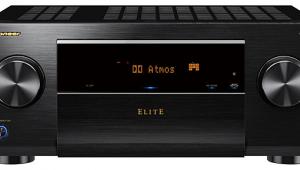
Pioneer Elite SC-09TX A/V Receiver Setup & Tests
As with all flagship models, the rear panel is extremely impressive, with enough connections for even the most complicated system. Ten pairs of speaker terminals are located on the bottom third of the back panel and provide adequate spacing to maneuver your fingers for bare-wire hookups.
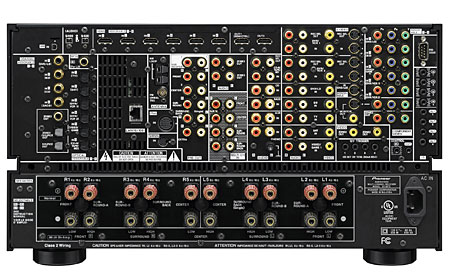
Each pair of speaker terminals is labeled R1 through R5 for the right speakers and L1 through L5 for the left. They are also labeled as Front (R1, L1), Surround A (R2, L2), Surround B (R3, L3), Surround Back (R4, L4), and Center (R5, L5). To make matters worse, these outputs can change their designation depending on the speaker configuration. For example, in a 5.1 system, the labeling corresponds to the proper speakers. But in a 7.1 system, the center speaker moves from R5 to R2, which is labeled Surround A. In this case, the terminals labeled Center (R5, L5) become the Zone 2 right and left. Are you confused yet? I sure was until I read page 12 of the manual multiple times and wondered why Pioneer didn't just label the outputs as R/L 1-5 and leave it at that?
Once I cleared up the speaker-connection confusion, hooking up my source components seemed like child's play. My HDMI sources include a TiVo Series3 DVR, an Oppo DV-983H DVD player, a Panasonic DMP-BD30 Blu-ray player, and a Toshiba HD-A35 HD DVD player. I also connected my Xbox 360 and BD30 via component, and the AVR transcoded their video to 1080p via HDMI.
Out of the box, I wasn't satisfied with the audio performance of the SC-09TX, but the culprit wasn't the AVR itself—it was my acoustically challenged room. Using the supplied microphone, I started the basic MCACC setup, and within 15 minutes, the audio improved immensely thanks to Pioneer's software.
Despite being satisfied with these results, I decided to try out the advanced MCACC program, which provides some customizable options and measures two additional seating positions. After the calibration was complete, three separate correction curves were stored in memory—"Symmetry" (default) flattens the frequency response of the front right and left channels, "All Channel Adjust" flattens all channels, and "Front Align" sets all speakers in accordance with the front-speaker settings (no equalization is applied to the front left and right channels). In my room, I found that the "Symmetry" setting was the most pleasing and the "Front Align" was the worst, but all sounded better than not applying any room correction.
The SC-09TX's video upscaling didn't do very well with test discs, but it fared much better with real-world material. I tested the deinterlacing performance with the HQV Benchmark DVD at 480i via component from the BD30. The single-bar jaggies and flag tests passed without any issues, but the three-bar test was borderline. The film-detail "race-car" sequence and mixed 3:2 content with horizontally scrolling video text both failed—the bleachers showed a trace of moiré, and the moving text looked jumbled. Strangely enough, the 3:2 content with vertically scrolling credits showed no issues whatsoever.
Watching the opening sequence of Star Trek: Insurrection didn't reveal any jaggies on the rooftops or bridges in this challenging scene, and the coliseum flyover in Gladiator looked just as good. This goes to show that test patterns aren't everything.
To test 1080i to 1080p, I used the Silicon Optix HQV Benchmark Blu-ray and set the component output on the BD30 to 1080i. All of the deinterlacing tests passed, but the highest frequencies in the film resolution-loss test were rolled off and the diagonal lines shifted from cyan to red when the pattern moved from side to side. This usually means there will be problems with chapter 8 of Mission: Impossible III, but surprisingly, the moiré in the Vatican steps was virtually non-existent. This is another case where the test patterns reveal a shortcoming that doesn't manifest itself in the real world.
Pioneer has chosen a "do no harm" philosophy with HDMI input signals, which bypass any video processing. While some may not agree with this decision, at least the HDMI inputs show no adverse affects from passing through the AVR—which is something that not all AVRs can claim. Below-black and above-white information isn't clipped, and depending on your other equipment, HDMI processing may be redundant. On the other hand, at this price, I think HDMI processing is something that should have been included.


| Displays Electronics Speakers | Sources Other Gear Software | Top Picks of the Year Top Picks | Custom Install How To Buy How To Use |
Tech 101
|
Latest News Features Blogs | Resources Subscriptions |
WHERE TECHNOLOGY BECOMES ENTERTAINMENT
 © 2026 Sound&Vision
AVTech Media Americas Inc., USA
All rights reserved

