- REVIEWS
Displays Electronics 
Speakers Sources Other Gear Software - HOW TO
How To Buy How To Use Tech 101
Amped Wireless REC10 Compact High-Power Wi-Fi Range Extender Page 2
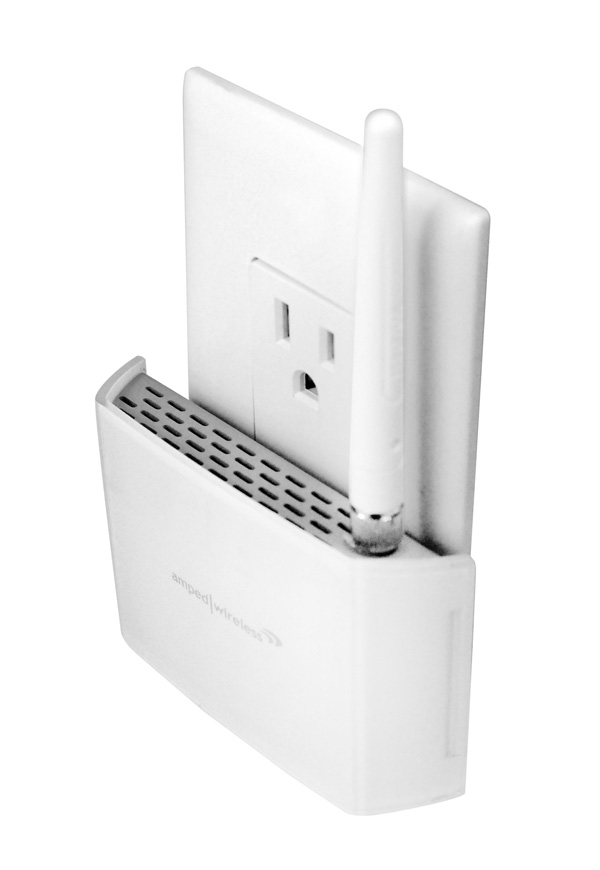
Setting up the REC10 was really a piece of cake. The Amped setup guide documentation was excellent—well illustrated, clearly written, and unintimidating, and their wizard software was intuitive and simple to follow. They also supply a how-to video on disc, but I never got close to tapping it. You basically just screw on the antenna and plug in the extender where you think it might best work for you, at which point an Amped Wireless logo softly glows from the unit’s front face to let you know it’s powered.
Amped recommends you find a spot that captures about 70 percent of your full signal strength from the router. Their software will tell you if you’re there, but if you want to move it after setup to a more ideal location you can just unplug it without losing your settings and put it in another outlet anywhere inside your router’s transmission footprint. I chose an outlet in my dining room that’s on the main floor of the house, directly above my test studio and almost directly below the router location upstairs. It showed 82 percent signal strength in the Amped setup software, a figure obviously calculated from whatever Amped uses as its reference for 100 percent, full signal strength. This gave me more than enough signal for a solid rebroadcast.
Once the REC10 is powered, it broadcasts its own temporary Wi-Fi network. You connect to that on your Wi-Fi equipped computer (or any iOS or Android phone or tablet), then enter the REC10’s setup wizard by typing in a supplied URL on your web browser. From there, just follow the prompts to select the network you wish to extend, create a name and password for the extended network (to make life simple, it can have the same security key you currently use for your existing network), then hit the button and wait for the software to complete a countdown and give you your cue to reconnect to the new, extended network.
The whole process should typically take about 10 minutes. However, the software repeatedly got hung up in the countdown when I tried to connect to the REC10 wirelessly in this prescribed fashion. As an alternative to wireless setup, the instructions suggest using an ethernet cable (supplied) to directly link the REC10’s ethernet port to your computer. This was easily accomplished by moving my laptop to the REC10’s new location and completing the setup there. That solved the problem, and afterward I was able to fully disconnect from the REC10 and use it normally. Another alternative is to do automatic pushbutton setup if your router has Wi-Fi Protected Setup (WPS) features.
The REC10 has some additional features you can tap from its browser setup menu. For example, you can create a dedicated guest network with different security settings from the primary extended network. You can also schedule when Wi-Fi is on or off, lock out specific users/devices from the extended network, and adjust the power output to reduce the wireless coverage if you desire a smaller broadcast footprint. I left all of these in their default settings.
Let the Games Begin
To test the REC10, I downloaded a popular freeware program to my Mac called iStumbler that’s used to locate nearby Wi-Fi networks and establish their comparative signal strength. This was very helpful for first establishing the baseline signal strength coming straight from the router and then quantifying the improvement with the REC10. But to understand how real-world performance changed, I also tapped the Oppo’s built-in Vudu streaming app and streamed some movie previews from the service with and without the REC10. This also allowed me to use the Oppo’s integrated Wi-Fi signal strength meter to further compare the two networks, and to use Vudu’s network test feature to measure throughput. All Vudu apps on any playback or streaming device have this function to allow users to determine which of Vudu’s offered video resolutions the network connection can hande without excessive buffering or degradation of image quality—standard def 480p, high def 720p, or full HD 1080p.
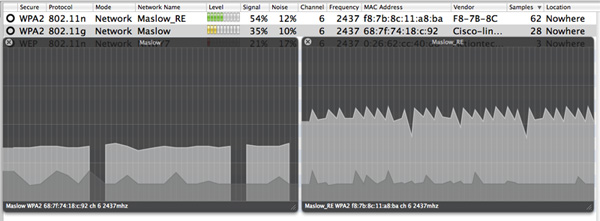
The screen capture above shows the iStumbler signal-to-noise pictographs for the straight unenhanced network (Maslow) and the extended network (MaslowRE). The unenhanced network was correctly detected by iStumbler as 802.11g, and it showed 36% signal strength directly from the router with my laptop situated next to my A/V rack. (This time, that 36% was based on whatever scale or reference point the iStumbler software uses for a 100% full strength signal). The right hand pictograph is the rebroadcast output from the REC10, which was detected as an 802.11n network and showed 54% signal strength. Notice that the original signal straight from the router was not just weaker and closer to the noise floor (which measured 11 to 12 % with each network), but also suffered periodic signal dropouts.
|
| ||||||||||


| Displays Electronics Speakers | Sources Other Gear Software | Top Picks of the Year Top Picks | Custom Install How To Buy How To Use |
Tech 101
|
Latest News Features Blogs | Resources Subscriptions |
WHERE TECHNOLOGY BECOMES ENTERTAINMENT
 © 2026 Sound&Vision
AVTech Media Americas Inc., USA
All rights reserved

