- REVIEWS
Displays Electronics 
Speakers Sources Other Gear Software - HOW TO
How To Buy How To Use Tech 101
Installing In-Wall/Ceiling Speakers: Part 2
So, starting part two, our route is mapped out, holes are drilled through the top plate in the attic (or bottom plate into the crawl space), and we’re ready to pull wire and install the new speakers. You’ll need your cordless drill, drill bits, Creep-Zit, electrical tape, drywall saw, wall box and plate, CL-rated speaker wire, pencil, level, wire strippers, and your new speakers. Let’s get to work!
Step 1: Cut in Wall Box  Now that we know we can get wire to our new speakers, we need to cut in a wall box like the Arlington LV1 shown here at our home run. Measure and match the height of
nearby wall boxes, and then get your pencil and level and trace the box, drawing a straight, square mark on the wall for the new box and cutting it out using the drywall saw. Don’t install the box yet.
Now that we know we can get wire to our new speakers, we need to cut in a wall box like the Arlington LV1 shown here at our home run. Measure and match the height of
nearby wall boxes, and then get your pencil and level and trace the box, drawing a straight, square mark on the wall for the new box and cutting it out using the drywall saw. Don’t install the box yet.
Step 1A: Did You Find an Obstruction?
If you found an obstruction during your wall investigation, you’ll need to drill it. Staying in line with the box you just cut in, determine the point just above the obstruction and cut in another single-gang wall box. This should reveal the obstacle just below your hole. Drill a hole large enough for the speaker wiring downwards through this, staying in the center as much as possible. After you finish wiring, you can either repair/repaint the drywall or install a wall box and cover it with a blank plate to provide easy access if you ever want to do more retro work.
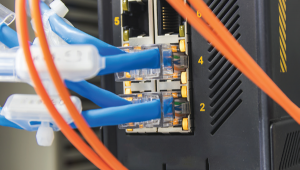
Step 2: Run the Wire
Go into the attic (or crawlspace) and slide the Creep-Zit rod into the hole you drilled and guide it to the home run wall box. If you had to cut in an additional box at step 1A, you should be able to reach into the wall and guide the rod through the hole you drilled. Retrieve the rod at the home run and secure the speaker wire to it using electrical tape. (Be sure to use CL-rated wire for in-wall installations.) Now go back to the attic (or crawlspace) and pull the rod back along with the wire and guide it to your desired speaker locations. Be sure to keep speaker wiring as far from electrical wiring as possible, crossing at 90 degrees if necessary.
Pro Tip: Electrical wire staples are perfect for securing wiring and keeping it out of the way. Just don’t hammer the staple in too hard as you don’t want it to pinch the cabling or penetrate the jacket.
Step 3: Cut in Speakers
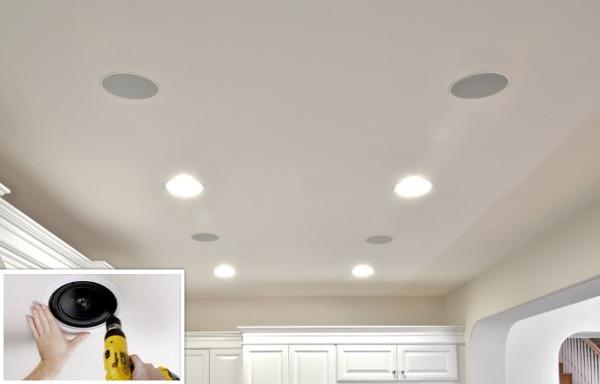
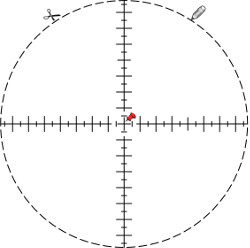 As a general rule, round speakers tend to look better in the ceiling as they blend in with existing, round can lights, whereas rectangular speakers fit in with other squarish items on the wall. Your new speakers will come with a cutout template like the one shown here, which makes installation much easier. If you’re installing in the ceiling, you can tape the template to the ceiling and run a 3/16-inch bell hanger bit through the center, and then check the location of the bit in the attic to confirm you’re clear of everything. Now place the template at your desired speaker location, trace it with your pencil, and cut out the drywall with your saw. After you remove the sheetrock, pull enough wire through the hole so you can set the speaker on top of a ladder to make connections. Strip the wire and connect it to the speaker. Place the speaker into the wall/ceiling and, using a low-clutch setting on your drill, screw it into the wall being sure not to over-tighten the screw, which can damage your wall or the speaker. If installing a rectangular speaker, check that the speaker is level before you tighten it all the way. Attach the grille.
Pro Tip: Put down a blanket or tarp below where you’re cutting and place the empty speaker box beneath the wall or ceiling while cutting. This will catch a lot of the drywall dust and make cleanup easier.
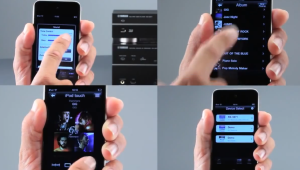
Step 4: Install Wall Boxes and Connect the Wire After you finish wiring, install the wall box at the home run and pull the speaker wire through a passthrough plate like the DataComm 45-0001-WH. Leave enough wire to comfortably reach your amplifier, strip back, and connect. (Make sure the amp is off when making new connections.) Configure your receiver for the new speakers and enjoy!


| Displays Electronics Speakers | Sources Other Gear Software | Top Picks of the Year Top Picks | Custom Install How To Buy How To Use |
Tech 101
|
Latest News Features Blogs | Resources Subscriptions |
WHERE TECHNOLOGY BECOMES ENTERTAINMENT
 © 2025 Sound&Vision
AVTech Media Americas Inc., USA
All rights reserved

