- REVIEWS
Displays Electronics 
Speakers Sources Other Gear Software - HOW TO
How To Buy How To Use Tech 101
Building a Home Theater? Avoid these Pitfalls Page 2
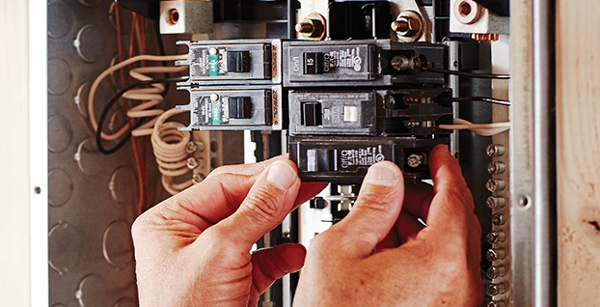
5. Ignoring AC Power Specifications
One of the last things many home theater builders think about when planning their dream theater is the electricity needed to power the system, but it’s an important issue that should be addressed early in the design process so you can determine whether an electrical upgrade is in order.When all of your components are tapping into a circuit that also feeds electricity to other parts of your home, you run the risk of tripping the breaker when things get loud as your amplifiers test the limits of the speakers while you’re watching Fast & Furious. Set aside some time to add up the power requirements of the A/V gear you’re planning to use to make sure the outlet(s) in the room can handle the load.
“What happens is you go to design your theater room and maybe you use an electrical outlet that’s also powering a bunch of other things in the room and your amplifiers either blow a circuit or blow their own fuses,” Newnam observes. “Or, you just can’t get that deep bass because the circuit doesn’t have enough amperage for what you’re running in the room. In some cases, you will need to pull a dedicated circuit for the room itself to give you the power needed to get the punch you want.”
Another potential pitfall to be aware of is what Audio Advice calls the “demon hum,” which can occur when components like an A/V receiver and powered subwoofer are plugged into different circuits. The culprit is improper grounding and the hum can also manifest itself as intrusive video noise on the screen. For a more detailed discussion of how to avoid AC power problems, check out home theater electrical considerations.
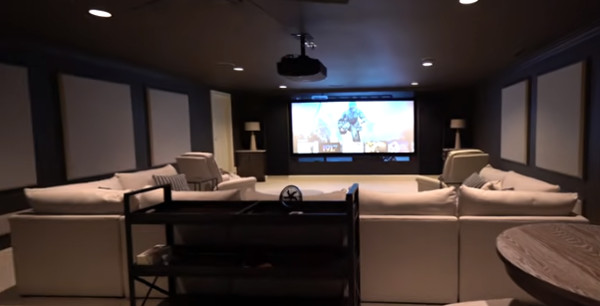
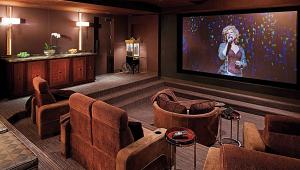
6. Ignoring Room Acoustics
Another often-overlooked yet vitally important aspect of home theater system design is room acoustics. It’s just something most people don’t think about, even though the physical characteristics of your theater space — including the size and shape of the room and how the walls, floor, and ceiling are finished — can actually have a greater effect on sound quality than any other component, except maybe the speakers (the only cure for bad speakers is to replace them with good speakers). While you’re visualizing how your space will look, it’s important to also consider how different finishes will affect the sound.“One of the top mistakes we see is not getting the acoustics right in the room,” explains Newnam. “And what I mean by this is not the settings and calibration but the actual acoustics of the room itself. When you’re designing a room, if you cut a lot of hard, flat walls or create a cube-like space and don’t have carpet, you’re going to have a very harsh sounding room.” Simply put, many rooms are dominated by reflective surfaces that bounce the sound around before it reaches your ears, which obliterates the nuance and detail in movie soundtracks and makes it hard to understand dialogue. In the worst cases, the room has an echo-chamber effect on the sound.
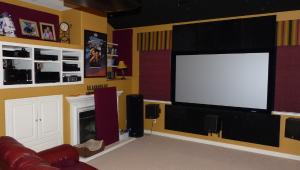
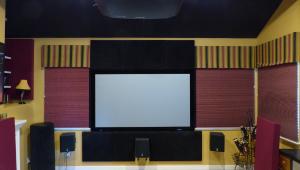
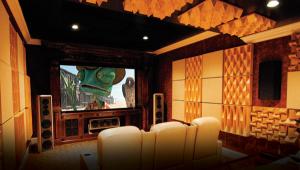
“There are some easy things you can do to make that room sound better,” he adds, like installing carpet, using soft textures on the walls and elsewhere, and maybe installing bookshelves in the back of the room. You should also pay attention to the location of speakers and subwoofers as well as the type of furniture and seating you have in mind: Is the seating covered in soft and cushy fabric or dense leather? How many hard, reflective surfaces does the furniture add to the space?
“Putting up acoustic panels is one of the easiest things you can do,” Newnam advises. “It’s not expensive and can really soften up a room and make it sound great.” A variety of room treatments are available, each designed to address a specific problem. An absorption panel, for instance, might be designed to absorb bass or high frequencies, while a diffusion panel is intended to spread sound to make it a little more pleasant. Acoustics is as much an art as it is a science, which is why it makes sense to consult an audio expert. For a more in-depth discussion on how to approach room acoustics, check out Audio Advice’s Guide to Home Theater Acoustics. Also see Acoustics 101.

7. Not Calibrating Your System
Now that your home theater room is complete and you’ve finished wiring up your A/V gear, it’s time to dim the lights and start a movie. Not so fast. Before you hit that play button, you need to set aside 10 minutes to calibrate your system to ensure that you’re getting the best possible performance out of it. What was once a daunting task requiring professional help has been reduced to a simple automated feature built into virtually every good A/V receiver and processor — all you have to do is follow the instructions in the owner’s manual.“Sometimes we’ll be brought into a home and they’re ready to upgrade the theater and we realize whoever installed the system just plugged in all the components and never calibrated the system,” says Newnam, adding that Audio Advice created a tips and tricks video to help its DIY customers really dial in the sound. “From an audio perspective, when you hear a system that’s been calibrated, it just sounds totally different and the experience is so much better.”
To delve into the nitty gritty of audio calibration, watch this excellent video tutorial by Audio Advice founder Leon Shaw. And to get a feel for how calibration can work wonders with bass performance, see Tom Norton’s recent blog Taming the Room Monster.
In addition to making use of auto calibration — which adjusts multiple parameters to improve sound quality and uses equalization to correct frequency response based on what the system “hears” via a small microphone — it’s also important to pay attention to audio settings to make sure you’re getting full surround sound and not just stereo, which is sometimes the default setting. “For most people, setting to Dolby Atmos for multichannel and Dolby for two channel is the best outcome but some audiophiles prefer to set the two channel to just stereo, which is fine as well.”
Calibration also applies to video but is less of an issue these days due to recent strides in TV and video-projection technology. With TVs, you’ll want to make a few key adjustments, starting with something as simple as turning on Movie mode and maybe turning off motion interpolation, which creates the “soap opera effect” videophiles tend to hate. “With video projection, we find that people know how to match a projector to the screen but they’re not going back and doing panel alignment in the color and all the things you need to do to get that great pop,” Newnam says. It’s worth consulting an A/V pro to make sure your setup is optimized for the best possible image quality.
The mission of this story can be summed up in one word: planning. As excited as you are about starting your home theater adventure, it pays to first step back, look at the big picture, and come up with a plan that addresses the key aspects of room and system design to make sure you get it right. Armed with these simple tips, you are now in a great position to start the process. Good luck!
More on Home Theater Setup and Design
Top Home Theater Design Mistakes, Part 1
Top Home Theater Design Mistakes, Part 2
Top Home Theater Design Mistakes, Part 3
Home Theater Planning: Walk Back the Design, Part 1
Home Theater Planning: Walk Back the Design, Part 2
|
| |||||||||


| Displays Electronics Speakers | Sources Other Gear Software | Top Picks of the Year Top Picks | Custom Install How To Buy How To Use |
Tech 101
|
Latest News Features Blogs | Resources Subscriptions |
WHERE TECHNOLOGY BECOMES ENTERTAINMENT
 © 2025 Sound&Vision
AVTech Media Americas Inc., USA
All rights reserved

