The Big Clean: How to Keep Your A/V Gear in Good Working Order

From the service calls I make, where I go into clients’ homes to service systems installed in racks and cabinets, I can say that for the majority of people, it is infrequent.
My suggestion is that at least once a year you give your system a general “love-in.” Not only will your gear look better — and last longer — it is also an opportunity to give your system a check-up to make sure everything is working the way you think it is!
Here are a few things for your Big Clean Checklist.
Dust: The Silent Killer
While your gear just sits there doing its thing, it is likely being slowly bombarded by dust. Even if you think your gear is safely cosseted away behind closed doors, to paraphrase Dr. Ian Malcolm from Jurassic Park, “Dust, uh, finds a way.” Over time, this dust build-up leads to your gear running hotter, which is ultimately one of the primary killers of electronics.
While most people give the front and top of their gear the occasional cursory swipe with a cloth or finger to keep it from looking like some prop from The Twilight Zone, dust problems usually occur in the back, sides, and underneath components, especially if the component has fans for forced-air circulation. Those fans are pulling air from somewhere, and that is where you will find the dust build-up. It can clog fans, choke air vents, and coat chips and circuits in an insulated thermal blanket that will eventually cause components to overheat.
Some higher-end components will give you access to their internal temperatures, and if you notice that something is running abnormally hot, chances are you have an issue with dust, a failed fan, or just poor air circulation around your gear.
Start with the Components
Remove all the gear from your rack if possible so you can clean all sides and the top and bottom. Depending on the complexity of your system, this is admittedly much easier said than done and might not even be practical or possible, especially if you have a system where all your gear is rack-mounted. With my Trinnov Altitude preamp/processor and two seven-channel amplifiers, just removing, reinstalling, and correctly reconnecting those pieces can be a multi-hour affair.
I like to clean my components with specialty cleaners like Endust for Electronics and a soft, lint-free microfiber cloth. This gives the entire chassis a spit-and-polish shine, removing dust and any fingerprints, without harming the electronics or finish.
For clogged areas or where a cloth cannot reach — like fans or vent ports — I use my vacuum’s wand to suck out the nooks and crevices. Once, my Kaleidescape server was giving me a thermal warning, and a quick pass over the front and side vents with the vacuum brought temperatures back to normal. A can of compressed air is another effective tool for blasting inside components to loosen and dislodge any nasties.
This is also a chance to take stock of your system. Do you really need that VCR, Laserdisc, or old game system? If you haven’t used a piece of gear in a few years, maybe it is time to let go. I kept a Pioneer LD player and Yamaha RF Dolby Digital demodulator in my rack for years and never used them. Parting with those allowed me to free up a lot of space in my rack and make everything clean and tidy.
Don’t Forget to Dust Your AV Cabinet or Rack
While the gear is out, you will likely notice a coating of dust on and inside the rack itself. Pledge Dust
& Allergen Spray is great on a variety of surfaces and also makes your air cleaner.
If you have any kids or pets, you will probably also find a variety of objects behind or under your rack: Cheerios, game pieces, pens, coins, dead bugs, crayons, etc. And there is something almost cathartic about putting all of your clean gear back into a freshly clean cabinet; it is like resetting your system.
That Jumble of Wiring Collects Dust Too
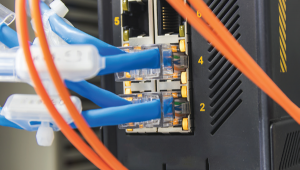
While HDMI has greatly reduced the number of cables required, a modern surround and house-wide audio system still includes quite a bit of cabling, which is another great haven for dust. Even though I give the back of my rack a monthly check with the vacuum wand to vanquish the big dust bunnies, that jumble of cables always seems to generate more dust, so I wipe down the cables with a damp cloth as part of my big clean.
This is also a terrific time to check over all the wiring and connections. As an equipment reviewer, it seems like there are always additional HDMI or Ethernet cables behind my rack left over from some product review. If you have friends or family that come over and occasionally connect things to your system, there’s a chance you’ve got some extra cables in there as well. While going over the cabling, make sure everything is properly labeled, and use zip ties for wire management. This will not only make the rack look neater, but it will make it easier to service your system and swap out components in the future.
The Do’s and Don’ts of Cleaning Your TV Screen
Because of static electricity, your TV’s screen is a dust magnet, but the screen’s optical coatings require special care when cleaning. First off, do NOT use a household or glass cleaner like Windex as this can damage the coatings on the screen. Fortunately, there are a variety of screen cleaners specifically designed for cleaning high-performance displays — or you can use distilled water, which won’t leave any residues or damage the screen.
You will also want to use an ultra-soft, microfiber cloth that won’t scratch the screen. I like to have two cloths, one to use dry and one to use damp. Use the dry cloth to remove dust from the screen, which might be all you need. If you have any stubborn smudges or fingerprints on the screen, use the wet cloth to gently wipe them off. Be sure to spray the cleaning solution onto the cloth, not directly onto the screen. Also, be sure to do this cleaning when the display is turned OFF.
If you have a projector, there are different steps needed. If your projector has a dust filter, you will want to clean that to ensure that airflow is not restricted (check your owner’s manual for this process). I have never felt the need to actually clean my projector lens, but if yours looks especially dusty, you can use a camera lens brush to gently clean the lens. If you wipe down the projector’s case, be sure to check the on-screen geometry afterward to make sure the image is still square and level.
Do a Final System Check
Okay, everything is completely clean, so you are finished, right? Not quite. It’s time to do the final system check to make sure everything is working correctly. Run a series of test tones at moderate volumes and listen to all your speakers individually. This will not only ensure that they are all wired correctly and working but also let you hear if one of them is blown or otherwise damaged. Chances are something has changed or moved in your room since your last go-over, so I also suggest re-running any room-correction software your system offers — or at least breaking out a tape measure and SPL (sound-pressure level) meter to check distances and channel levels.
Developing a regular maintenance and cleaning plan will ensure your system remains in optimal condition and delivers excellent performance for years to come!
The Author
Since 1998, John Sciacca has worked as a custom installer in South Carolina. In his free time, he enjoys drinking craft beer, playing pickleball, and watching movies on his 7.2.6 surround system.

