- REVIEWS
Displays Electronics 
Speakers Sources Other Gear Software - HOW TO
How To Buy How To Use Tech 101
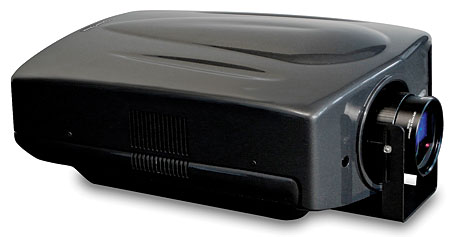
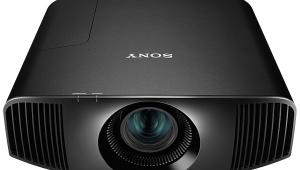
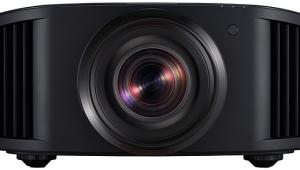
DreamVision StarLight1 LCOS Projector Page 3
Note that stretching the picture vertically to fill all of the available pixels doesn’t increase the actual resolution you see on the screen. The 2.35:1 source on the disc still has black bars, and stretching it vertically can’t add information that wasn’t there in the first place. It merely maps the same number of source pixels onto more display pixels. It would be possible to master the disc itself with an inherent stretch, so that the real information is present in the area that’s currently wasted by the black bars in 2.35:1 transfers. But then the discs would be incompatible with the playback gear of the 99.99 percent of viewers who lack anamorphic setups. Ain’t gonna happen.
Our measurements show that the actual displayed gamma is considerably lower than the gamma indicated by the projector’s Gamma setting. In the Normal lamp mode, a Gamma setting of 2.2 produced a measured average gamma of 1.86. This sounds alarmingly low (recommended playback gammas generally range from 2.2 to 2.4), but it didn’t look that way at all. When I increased the Gamma setting to 2.6 (which by interpolation would appear to then give a real value closer to 2.3), the picture looked drab.
I ultimately settled on a Gamma setting of 2.4 and, as before, the High lamp setting. This produced the best picture even though the actual gamma was lower than 2.4. I briefly tried the projector’s custom gamma feature, which gives you control over the light output at individual steps across the brightness range (including not only white gamma, but red, green, and blue as well). This process is extremely tedious, and you need the right test tools to do it.
The only anamorphic artifact I noticed was a pale white shadow below white titles on a black background (lens flare, perhaps). It was subtle but visible on stationary titles, but it was more obvious on scrolling titles. With one exception (a vertical pan), I never spotted this on more complex images. I attempted several adjustments to the lens’ position and orientation, as DreamVision suggested, but I was never able to eliminate the artifact. It’s entirely possible that an installer who’s experienced in such setups could do better. In any case, I didn’t consider the issue a deal breaker. The picture was just too good in all other respects.
 Let’s Get Wider
Pirates of the Caribbean: The Curse of the Black Pearl is a great Blu-ray transfer, and the scenes that run from the arrival of Jack Sparrow in Port Royal to his rescue of Elizabeth is a primo reference sequence. The detail, particularly in the period costumes and sets, was incredible on the StarLight1. The colors were also hard to fault.
In its High lamp setting, the StarLight1 with the Schneider lens produced a peak white level of over 18 ft-L on the 118-inch-wide screen, and Pirates was as sharply detailed as I’ve ever seen it. In fact, I’ve never seen it look better overall. It absolutely blew me out of the water.
The darker scenes in Pirates appeared a little grainy, but any thoughts that this might indicate a weakness in the projector or lens were dispelled as soon as I put on Harry Potter and the Half-Blood Prince. Dark, disturbing scenes dominate this movie. I don’t think there’s a single shot in bright sunlight; even the opening daylight scenes are overcast. But the StarLight1 sailed through it all. For example, Harry’s late-night return to Hogwarts is deeply shadowed and moody, but nothing looked muddled, blotchy, or washed out. Later, Harry ends up knee-deep in a bog near the Weasley house—another gray-to-black night scene that I can only describe as a horror show for video displays. It was child’s play for the StarLight1.
When I first popped on the Potter disc, I was horrified at how soft everything looked. Had something gone wrong? No, it hadn’t. The Potter set includes both Bluray and DVD versions of the film, and in the darkness I had accidentally pulled out the DVD. Yes, it was watchable, but don’t let anyone tell you that Blu-ray is only a small improvement over DVD. It’s huge—particularly when you view it on a great projector and a really big screen.
One downside to a fixed (as compared to a movable) anamorphic lens is that for a standard-aspect source (1.85:1 and smaller), the processing must perform a horizontal squeeze (to compensate for the lens’ opposite effect). To do this, you must set the projector’s aspect to 4:3 and turn off the V-Stretch control. But the squeeze that the 4:3 setting produces eliminates 25 percent of the horizontal resolution. For example, for a 1920-by-1080 source, the effective resolution on the screen becomes 1440 by 1080.
When I took a careful look at familiar standard-aspect, high-definition program material with the anamorphic lens in place, it suggested a softening of very fine detail from this reduction in resolution. Most viewers will never notice it. Avatar was jaw-dropping in a 2.35:1 aspect playback. (This did require cropping the top and bottom of the picture, but many theaters ran it that way.) It had perhaps a little less magic (picture quality wise) in 1.85:1, the disc’s native aspect ratio. How much of that was due to the smaller, narrower image and how much to the loss of resolution is hard to say. It still looked very good. Nevertheless, a movable anamorphic lens (instead of a fixed one) will get the best out of less than the widest sources. The compromise was small, but if you’re a serious videophile, you’ll want to check out a fixed-lens setup before you decide whether to go the fixed or movable route.
Conclusions
The StarLight1 commands a premium above the $5,500 price of the equivalent JVC projector. This can’t be ignored. DreamVision’s $650 lamp replacement cost also seems rather steep. But only you can decide if the StarLight1’s upscale aesthetics—and the potential for more personalized setup, service, and integration that DreamVision’s dealer network aims to provide—justifies the added cost.
I began this review just days after I’d spent time with the Digital Projection TITAN, an $85,000, pro-oriented, 3D-capable three-chip DLP projector. Was the pricey DLP better? In many ways, yes, although its blacks were definitely inferior. Apart from the DLP’s incredible 3D performance, did I feel deprived as I moved on to the 2D StarLight1, either with or without the Schneider lens? Not at all. I experienced no withdrawal pains whatsoever. In fact, I never looked back.

|
|
| ||||||||||


| Displays Electronics Speakers | Sources Other Gear Software | Top Picks of the Year Top Picks | Custom Install How To Buy How To Use |
Tech 101
|
Latest News Features Blogs | Resources Subscriptions |
WHERE TECHNOLOGY BECOMES ENTERTAINMENT
 © 2026 Sound&Vision
AVTech Media Americas Inc., USA
All rights reserved

