- REVIEWS
Displays Electronics 
Speakers Sources Other Gear Software - HOW TO
How To Buy How To Use Tech 101
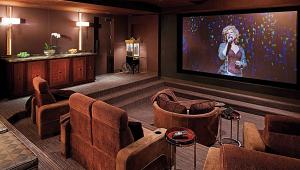
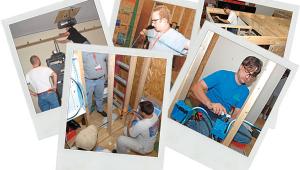
How To Install In-Wall Speakers
Determine Speaker Placement
Ideal speaker placement for the front left and right speakers is 6 to 10 feet apart and positioned at seated ear level. Try to locate the speakers at least 3 feet from a corner to avoid boomy bass from boundary effects. Odds are that the left and right will straddle a flat panel or screen and the center will go in just below, or sometimes above. As with any system, you should ideally mount the surround speakers to the left and right of the primary seats, slightly behind the viewing position and about 6 feet off the ground, although if you listen to a lot of multichannel music, you might target a height more in line with the fronts.
Once you’ve identified your locations, use your stud finder to determine the center of each stud bay you want to mount in. Depending on the speaker, you may have a little leeway to move left and right within the bay. But ultimately there needs to be enough clearance to mount the speaker between the studs.

Identify Your Wire Paths
Before you take saw to drywall, plan out your wire runs. If you’re mounting in a first-floor room
and the basement ceiling is
unfinished, or in a second-floor room with attic access, you might be able to see any ductwork, pipes, or electrical cables that could potentially interfere with your mount location. The likely scenario is you’ll cut a one-
gang or two-gang electrical box opening into the wall behind your equipment rack, then drill a hole from the stud bay you’ve opened up through the floor plate (for first floor) or the top plate to run the wire into the basement or attic. From there, you’ll run it across the basement or attic to the stud bay where you’re mounting the speaker, and
drill up or down accordingly
into the bay. Sometimes, it’s easier (and safer) to drill up or down into the stud bay rather than from the bay into the basement or attic.

Check for Obstructions and Cut the Holes
OK, it’s almost time to start ripping. Once you’ve identified your speaker locations using your stud finder and made sure you can get wires to them, check for obstructions behind the drywall, such as electrical wires, ducts, or pipes. Drill a small 0.25-inch hole in the wall at the center of the stud bay and insert a coat hanger bent at a 90-degree angle; move the coat hanger around to feel for any obstructions. If you find any, it’s easy to patch the small hole.
If everything looks cool, you can start carving the full speaker cutout. Use the template that came with the speaker, align and mark the cutout lightly with a pencil, and have at it. Here’s some good advice: Start with a small, rectangular hole at the center of the proposed cutout that’s big enough to get your hand in, and before you cut the full hole, take a peek with a small wand mirror or carefully feel around again to make sure there’s nothing that’ll make trouble for you. You can also
use this opportunity to send a fiberglass push rod or snake down (or up) to make sure your wires will make it all the way to the top or bottom plate without running into blocking or other obstructions. Cut this exploratory rectangle with beveled edges, with the point of the blade pointing toward the center of the speaker location as you move around. If you need to change your speaker location, the piece you cut out will fit into the hole like a lid and make for easier drywall repair.
Running the Speaker Wires
There are four choices for installing speaker wires. As mentioned, you can run them overhead through an attic space or beneath the floor if you have a basement or crawl space. But you can also remove the baseboards, cut a channel into the drywall with a utility knife, run the wires, and then replace the baseboards. The last option is flat speaker wire that adheres to the walls, although that’s the least desirable.
If you’re running wires laterally across the wall and can’t get access from above or below, you may need to cut small holes in the drywall to expose the studs and drill holes large enough to pass the
wire. The drywall holes only need to be 1 inch high and wide enough to expose the stud. They’re easily patched later. Typically, 14- or 16-gauge wire works well for most installations up to 100 feet. Beyond that, use 10- or 12-
gauge wire, which is larger
in diameter. Use cable that’s rated for in-wall use.
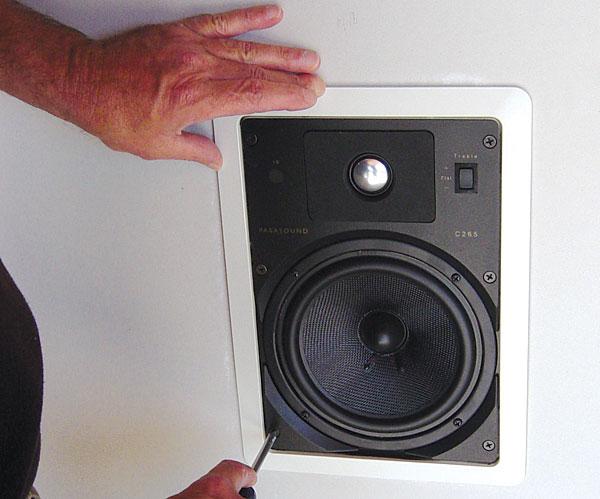
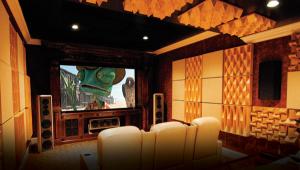
Installing the Speakers
If you want to paint the frames and grilles to match the walls,
do so before you install them. Always use spray paint or a sprayer and mask the speaker components. Use light coats; don’t clog the grille perforations.
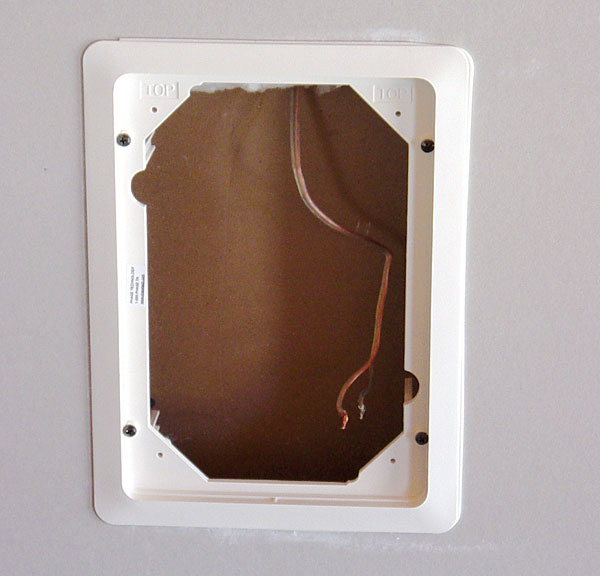
Most in-wall speakers use
four or six dog-leg clamps to secure the speaker to the
wall. Some are two-piece designs, so the frame attaches separately to the wall with clamps, and the speaker locks
or screws into the frame
later. Consider installing insul-ation (R-13) in the wall cavity behind the speakers to improve sound quality.
Before you screw the speaker into place, you’ll need to attach the wires to the binding posts, which are most likely spring-loaded terminals. Once you know the speakers are working properly and you’ve adjusted any EQ controls or the position of drivers, slap on the grilles, sit back, and enjoy.


| Displays Electronics Speakers | Sources Other Gear Software | Top Picks of the Year Top Picks | Custom Install How To Buy How To Use |
Tech 101
|
Latest News Features Blogs | Resources Subscriptions |
WHERE TECHNOLOGY BECOMES ENTERTAINMENT
 © 2026 Sound&Vision
AVTech Media Americas Inc., USA
All rights reserved

