- REVIEWS
Displays Electronics 
Speakers Sources Other Gear Software - HOW TO
How To Buy How To Use Tech 101
Show and Tell: Phono Cartridge Choice and Installation
After having been declared dead sometime back in the 1990s, analog turntables and vinyl records have made a strong comeback in recent years. That's great, but for people who come from the CD or iPod generations, it's hard to comprehend just how tweaky the world of analog playback can be. Unlike a CD player or iPod which you simply connect and play, most turntables require careful optimization to deliver the best possible sound.
One key factor in hitting this auditory sweet spot is to make sure the phono cartridge is installed and aligned skillfully. I covered some of the basics in an earlier article called Mysteries of the Turntable Explained, and I would suggest starting there for some tips on how to get your turntable running correctly. My goal here is to go into a little more detail on the finer points of cartridge alignment.
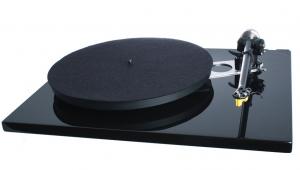
Choosing a Cartridge
Of course before you can install a cartridge you need to have one to install, and this involves choosing from the vast array of models ranging in price from less than $20 to over $10,000. Budget aside, your choice will depend to some extent on the turntable you want to mount it in, and the type of phono input you plan to connect it to.
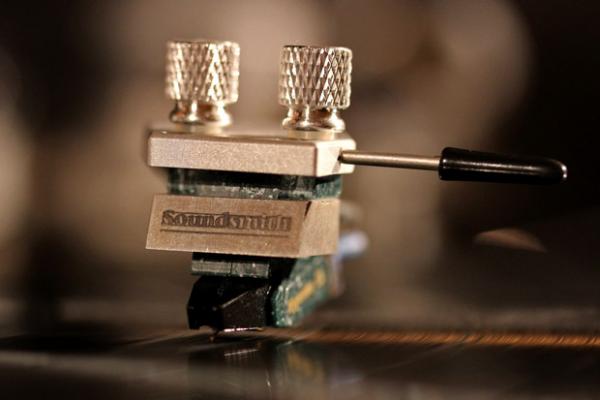
Almost all cartridges fall into one of two camps, the more exotic moving coil (MC) models that often have a very low output level, and the more popular high output moving magnet (MM) types. There are a number of relatives of the moving magnet type such as the induced magnet system used by Grado, but for the sake of simplicity I'll simply refer to all of those here as moving magnet (MM) cartridges.
With typically ten times the output level and a user-replaceable stylus, a good MM cartridge is normally the best replacement choice for most systems. While the exotic nature of the most expensive MC cartridges has given them a cachet that can make a MM seem ordinary, in most systems an MM will deliver equal - if not better - performance than a fancy MC. The high output means less noise with many phono inputs, and the user-replaceable stylus saves a lot of tears and headaches if you suffer from what I call "cleaning lady syndrome." After all, nobody ever admits to breaking their own cartridge, do they?
If you're just looking to get that old 1970s turntable from your college system back up and running, there are plenty of good affordable cartridges from brands like Ortofon, Audio Technica, and Grado. Shure was traditionally one of the biggest players in this field, but they now have a rather limited selection, though that includes the excellent M97xE. Ortofon's recent 2M series, Audio Technica's AT95E, and Grado's Prestige series are also fine choices, along with the bargain-basement Ed Saunders Red Ed at just $15.95.
Unless you plan to become the next Tiësto, I would steer clear of cartridges aimed at the DJ market. To stand up to the beating they take at the hands of your typical DJ, these cartridges usually work at very high stylus pressures, and they are built for ruggedness rather than subtlety. Stanton, Shure, and Ortofon are the biggest names in DJ cartridges, but as we have seen they also make models specifically for the hi-fi customer.
Making the Connections
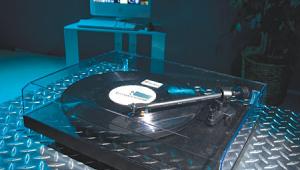
Once you have your cartridge you need to install it, and this is where the fiddly part starts. Most new cartridges come with screws that will work in the majority of arms, and often they'll even throw in a suitable tool for tightening things up. For more details I suggest checking out the Mysteries of the Turntable article, where I go into more detail on how to make the electrical connections.
Perfecting your Alignment
Once you have the cartridge mounted in the headshell with the wires all connected up, the next job is to get the cartridge positioned properly and all the various settings on the arm dialed in.
Vertical Tracking Force
Before making any other adjustments, it's important to set the vertical tracking force or the downward pressure of the stylus on the record. Leaving this setting way out of whack as you make the other adjustments can damage your cartridge, so set it first. The instruction sheet for the cartridge will have a recommended tracking force, and you can use this to start. It also helps if you turn the anti-skating setting to zero until later in the process, as this will stop the arm from constantly trying to pull out towards the edge of the record. Most arms have markings that you can use to show the tracking force, but you need to follow the arm's instructions on how to calibrate this. Go visit the Vinyl Engine site, where you can download manuals for many turntables (free registration required), or if all else fails, you can get an after-market stylus scale like the Shure SFG-2.
Vision
Cartridge alignment requires you to see up close with real precision, so unless you are young with incredibly sharp vision for detailed work, I would get some magnifying glasses to help you see. I use +275 reading glasses and find they work well for me, but there are fancier options if you insist. A couple of small LED flashlights are also really useful, as you can lay them right on the platter to light up the stylus as you check things out.
Now that you've got your glasses in hand, on to the next page for the fiddly stuff...
|
| |||||||||


| Displays Electronics Speakers | Sources Other Gear Software | Top Picks of the Year Top Picks | Custom Install How To Buy How To Use |
Tech 101
|
Latest News Features Blogs | Resources Subscriptions |
WHERE TECHNOLOGY BECOMES ENTERTAINMENT
 © 2026 Sound&Vision
AVTech Media Americas Inc., USA
All rights reserved

