- REVIEWS
Displays Electronics 
Speakers Sources Other Gear Software - HOW TO
How To Buy How To Use Tech 101
How To: DIY Audio Measurement Page 3
Assembling Your Toolkit
The basic tools of an audio system evaluation kit are a measurement microphone and a computer running audio measurement software. The trick is, the frequency response of your measurement system has to be flat. If you use, say, a typical vocal mike with a "presence peak" at 2 kHz, you'll think your system has a bump at 2 kHz when it doesn't.
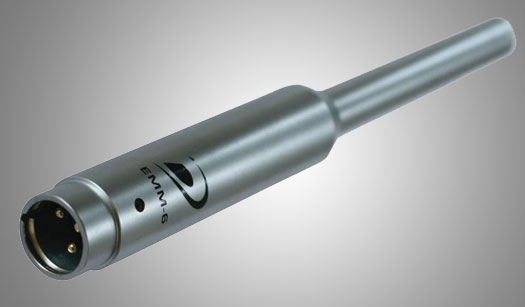
Fortunately, there's now a pretty good measurement mike that costs less than many special-edition Blu-ray Discs: the Dayton Audio EMM-6. The Web site partsexpress.com sells it for about $50. You can also find an almost. identical mike, the Behringer ECM-8000, for about the same price. You'll need a stand for the mike, too; a $25 cheapie will suffice.
The response of the EMM-6/ECM-8000 is almost perfectly flat, marred only by a few slight dips of –1 dB or less. Computer software can easily compensate for these minor errors by applying a reverse correction curve that nulls out the flaws generic to the EMM-6/ECM-8000. However, even different samples of the same microphone vary slightly, so if you want to get absolutely perfect measurements, use a calibrated mike instead. A calibrated mike has been individually tested, and comes supplied with correction data that can be plugged into a computer so its corrected response is dead flat. Partsexpress.com offers a free, downloadable calibration file with each EMM-6, and you can also purchase calibrated EMM-6 and ECM-8000 mikes from cross-spectrum.com.
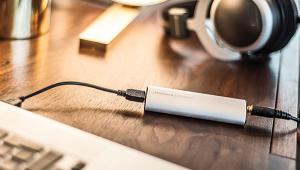
The EMM-6 and ECM-8000 require phantom power: a separate DC supply that sends voltage up the cable to power the mike's internal preamp. Fortunately, there's a phantom power supply with a street price of about $20: Nady's SMPS-1X. You can also use a mike preamp with phantom power, but make sure it's a straightforward design with flat frequency response, such as the Rolls MP-13 or the ART USB Dual Pre. (You can measure the response of a mike preamp using RightMark Audio Analyzer, a free software package available at rightmark.org.)
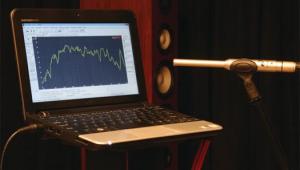
A laptop computer is your best bet for audio measurements: It's quiet, it's portable, and it has a built-in display. You can get audio measurement software for a Mac, but there's a much better selection of PC software for low-cost scientific/engineering applications. Almost any PC laptop will do, even a $300 netbook. And just as this was going to press, I found an iPhone-based hardware/ software app that will also work - for more info, click here.
While lots of audio measurement software applications exist for the PC, the one that seems to have captured the hearts of engineers and enthusiasts is True RTA, available at trueaudio.com. Most speaker engineers I know keep a copy on their computers. As its name implies, True RTA is a real-time analyzer, sometimes referred to as an audio spectrum analyzer. Through a connected microphone, it "listens" to the sound your system is producing and then shows you the level of sound at each of numerous frequencies. True RTA also includes a test-tone generator, which produces pink noise, sine waves, etc., using your computer's sound card. The idea is that True RTA spits out the test tone through a cable connected from the computer to your system, listens to the result through the microphone, and shows you graphically how your system is altering the sound of that tone.
You can download a free copy of True RTA, but the resolution of the free version is only 1 octave, so instead of getting 12 or 24 discrete bars between, say, 40 and 80 Hz, you just get one bar that tells you the total energy in that band. The 1/6-octave version of True RTA ($69.95) is adequate for the measurements you'll be making, but the 1/24-octave version ($99.95) is a worthwhile step up.
To set up your system for measurement, connect the mike to its power supply or preamp, connect the power supply/preamp to your computer's mike input (or its USB port if you're using the ART USB Dual Pre), and connect your computer's headphone output to your audio system. Obviously, you'll need adapters to make these connections.
When you run your measurements, be sure to have all your speakers running, not just the subwoofer. This way, you'll include the bass produced by your main speakers, and you'll be able to gauge the effects of the subwoofer crossover in your receiver or preamp/processor.


| Displays Electronics Speakers | Sources Other Gear Software | Top Picks of the Year Top Picks | Custom Install How To Buy How To Use |
Tech 101
|
Latest News Features Blogs | Resources Subscriptions |
WHERE TECHNOLOGY BECOMES ENTERTAINMENT
 © 2026 Sound&Vision
AVTech Media Americas Inc., USA
All rights reserved

