- REVIEWS
Displays Electronics 
Speakers Sources Other Gear Software - HOW TO
How To Buy How To Use Tech 101
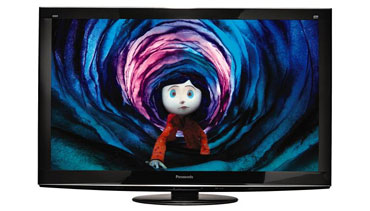
Test Report: Panasonic TC-P5OVT25 Plasma HDTV Page 3
Setup
Panasonic’s picture presets include a THX setting that applies globally to all inputs — just set it once and forget it. There’s also a Custom mode with settings that can be independently tweaked for each component you connect to the TV. While THX provided dead-on accurate color points, the TV’s grayscale reproduction in that mode displayed a too-warm, somewhat greenish bias (see Test Bench for details). For this reason, I preferred to make my adjustments in Custom, which gave me access to a Pro menu with white balance and red/green/blue hue and saturation adjustments — something that’s not available in the partially locked-down THX preset.
The Panasonic VT25 Series TV provides four picture-size Format options, including a 16:9-picture-friendly Full mode, that are selectable via remote control. During setup, however, it’s important to first visit the Aspect Adjustments submenu and select the Size 2 HD Size option, especially if you want to see every pixel in the image during Bluray playback. (The Size 1 option — the default for most picture modes — crops off around 4% of the picture to avoid edge noise from showing up with broadcast and cable TV sources.)
Other picture setup options that I selected for the P50VT25 included Warm 2 color temperature, Medium video noise reduction, Light black level, 3:2pulldown On, and the 96 Hz 24p Direct In. Previous Panasonic plasmas mostly provided only two screen- refresh options — 48 Hz and 60 Hz — for handling a 1080p/24 input signal from a Blu-ray Disc player. But the trouble with those modes was that 48 Hz created visible flickering in bright areas of images, while 60 Hz introduced the potential for film-pulldown-related artifacts like picture “stutter.” But with the VT25’s 96 Hz 24p Direct In mode selected, Blu-ray images look both solid and smooth.
Getting 3D going on the Panasonic isn’t a problem. You simply hit the Viera Tools button on the remote and select the 3D window, and a 3D settings menu pops up. Unlike the Samsung LED model I tested in our June/July/August issue, the options here are simple and straightforward. The Auto 3D setup option should work for most 3D signals, whether arriving from Blu-ray, satellite, or cable. (Other choices include Side-by-Side, Top and Bottom, and Native.) Two other items, Left/Right Swap and Diagonal Line Filter, don’t get much explanation in Panasonic’s manual, but they are apparently there to normalize things if 3D images start to look funny. Finally, you need to press and hold the Power button on Panasonic’s eyewear for about a second.
|
| |||||||||


| Displays Electronics Speakers | Sources Other Gear Software | Top Picks of the Year Top Picks | Custom Install How To Buy How To Use |
Tech 101
|
Latest News Features Blogs | Resources Subscriptions |
WHERE TECHNOLOGY BECOMES ENTERTAINMENT
 © 2026 Sound&Vision
AVTech Media Americas Inc., USA
All rights reserved

