- REVIEWS
Displays Electronics 
Speakers Sources Other Gear Software - HOW TO
How To Buy How To Use Tech 101
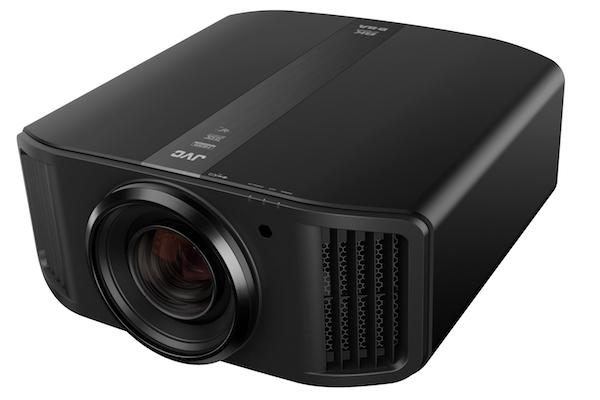
Hands-On With JVC’s Dynamic Tone Mapping Update
The new firmware adds features including proper 16x9 internal scaling when using a Panamorph “DCR” anamorphic lens and screen offsets for calibration purposes. But the most beneficial update by far is dynamic tone mapping, a feature that sets JVC apart as the only front projection brand on the market to offer a true “frame by frame” solution (LG’s HU85LA ultra-short throw projector also features frame by frame tone mapping) for displaying HDR10 content.
A Static Approach
Projector owners so far have faced an uphill battle to optimize image quality for HDR sources. That’s mainly because HDR formats were developed not with consumer projection in mind, but rather flat-panel TVs capable of delivering massive light output. But even knowing the brightness limitations of their displays, projector owners may also want to take advantage of improvements offered by HDR such as higher video bit-depth and wide color gamut.
For a projector to work with HDR, it must employ what is known as a “tone map.” In a nutshell, this is a method for compressing a large amount of video dynamic range into the smaller space that the projector is capable of reproducing. Unfortunately, there’s no standard for tone mapping, so each manufacturer brings a different approach to the process.
If you look at HDR-capable projectors available today, they all employ some variation of what is known as a “static tone map.” This basically means that the HDR signal is stuffed into a single, fixed video range that’s typically based on the highest expected video level the content contains. Ultimately, this information is very difficult to predict—while some HDR programs provide metadata that conveys the correct peak video level, with others it may be wrong or missing entirely.
Regardless of how the static tone map is created, all images in the program that are less bright than the portion containing the highest video level are compromised. Here’s how that happens. The tone map applies to the program’s brightest point so that highlight detail in the image won’t be clipped when that particular scene is displayed. But that moment may only represent a few seconds of the entire movie, and because the video signal now has extra headroom added to it, the remainder of the program appears dimmer than it should. Essentially, dynamic range—something that’s already an issue with projectors due to their limited light output compared with flat-panel TVs—is being wasted to accommodate a single moment of peak brightness.
Dynamic Duo
In contrast with the typical static approach, the dynamic tone mapping provided by JVC’s new firmware means that instead of creating a single video range to map HDR content to, the projector can adapt on either a frame-by-frame or a scene-by-scene basis. There are pros and cons to each approach (frame vs. scene), but both do a much better job in matching the projector’s existing dynamic range to the video being displayed. There is still some loss in either case due to a small amount of headroom or “padding” being used to prevent the clipping or pumping artifacts commonly seen with other dynamic systems (dynamic contrast, for instance). But the compromise is much less than what you’d get with a static tone map, with the result being dramatically improved image quality with HDR content.
Dynamic tone mapping is part of a new Frame Adapt HDR Picture Mode that JVC’s firmware update adds. Frame Adapt HDR is now the default picture mode that becomes active when the projector receives an HDR signal, and it includes HDR Level, HDR Processing, and Cinema Filter settings.
HDR Level provides Auto, Low, Medium and High options. According to JVC, when in Auto mode the projector will measure the incoming video signal in real time and determine which level (Low/Medium/High) to use based on the brightness of the incoming frame or scene. (During my testing, I found that it always seemed to default to the Medium setting.) While Auto works well for the most part, it may be preferable to select a different mode depending how dim or bright your specific projection setup is.
Which brings up the biggest issue I see with Frame Adapt mode. Home theater installations vary dramatically in screen size and material, and there can be massive differences in the total amount of light measured off the screen. But JVC’s HDR Level settings are the only way to give the projector an idea of how much light is available for processing. Those with a lower brightness projection system may find that the High setting delivers a much better-looking image than Low, while others with a system capable of greater light output may find High to be too bright, or even clipped, and that Low or Medium provides better results. With no direct guidance from JVC on the estimated light output for each mode, it becomes a bit of a guessing game as to which one should be used. The Auto setting performs better than previous HDR solutions, but you still have to experiment to get the best image quality from different program sources.
Next up is HDR Processing, which includes Frame by Frame, Scene by Scene, and Static modes. Since adjusting the tone map on a frame by frame basis is difficult to do if the content varies significantly (a quick explosion, for example), there will be a greater chance of artifacts. When using Frame by Frame mode, I rarely saw issues, but they did pop up on rare occasions. Scene by Scene looks for breaks in the content where the average picture level has changed due to a scene change. For example, scene one might be Johnny and his girlfriend talking at the beach, while the next scene has them hanging out in his bedroom with the lights down. With Scene by Scene active, the tone map adapts to such longer-range changes rather than trying to adjust for every frame. The end result is that you are less likely to see tone mapping-related artifacts with Scene by Scene, though overall dynamic range will be more limited than with Frame by Frame since there is more “padding.”
Last up is Static, which performs in a similar manner to the older style of tone mapping I mentioned above. JVC projectors already offer a static tone map picture mode called HDR10 that uses an “intelligent” method to analyze incoming metadata and generate the best possible tone map. From what I can tell, this Static option provided in the new Frame Adapt HDR picture mode doesn’t use metadata, though the results you’ll get can vary dramatically depending on which HDR Processing selection is active. JVC recommends Static HDR Processing when using an Ultra HD Blu-ray player like Panasonic’s DP-UB820 or DP-UB9000 that outputs a fixed nit level, though I honestly don’t know why you would select that instead of using the new dynamic tone mapping options the firmware update provides.
The only other real change JVC’s firmware update brings is a Cinema Filter setting in the Advanced Setup menu that selects the color profile the projector is using. The selections include Normal and Wide, which correspond to the HDR and BT.2020 color profiles in the projector’s HDR10 picture mode, respectively.
A Giant Leap
Now that we’ve covered what dynamic tone mapping is, and how it’s handled in JVC’s new picture mode, let’s discuss how HDR content looked when I tested the new mode on the company’s DLA-NX9 projector. In a word: marvelous! The improvement in picture quality when you transition from a static tone map to a true dynamic tone map is not subtle. Scenes that previously looked dreary and dynamically truncated come alive with better shadow detail and color vibrancy. Highlights stand out and give the HDR image a greater sense of pop. Movies that benefit the most from dynamic tone mapping are ones with a limited dynamic range to begin with such as Blade Runner 2049. When displayed using static tone mapping, this film typically looks murky and subdued, but JVC’s dynamic tone mapping did an excellent job of increasing highlight detail and adding color saturation to the image.
The Revenant was shot using natural lighting and has a more limited dynamic range compared with the flashy CGI-filled blockbusters that dominate the movie market today. (This is also a Fox release, which means there is no usable HDR metadata to even properly set a static tone map.) JVC’s dynamic solution did a splendid job of displaying both dark scenes and subtle highlights presented by the film’s campfires and snowy landscapes. It truly felt like I was watching the film again for the first time when using either the projector’s Frame by Frame or Scene by Scene HDR modes.
JVC’s new tone mapping options performed equally well when streaming HDR content from sources like Netflix, Apple, and Amazon via an Apple TV 4K box. For some time now, I’ve been using a Lumagen Radiance Pro outboard video processor to generate dynamic tone mapping for projectors. I was surprised to see how close the JVC’s new modes came to rivaling the Lumagen, though the former did struggle with the darkest and brightest content in direct comparisons. These included titles like The Meg, a disc with an extremely high average picture level and peak highlights, and the demo montage from the Spears & Munsil UHD HDR Benchmark, which also features difficult footage with high peak values.
A Must-Have
JVC’s new firmware update is probably one of the most effective upgrades I’ve ever seen offered for projectors—I can’t remember the last time I encountered a feature this significant made available as a free update and am thrilled with the results. If you own one of the supported JVC models, you should download the new firmware without hesitation. And if you happen to be shopping for a 4K projector, be aware that you’ll have a hard time finding anything on the market that approaches this performance level when it comes to displaying HDR. After years of waiting, the front projection HDR experience I’ve hoped for is finally available!


| Displays Electronics Speakers | Sources Other Gear Software | Top Picks of the Year Top Picks | Custom Install How To Buy How To Use |
Tech 101
|
Latest News Features Blogs | Resources Subscriptions |
WHERE TECHNOLOGY BECOMES ENTERTAINMENT
 © 2026 Sound&Vision
AVTech Media Americas Inc., USA
All rights reserved

