- REVIEWS
Displays Electronics 
Speakers Sources Other Gear Software - HOW TO
How To Buy How To Use Tech 101
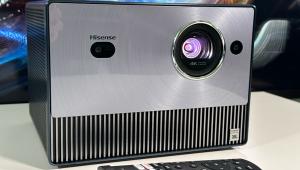
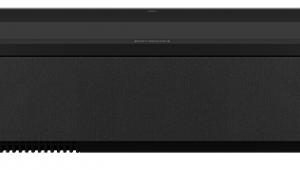
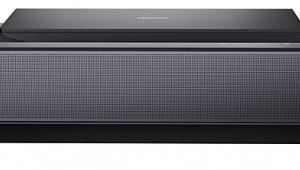
Samsung SP-A800B DLP Projector Setup & Tests
The Quick Setup Guide provided with the projector is hefty, but as the title indicates, it provides only very basic information—in 12 languages. The full manual is provided on a CD-ROM.
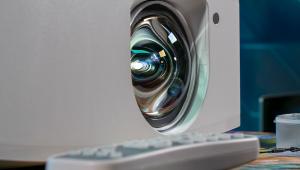
Positioning the Samsung is no more complicated than with most modern projectors. Place it so the projection axis is horizontally centered and perpendicular to the screen, adjust the zoom, focus, and vertical lens shift, and you're done.

I found that, despite the available lens shift, the vertical position of the projector relative to the screen height was fairly critical to get the best focus from top to bottom on test patterns. The optimum position is slightly below the bottom of the screen for a table-mount placement or above the top of the screen for a ceiling-mount. The exact distance will vary with the size of the screen, and this info is provided in the manual. You should try to accommodate this as much as possible, but in practice, the slight loss of resolution at the top or bottom of the screen from non-optimum vertical positioning was subtle on real program material.
Calibrating the Samsung involves a very different procedure than on most video displays. It's also done largely in the service menu. As always, this should be left to a qualified calibrator with the appropriate test equipment.
First, using the projector's own internal test patterns, the calibrator measures the coordinates and brightness of the out-of-box red, green, and blue color points, together with the white point. He or she then inputs these readings into a color-temperature table in the service menu. The projector automatically calculates and applies the corrections needed to produce the correct color points and the D65 white point across the full grayscale, from light to dark. All three Color Standard settings—SMPTE-C, HD, and EBU—are automatically calculated from a single calibration.
In addition, if the projector has been fully calibrated in the Movie1 mode (the best mode for most program material), switching to Movie2 automatically produces a slightly different white and color balance optimized for older black-and-white films. This balance is slightly warmer than the D65 standard for color material. (On the Samsung, the white point for Movie2 is the point where the 5500K line crosses the black-body curve on the CIE color chart.)
Don't be mislead by the Color Temperature controls in the user menu that offer not only color-temperature presets but also Gain (high) and Offset (low) controls for red, green, and blue—the sort of controls most commonly used for calibration. Yes, the Color Temperature should be set to 6500K, but the Gain and Offset controls should not be used for the primary calibration. Instead, they can be used after the service-menu calibration, if needed, to adjust the projector for correct performance with different sources.
This adjustment should be performed with as much care as a normal calibration using the same precision test tools. In my experience (see "Measurements"), the benefits from this second-level tweaking are subtle and probably not necessary, but individual situations vary, and the flexibility is available if you need it.
The Samsung's performance was stellar with 1080p signals, and its video processing (deinterlacing and scaling) generally performed acceptably with real-world 480i program material. But its performance on both 480i and 1080i sources in my standard series of video-processing tests was a mixed bag overall.
When upconverting 480i to 1080p using a component input (the projector will not accept 480i via HDMI), it performed poorly on the HQV Benchmark DVD's jaggies and waving-flag tests and below average on the 3:2 pulldown test—it locked onto 3:2, but consistently broke lock a fraction of a second later. But it did pass the 2:2 and 3:2 cadence tests elsewhere on the disc, and it performed well on my real-world tests from Gladiator, Star Trek: Insurrection, and The Day the Earth Stood Still.
In 1080i-to-1080p tests from the HQV Benchmark Blu-ray disc, the Samsung did not "bob" the fields when deinterlacing film or video material—that is, it used both fields to reconstruct each frame ("weaving") rather than repeating one field to create a complete frame ("bobbing"). However, it did not recognize 3:2 pulldown in film-based content, which means that some deinterlaced film frames consist of mismatched fields. This was evident in chapters 7 and 8 of Mission: Impossible III, which exhibited moiré in the Vatican brick wall and steps.
In addition, the projector turned in only a fair-to-good result on the two HQV HD jaggies tests. Most displays range from good to (more commonly) excellent on the latter. On the Spears and Munsil Blu-ray HD test disc (not commercially available), it produced moiré on the race-track tests that show a rapid pan across empty bleachers.
On the upside, the projector's color decoding is flawless. With the Overscan control off, overscan is zero via HDMI at any source resolution and a maximum of 0.5% (on the right side only) via component. There was no overscan scaling—that is, it exhibited perfect 1:1 pixel mapping in the 16:9 aspect-ratio setting—and no visible ringing in the optimum setting of the Sharpness control.
Just before this review was finished, UAV editor Scott Wilkinson and I had the opportunity to look at some test patterns on a swatch of the new Affinity screen material from Da-Lite. This material, which has no granular coating like many projection-screen materials, was developed in collaboration with Joe Kane to wring even more detail, contrast, and uniformity from this—and any other—projector.
Actually, we had two swatches of Affinity material, dubbed Matte White (1.0 gain) and HD Progressive (0.9 gain). In the center of a full-screen 100 IRE white field, the Stewart Studiotek 130 reflected a peak-white level of 23.5 foot-lamberts (fL), while the Matte White was 18.3fL and the HD Progressive was 16.6fL—not surprising given the gain of each material.
In the upper left corner, the Studiotek 130 exhibited a peak-white level of 18.7fL while the Matte White was 15.3fL and the HD Progressive was 14.5fL. This translates to a fall-off of 20% from center to corner on the Studiotek, 16% on the Matte White, and less than 13% on the HD Progressive, making it the most uniform of the three.
Next, we examined the pixel-phase test (alternating rows of one pixel on/one pixel off) on the Digital Video Essentials: HD Basics Blu-ray disc. We could see no appreciable difference in detail resolution between the three materials, though the Studiotek was significantly brighter. Also, we could see some "sparklies" on the Studiotek and Matte White, but not on the HD Progressive material.
|
| ||||||||||


| Displays Electronics Speakers | Sources Other Gear Software | Top Picks of the Year Top Picks | Custom Install How To Buy How To Use |
Tech 101
|
Latest News Features Blogs | Resources Subscriptions |
WHERE TECHNOLOGY BECOMES ENTERTAINMENT
 © 2025 Sound&Vision
AVTech Media Americas Inc., USA
All rights reserved

