- REVIEWS
Displays Electronics 
Speakers Sources Other Gear Software - HOW TO
How To Buy How To Use Tech 101
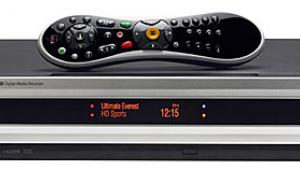
JVC DR-MV1S DVD Recorder/VCR
If you're anything like me, you have a pile of VHS tapes lying around, gathering dust. Perhaps they're neatly organized, or maybe they're thrown in some boxes in the garage. They might be precious home movies of the tykes growing up, or they could contain rare TV appearances by celebs of a bygone era. In my case, they're mostly treasured TV shows that I captured to enjoy over and over again. The only problem is that they take up way too much space, and they're on videotape, which makes it almost impossible to find the spots I want to watch.

Thankfully, a new product category is emerging that promises to address these problems. Many manufacturers are now introducing components that combine a VHS VCR and DVD recorder in one box. Among the first is JVC's DR-MV1S.
Ins and Outs
The DR-MV1S includes a VHS Hi-Fi VCR and a DVD recorder that uses the DVD-R, -RW, and -RAM formats. Each deck has its own NTSC tuner, so you can record a TV show on either one while watching another channel or recorded program on the other one; you can even record independently on both at once. You can also dub material from either deck to the other, and you can record from an external source via rear- and front-panel inputs, including a DV input for digital camcorders. (Of course, you can't duplicate copy-protected, pre-recorded material.)
The connections are a bit confusing at first. DVD inputs and outputs include S-video and composite, along with stereo audio. The DVD deck also has a component video output, which can be set for interlaced or progressive operation, and two digital audio outputs. The VCR inputs and outputs are composite only with stereo audio. Each deck also has its own RF input for an antenna or cable feed, and the manual says to split a common feed to connect both. However, I connected my cable feed to the DVD input and a short RF cable from the loop out to the VCR RF in, which worked fine.
The easiest way to view either the VCR or DVD player at the touch of a button from a common output is to use the composite DVD/VCR output, which is OK for the VCR but entirely inadequate for the DVD player. I used this connection to monitor my dubs, but I used the DVD deck's component output for serious DVD watching. One thing to be aware of: If progressive mode is enabled, the other video outputs are disabled.
Interestingly, you can set up the device to watch the VCR from the component output by internally routing the VCR through the DVD recorder as if you were going to dub a tape to disc. This produces a much better picture than the composite output, but it requires a somewhat more-complicated procedure to activate, and the DVD player must be in full-stop (not pause or first-stop). The manual implies that this will only work when the component output is set to progressive mode, but I found that it worked in interlaced mode, as well.
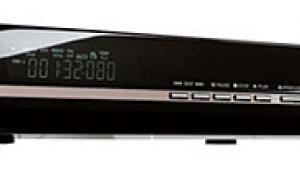
The front panel is fairly straightforward. The top half, which includes the access doors for the two drives, is separated from the bottom half by a horizontal, bright-blue light that extends across the unit. Fortunately, you can turn it off. Just below this blue line of light are several slim buttons, some with LED indicators to show which deck is active, dubbing direction (VCR to DVD or vice versa), timer mode engaged, recording in progress, etc. The labels for these buttons are hard to read. To the left of the central display behind a flip-down door are the front-panel inputs; to the right are the transport and channel-up/-down buttons, along with the DV input behind another door.
Basic Functions
When you first plug in the unit, it automatically sets its clock and does a channel scan (assuming that you have an RF feed connected). This is very convenient, but the process for manually deleting channels you don't watch is very cumbersome.
The remote's layout is OK but not great, with some multifunction buttons and confusing labels. The main transport controls glow in the dark, but the remote is not otherwise illuminated. On the plus side, it's a preprogrammed universal model that can control up to three components. Even better, it has a 30-second skip-ahead button, which is great for skipping recorded commercials, and a 6-second jump back button, so you can watch Janet Jackson's costume malfunction over and over. These buttons work with both decks.

The VCR transport is very responsive; changes in scan speed and direction are quick, unlike some JVC VCRs I've known. There are two forward-scan and three reverse-scan speeds, including 1x reverse, which is great for cuing the tape back to the desired point after you pass it while scanning forward.
The DVD drive is a fine playback deck, especially from the component output. When the progressive output is engaged, there are four film/video modes to choose from: Auto1 and Auto2 automatically detect film or video material, while the Film and Video modes are limited to film and video material, respectively. I played a number of test sequences to see which mode worked best, and I concluded that it was Auto2, which caught the 3:2 cadence quickly and smoothly and handled mixed film/video material very well. Overall, the progressive output was excellent, almost completely eliminating the jaggies on all tough material, such as a waving American flag.

The Dub Factor
OK, so what about dubbing from VHS to DVD? You can choose to copy an entire tape, which is quite easy, or manually select any segments you wish, which is a bit more work. When you've recorded what you want, you can hit the DVD's stop or pause button, cue the tape to the next selection, and go again. If you hit the DVD's stop button, the next selection will be a new title; if you use the pause button, the next selection will be a new chapter within the current title.
Like all recording devices, this one offers several record modes that trade image quality for recording time: The higher the quality, the less material will fit on a disc or tape. I recorded some resolution charts from Video Essentials in all four DVD record modes to see how different the quality of each one was, and my findings are summarized in the table below. (By the way, to select one of the external inputs to record from, you must tune the channel to the gap between the lowest and highest broadcast channels; I always prefer an input-select button on the remote or front panel.)
As you can see in the table, there was no visible difference between the top two modes and no difference between the bottom two modes. As a result, I recommend that you use the lowest mode you can get away with. In the case of VHS dubs, EP mode is fine, since VHS tape has less than 275 lines of horizontal resolution anyway. As I was dubbing from VHS to DVD, it was clear that recording in the higher-quality modes made no perceptible difference, so I ended up doing most of it in EP mode.
If you're recording off the air or cable, you might want to use SP mode if the signal is exceptionally good. In this application, there is another record mode available: FR (Free Rate), which dynamically sets the quality level based on the length of the program to be recorded and either the remaining time on the disc or the specified recording time (from 60 to 480 minutes).
Of course, I'm nowhere near finished dubbing my prized VHS collection to DVD, but I've made a good dent in the project during this review. I'm very happy that JVC has introduced this product, which not only makes tape-to-DVD copies and records broadcast TV, but it also provides a top-notch VCR and progressive DVD player in the bargain. I'm sold!
Highlights
•Dubs VHS to DVD and vice versa
•Excellent progressive DVD player
•Very responsive VCR transport
|
|
| ||||||||||


| Displays Electronics Speakers | Sources Other Gear Software | Top Picks of the Year Top Picks | Custom Install How To Buy How To Use |
Tech 101
|
Latest News Features Blogs | Resources Subscriptions |
WHERE TECHNOLOGY BECOMES ENTERTAINMENT
 © 2025 Sound&Vision
AVTech Media Americas Inc., USA
All rights reserved

