- REVIEWS
Displays Electronics 
Speakers Sources Other Gear Software - HOW TO
How To Buy How To Use Tech 101
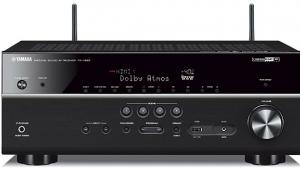
Yamaha RX-Z11 A/V Receiver Setup & Tests
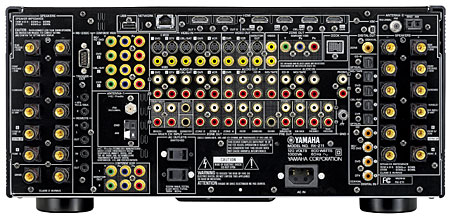
With four HDMI inputs on the rear, I was able to hook up all my HDMI components, including an Oppo DV-970HD DVD player, a TiVo Series3 DVR, a Toshiba HD-A35 HD DVD player, and a Sony PS3. I also connected my Xbox 360 to one of the component inputs, and the AVR transcoded its video to 1080p via HDMI.
The layout on the rear of the Z11 is impressive. There are 13 speaker connections with plenty of room to maneuver your fingers between them if you want to use bare wires. (In addition to the 11 main speaker outputs, there is an extra pair of outputs labeled Front B.) There are also 11 RCA pre-outs if you want to use the Z11 as a pre/pro, as well as an 8-channel input.
There are three different YPAO setup options. Quick Setup takes about five minutes to complete. Then there's Basic Setup, which lets you customize the measurements and settings. Finally, there is Advanced Setup, which measures up to eight listening positions and determines speaker angles to optimize the effects of the AVR's Cinema DSP programs.
I decided to start with the Quick Setup, and I was impressed with the results. It nailed my speaker distances on the first try, and the speaker levels were correct to within 1dB when I tested them using a RadioShack SPL meter. However, like every auto-setup routine seems to do, it identified my M&K studio monitors as large (which they aren't), and the crossovers ranged from 40Hz for my front speakers to as high as 110Hz for my rear speakers. I manually set the speakers to "small" and adjusted the crossovers to 80Hz as recommended by THX.
After living with the AVR for a couple of weeks, I ran the Basic Setup, which yielded the exact same results as the Quick Setup, but I was able to watch the progress of the measurements from the GUI. Then I ran the Advanced Setup to measure eight positions, and I utilized the supplied microphone base to measure the speaker angles. Comparing the results of the three setup procedures, I can't say there was a big difference between them.
As I started testing the Z11's video processing, I discovered something disturbing—even though the receiver offers a "through" mode, the video signal did not pass unmolested. Below-black information was clipped as illustrated by the PLUGE pattern on the Digital Video Essentials HD DVD. I also confirmed that the processor clips above-white using DVE's grayscale ramps. I obtained similar results with the output set to 1080p, so it seems clear that the Yamaha only supports a dynamic range of 16-235 instead of 0-255 as it should.
Companies whose products impose this limitation often argue that there isn't supposed to be any information below 16 or above 235 in a video signal, but that doesn't mean it's never present. Besides, the ability to pass below-black and above-white makes it much easier to set a display's brightness and contrast controls. Speaking of picture controls, this AVR offers none for brightness, contrast, hue, or saturation, unlike other products on the market, such as the Onkyo TX-SR875.
The deinterlacing performance was a mixed bag. Processing 480i signals to 1080p was first-rate, but deinterlacing from 1080i to 1080p was less stellar. Using the Silicon Optix HQV Benchmark HD DVD, the three-bar jaggies test showed significant jaggies with a 1080i input and the AVR outputting 1080p. Also, the video resolution-loss test revealed that the Z11 rolled off the highest frequencies, which was also evident in the resolution-loss test on the Spears & Munsil test HD DVD.
This is harder to detect in real-world material, but chapters 7 and 8 of Mission: Impossible III on HD DVD certainly revealed the shortcomings of the video processing. When viewing these chapters, there was slight moiré in the bricks during chapter 7 as well as in the steps at the beginning of chapter 8. I have seen worse performance in these sequences, but I have also seen near-perfect results from AVRs and pre/pros priced much less than the Z11.


| Displays Electronics Speakers | Sources Other Gear Software | Top Picks of the Year Top Picks | Custom Install How To Buy How To Use |
Tech 101
|
Latest News Features Blogs | Resources Subscriptions |
WHERE TECHNOLOGY BECOMES ENTERTAINMENT
 © 2025 Sound&Vision
AVTech Media Americas Inc., USA
All rights reserved

