- REVIEWS
Displays Electronics 
Speakers Sources Other Gear Software - HOW TO
How To Buy How To Use Tech 101
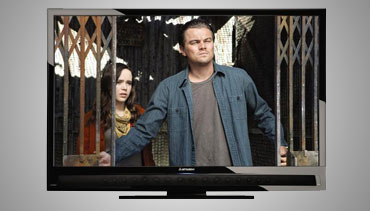
Test Report: Mitsubishi LT-46265 LCD HDTV Page 2
SETUP
The LT-46265 lets you choose between five preset picture modes, including one called Natural that for the most part lives up to its name when it comes to color reproduction. In addition to the basic suite of picture adjustments available in the preset modes, there's also a PerfectColor/ Tint menu that lets you individually fine-tune hue and tint for primary and secondary colors. Two additional picture modes, Advanced 1 and 2, are designed for ad- vanced tweakers and provide a lengthy menu of adjustments, including gamma settings and a second set of color-management system adjustments that go beyond what's offered in PerfectColor/Tint. All 265 Series TVs also apparently have the ability to store special ISF Day and Night modes. (These are dialed in by an Imaging Sci- ence Foundation-trained pro calibrator, and then get locked down in the service menu so you can?t muck with the settings.)
Another submenu, PicturePlus, contains the TV's True 240 Hz mode, which offers up separate Motion Blur and Film Judder adjustments for video- and film-based programs, respectively. LCD TVs in particular are susceptible to motion-blur artifacts. In this case, having the ability to independently correct for that problem (some TVs bundle the two controls into a single slider) is a good thing since film-judder adjustments often inject motion picture film with the hypercaffeinated visual quality of handheld video.
Since Vudu is a big part of this TV's appeal, I hitched the TV up to my home?s Wi-Fi network (and then opted for a hardwired powerline Ethernet connection, which I find to be more reliable). Wi-Fi setup went smoothly, though, as usual, keying in my security code with a remote via a virtual keypad was a bit of a pain. Mitsubishi gives you both automatic and manual options in the SoundPro menu to set up the TV's sound system. With the auto option, you simply place the supplied calibration mike at ear level at your normal seating position. (Best to use a tripod placed on your couch for this.) With manual setup, you first enter the wall lengths of your room and then individually adjust beam angle and level for the right/left front, center, and right/left surround channels via a color-coded onscreen display. Subwoofer-output level adjustments are made via the TV's main audio menu. Using an SPL meter from Radio Shack or elsewhere will give you get the most accurate balance, though you can also do it by ear.
|
| |||||||||
- Log in or register to post comments


| Displays Electronics Speakers | Sources Other Gear Software | Top Picks of the Year Top Picks | Custom Install How To Buy How To Use |
Tech 101
|
Latest News Features Blogs | Resources Subscriptions |
WHERE TECHNOLOGY BECOMES ENTERTAINMENT
 © 2024 Sound&Vision
AVTech Media Americas Inc., USA
All rights reserved

