- REVIEWS
Displays Electronics 
Speakers Sources Other Gear Software - HOW TO
How To Buy How To Use Tech 101
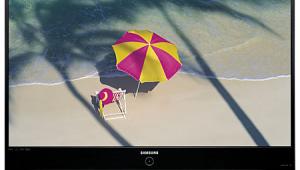
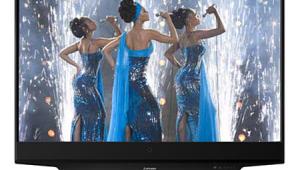
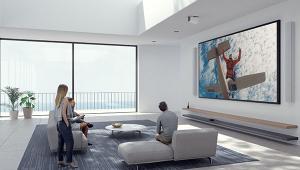
Samsung HL-T5687S 1080p DLP Rear Projection HDTV HT Labs Measures
Summary
• The Samsung's resolution at 1080i with component and HDMI is limited at the top end, though better in 720p. But this limitation was not evident with normal program material.
• Its color was much better than average out of the box—in Warm2 and the sRGB setting of the Color Space Control. The color point and grayscale calibration procedure was very precise, though also atypical, complicated, and excessively time consuming.
• The contrast is below average, due to the set's poor black level.
Details
Settings
Keep in mind that unit-to-unit sample variations, the viewing environment, and the source might render these recommendations less than optimum, though we hope they will provide a useful starting place.
I strongly recommend that you confirm the results on your sample by using one of the many display setup DVDs that are available, such as Digital Video Essentials. This will help you to set the user video controls correctly, though a full calibration, by a trained and properly equipped technician such as those trained and certified by the Imaging Science Foundation (ISF), will produce even better results.
Mode: Movie
Contrast: 85
Brightness: 45
Sharpness: minimum
Color: 44
Tint: G50/R50
Color Tone: Warm2
Size: Just Scan (16:9 for 480i and 480p sources)
Digital NR: Off
Active Color and DNIe: N/A in Movie Mode
Color Gamut: sRGB pre-calibration, Normal after a full calibration
Detailed Settings
Black Adjust: Off
Dynamic Contrast: Off
Gamma: 0
White Balance: 0
My Color Control: All centered (15)
Edge Enhancement: Off
xvYCC: Off
Film Mode: On (for 480i film-based sources only)
Resolution
The Just Scan aspect ratio was used for the 1080i HDMI and component measurements because it minimizes overscan and maximizes resolution. But it is available only for 1080i/p sources, both HDMI and component.
In 1080i, HDMI, with the aspect ratio set to Just Scan, a sharpness test pattern looked very good, with the one pixel-width vertical line well defined. But it was not quite as crisp as the best I've seen (including on Samsung's own, recently reviewed LN-T5265F flat panel LCD).
There was also a trace of non-defeatable edge enhancement even with the Sharpness control set to minimum and the Edge Enhancement control off. In fact this was the case with all settings using both HDMI and component. It was subtle, however, and didn't have any obvious effect on normal program material. Curiously, it was less obvious with 480i and 480p than 720p and 1080i. It was, in fact, most pronounced at 720p.
The Sharpness control had little or no effect in Movie mode, so I left it at its minimum setting for all my viewing and tests.
In HDMI, Just Scan, at 1080i, the multiburst resolution patterns from my AccuPel test pattern generator showed no visible response in either the luminance (black and white) or color at the highest burst frequency (37.1MHz for luma). Both were fine, however, up to 18.5MHz. In component, at 1080i, in Just Scan, the response, or lack of it, was essentially the same.
In 720p, both component and HDMI, the highest frequency burst was actually better than in 1080i, with respectable though somewhat rolled off response at 37.1MHz.
The set did respond very well to both 480i (component) and 480p (component and HDMI) up to the respective limits of those resolutions.
Color: Commentary
As mentioned earlier in the review, the calibration for Samsung's rear projection sets is extremely complex and tedious, and not typical of normal calibration procedures. It involves going back and forth in the service menu, each time applying new correction factors to the x/y coordinates of each of the primary and secondary color points (red, green, blue, yellow, cyan, magenta) to push them closer and closer to the optimum values.
There is a similar correction procedure for the white point. I found that the latter was ineffective, but fortunately there are also individual adjustments for the top and bottom of the brightness range in the White Balance section of the service menu that can be corrected using the same back and forth procedure.
It took me more than twice as long to calibrate this Samsung as I normally spend on a set. This included entering the service menu an estimated 50 times (you have to exit it each time to take a new, accurate reading and gauge the result of your adjustments). But I lost count.
Color Results
In theWarm2 color temperature setting, the Samsung's pre-calibration color temperature (measured with our Photo Research PR-650 colorimeter) was good, but a bit off at both extremes of the brightness range (Fig.1). Calibration brought this closer, though the color temperature was still a bit high in the mid-low brightness range (Fig.2).

Fig.1

Fig.2
Recall that any color temperature, including the desired 6500K, forms a line on the CIE color chart. But the optimum white point, D6500, is a specific point on that line. While Figs.1 and 2 are useful in that they show the color temperature in degrees Kelvin, Figs.3 and 4 show how closely the result adheres to the optimum D6500 white point. If the red, green, and blue overlap perfectly from the low end of the brightness range to the top at the center of this chart (on the 100% line), the white points will be perfectly positioned at the optimum D6500 across the full brightness range.

Fig.3
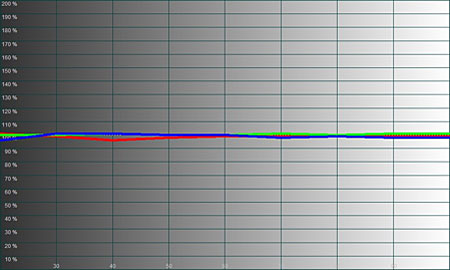
Fig.4
Fig.3 shows that in Warm2, out of the box, the set's red, green, and blue levels were clustered reasonably well. But the result is a little too blue at the bottom end and too red at the top—consistent with the result in Fig.1. The post-calibration result in Fig.4, apart from a slight lack of red around 40IRE, shows a much tighter match—and thus a result much closer to the D6500 standard.
Out of the box, the primary red and blue color points on the Samsung were reasonably close to the correct values with the Color Space set to sRGB (Fig.5). Fig.6 shows the Normal setting after calibration. The primaries (red, green, and blue) were virtually spot-on. The secondaries (yellow, cyan, and magenta) were still slightly off, but my past experience suggests that the small remaining deviations should be visibly insignificant. I have no doubt that they could be dialed in as closely as the primaries, but with much serious viewing yet to be done after the calibration, a deadline approaching, and having survived many a setback in the several hours it took to get this far, I elected to leave well enough alone.

Fig.5

Fig.6
Figs.7 and 8 show the out-of-box color spaces you'll get in the Normal and Wide Color Gamut settings. Normal was respectable (though less accurate than sRGB—at least in our sample).

Fig.7

Fig.8
It might appear that the extra range of the Wide color space in shown in Fig.8 is an advantage, but this is not the case. When a video display produces any colors besides the pure red, green, and blue primaries, it uses various mixtures of these primaries to generate them. The only color information in the input signal is the instructions on how to mix the primaries to create all the other colors required by the image. If the set's primaries are wrong, all the other colors will also be wrong.
Contrast and Overscan
I measured a peak contrast ratio of 995 (93.34 foot-Lamberts full field peak white/0.094fL full field video black), with the controls adjusted as shown in the Settings section, above.
Overscan averaged slightly above 3.5% in HDMI and component at all resolutions with the aspect ratio in 16:9. In the Just Scan mode with a 1080i source over HDMI, it was 2%, and in component, 1080i, just a bit under 2%.
|
|
| ||||||||||


| Displays Electronics Speakers | Sources Other Gear Software | Top Picks of the Year Top Picks | Custom Install How To Buy How To Use |
Tech 101
|
Latest News Features Blogs | Resources Subscriptions |
WHERE TECHNOLOGY BECOMES ENTERTAINMENT
 © 2025 Sound&Vision
AVTech Media Americas Inc., USA
All rights reserved

