- REVIEWS
Displays Electronics 
Speakers Sources Other Gear Software - HOW TO
How To Buy How To Use Tech 101
It Came From Above 16 Easy Steps
 1. Using a stud sensor, locate and mark all stud locations. Repeat for both speaker locations in the room.
2. Using the provided cardboard template, measure out from the wall(s) to ensure that both speakers are equal distance from their respective walls and corners. Mark the center of these templates.
3. To make sure there are no obstructions that the stud sensor didn't pick up, bend a heavy-gauge wire the radius of the speaker's hole size. Once inside the hole, lift the wire to the speaker's depth requirement and then spin it 360 degrees. If you hit something solid, you will need to find out what it is. If the offending obstruction can't be moved, you need to find a new location to mount the speaker.
4. Staple the cardboard template in place.
5. Trace the template.
6. Cut the speaker-mounting hole using a wallboard knife.
7. Feed the fish tape up through the attic, with the speaker wire taped to its end. It helps to have an assistant in the attic to pull the wire to the desired length. Pull up enough wire to equal the length needed to travel: 1) from the speaker location down from the attic to the volume control; 2) up from the attic to the ceiling; 3) to your final destination: the distribution box.
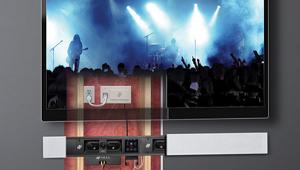
8. Install the volume control: Measure up from the floor to match the vertical height of the room's light switches. Using the stud sensor, travel up the wall to the ceiling, indicating with a pencil mark where the firebreaks reside. Drill a small hole in the wall. Using the same technique described in step 3, make sure the canal is free of obstructions. Using a 6-inch bubble level, draw the area to be cut to mount the volume control.
9. Cut the hole using a wallboard knife.
10. Drill up through the firebreak. If your drill bit is not long enough, you can "cheat" around the firebreak by drilling a hole into it through the drywall. Then, drill up- and down-angle holes through it. This creates a channel by which you can cheat the wire around the firebreak. You will, of course, need to patch the wall with plaster and then paint over it later.
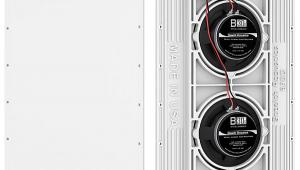
11. After drilling through the header board and all the firebreaks, loop the two speakers' wires and then feed them down to the volume-control location. At this point, clip the loop. You should now have one two-conductor wire running from each speaker location down to the volume control and two two-conductor wires running up from the volume control to the attic and down to your speaker-selector box. For this installation, we used four-conductor wire; that is why you only see two sheathed cables. At this time, put in the volume-control bracket (black ring).
12. Secure the wires to the proper terminals and screw in the volume control.
13. After screwing on the faceplate, use a bubble-level check to make sure that the volume control is square. Adjust it if it's not.
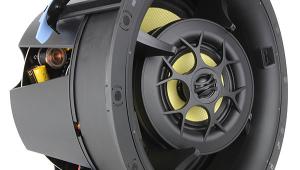
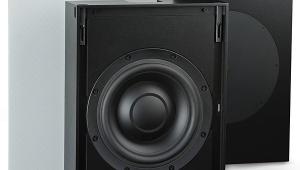
14. Attach the wires to the speaker and screw into place. The AIM One speakers have a clamp-down design that does not require a bracket.
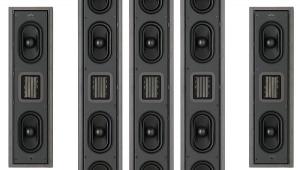
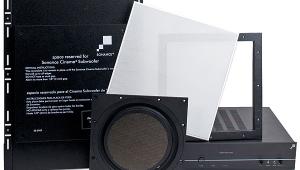
15. Rotate the speaker toward the prime listening area. Hook up the distribution box to the speaker leads and your receiver's B-position output. Label the distribution box with the provided room-description stickers. Once the system is completely wired, test to make sure all the speakers and volume controls are operating properly.
16. Enjoy your new multiroom audio system.
|
| |||||||||


| Displays Electronics Speakers | Sources Other Gear Software | Top Picks of the Year Top Picks | Custom Install How To Buy How To Use |
Tech 101
|
Latest News Features Blogs | Resources Subscriptions |
WHERE TECHNOLOGY BECOMES ENTERTAINMENT
 © 2025 Sound&Vision
AVTech Media Americas Inc., USA
All rights reserved

