- REVIEWS
Displays Electronics 
Speakers Sources Other Gear Software - HOW TO
How To Buy How To Use Tech 101
Sanyo PLV-Z2000 1080p LCD Projector
Sanyo's PLV-Z2000 is at $2,699 after a manufacturer's $300 rebate. That's a lot of pixels for the money. Let's take a look.

Cosmetics, Build Quality, Connections & Specs
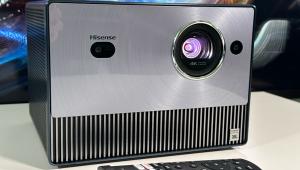
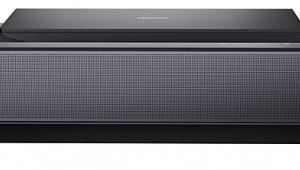
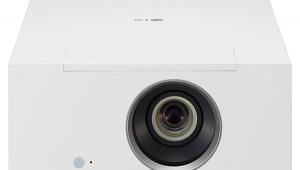
When you think of a 1080p projector in this price range, the first thing that comes to mind is that corners are certainly going to have to be cut. By first appearance, it doesn't look like money was saved in the design process. The Z2000 has a quiet stylish appearance to it. Sporting a muted white finish, the projector still has the "boxy" look that you would expect from a projector, but looks much better than your typical "cheap" model.
We had to receive two samples of the projector though, because the first one that arrived was flawed. Upon taking it out of the box, I noticed that the case was misaligned and I worried that the shipping company ignored the "fragile" label on the packaging. Sure enough, when I fired it up there were three-inch bands of colors on the top and bottom of my screen regardless of the program material. Sanyo immediately sent me another review sample, and I noticed the exact same case misalignment where the top and bottom pieces didn't fit "snug" together. But, this sample didn't have any of the color-banding issues.
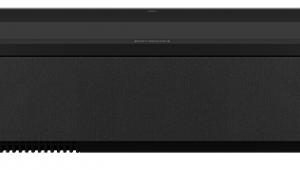
On the rear of the case, all of the connections the average user would need are present on the model as well, including two HDMI 1.3 inputs, a computer RGB input as well as a service port. The only connections apparently lacking on the Z2000 are an RS-232 port and a remote trigger to activate a drop down screen, but Sanyo informs is that the provided Mini DIN 8-pin service port does handle RS232C controls . At this price, if a 12-volt trigger is the corner that was cut, I think Sanyo made a wise choice.
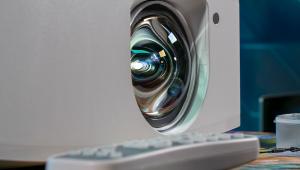
Inside the Z2000 you will find three 0.7" PolySi LCD panels at full 1920x1080 resolution, as well as a dynamic iris system for improving the contrast ratio of the projector. The Z2000 can accept virtually every type of video signal you choose to send to it, including 1080p/60 and even 1080p/24 from your HD DVD or Blu-ray player over HDMI connection. Also included are manual vertical and horizontal lens shift, a manual focus, and a 2:1 lens throw that makes placing the projector in most any room a snap. Another feature that the Z2000 has is an automatic sliding door that will cover the lens when the projector isn't in use. I assume this is there to keep the lens from getting too dusty and to protect it from any critters that may want to take up residence. Once the projector is powered on, this sliding door retracts and a picture is produced. When the projector is powered down, the sliding door reappears and seals up the lens area. While this adds nothing to the picture quality, it is a nice bonus feature nonetheless.
The supplied remote is well laid out and is thankfully backlit with the press of a button. On the remote are the standard features that you need, namely a power button, menu button to access the setup menu's, directional arrows, as well as a bevy of picture controls and direct input buttons (HDMI 1 & 2, Component 1 & 2, etc.). As far as remotes go, this one offers everything that you need at the tip of your fingers to adjust the picture and to access the user menu.

Setup & Calibration
Upon opening up the box, I see that there is "Quick Reference Guide" containing close to 200 pages of setup information in it. Unfortunately, the "Reference Guide" is in 10 different languages and the English portion is limited to 19 pages that will guide you through the initial setup. Unfortunately two important pieces of information were missing. First is which size screws are needed to ceiling mount the projector. Second, and less critical, there was no mention of how to work the manual lens shift. Granted, this second item was not an issue since I am familiar with how they work, but for the newbie, this may cause some heartburn.
Not finding the information that I needed in the "Quick Reference Guide", I decide a trip into the actual owner's manual will be needed in order to find out the proper screw size so I can hang the projector and get on with my evaluation. Unfortunately, the manual is only has been placed on a CD, so I needed to fire up my laptop in order to have access to the manual in my viewing room. I could have printed the manual out, but at 60 pages for something that I would only look at a few times, the "green" thing to do was to save some paper and view the manual on my computer. I guess you could consider this the second corner that was cut, but it was a very small corner indeed.
Also, I still could not find out what size mounting screw was needed. Luckily for me though, my neighbor has every screw size imaginable and I took the projector over to his workshop and we were able to find three screws that would do the job. But to this day, I still don't know what size they are.
Once mounted and firing up the projector, I was able to easily navigate the well laid out menu system and was able to adjust the image for a ceiling mount, and align the projector to my screen. The menu system is broken down into 7 categories: Image, Image adj., Picture adj., Screen, Input, Setting, and Information. In Image adj. Menu, you have the option to turn on the advanced adjustments that will give you more control on how to set up the projector with added control over the auto iris, the iris range, black level adjustment as well as color management and custom gamma.
Once I familiarized myself with the menu system, it was time to calibrate the display. The model that I received for review has about 150 hours on the lamp, so it was quite ready to be calibrated. Normally, there is a natural dimming of the lamp that will take some time to materialize, but at 150 hours, any noticeable dimming should have already happened. I also didn't find myself wanting for any user controls that were lacking in the menu system and all of the controls that I needed to adjust in the calibration process were easily found.
There are seven preset picture modes: Brilliant Cinema, Creative Cinema, Pure Cinema, Natural, Living, Dynamic, and Vivid. There are also seven user programmable modes that will allow you to make changes to one of the preset modes and save those changes as one of the User Settings. Words to the wise though- write down any changes that you make. On two occasions, the projector reset my settings back to default settings for no apparent reason. In fact, on one such occasion, this happened right in the middle of a movie!
Another item to note is the HDMI setting in the user menus. The two choices are "Normal" and "Enhanced". Normal generally refers to video settings (16-235), while Enhanced is for computer settings (0-255). In Sanyo's case, they have the two flip flopped. So, in order to receive below black and above white signals, you need to set you HDMI to "Enhanced" instead of "Normal."
Performance and Evaluation
With the projector mounted and installed and the calibration complete, it was time to run it through the paces. First off, I feel the need to comment on how quiet this projector is. The specs rate it at 19dB, but in reality, it makes virtually no noise at all. I had it mounted about four feet above my head and even standing up I couldn't hear the cooling fan.


| Displays Electronics Speakers | Sources Other Gear Software | Top Picks of the Year Top Picks | Custom Install How To Buy How To Use |
Tech 101
|
Latest News Features Blogs | Resources Subscriptions |
WHERE TECHNOLOGY BECOMES ENTERTAINMENT
 © 2026 Sound&Vision
AVTech Media Americas Inc., USA
All rights reserved

