- REVIEWS
Displays Electronics 
Speakers Sources Other Gear Software - HOW TO
How To Buy How To Use Tech 101
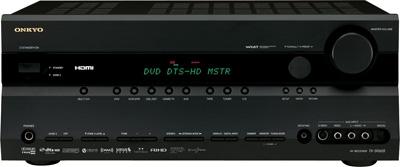
Onkyo TX-SR605 Receiver
The question I get asked the most often: "Which speakers should I buy?" My answer is frustratingly subjective: Buy whatever sounds best to you. The second most asked question is: "Which receiver should I buy?" My answer is purely objective: It's all about bang for the buck. Research the field, list the features you need now and the features you think you'll need in the future, then find the best deal on the cheapest model that covers your list.
Which brings us to Onkyo's TX-SR605 A/V receiver. I have tested numerous Onkyo receivers, and been impressed by their build quality and value. The company seems to have perfected the art of identifying the features that are important, and then creating economical designs around them. Thus I was not surprised when buzz started building for the TX-SR605. It follows that bang/buck business plan, offering 7.1-channel playback, HDMI 1.3a, Dolby TrueHD and DTS HD Master Audio decoding, and is XM and Sirius ready, all in a mid-priced ($600 list, $499 street) box. Not surprisingly, it's a big seller for Onkyo. Another example of finely tuned engineering, or just a product of viral marketing? Inquiring minds wanted to know.
Setup Before I start flinging wires around a new receiver, I always take a moment (or several hours) to look over the hardware at hand. It helps to know what you're dealing with. The short list: The TX-SR605 is rated at 90 watts per channel (2 channels driven), performs upconversion to HDMI, provides powered Zone 2 stereo (reducing the main room to 5.1), has Audyssey 2EQ room acoustics correction, is bi-amp connectable (to 5.1) using front L/R and surround-back L/R, has 40 XM/Sirius/AM/FM presets, and sports the usual plethora of processing modes. As noted, it will also decode Dolby TrueHD and DTS-HD lossless digital audio bitstreams on an HDMI input from a compatible HD DVD or Blu-ray Disc player.
As with many new receivers, this one lets you add optional satellite radio playback (subscription fees apply). But unlike many receivers (and car makers) that make the choice for you, the TX-SR605 has ports for both XM (with XMHD Surround) and Sirius. Satellite metadata appears in the receiver's front panel display, and you can run playback from the front panel and remote. Unfortunately, HD Radio is not supported.
While we're talking about add-ons, I'll give a shout-out for the RI (Remote Interactive) port. This generally unheralded Onkyo feature has long been available for connecting peripherals, but its time has truly come with the iPod boom. Using the optional DS-A2 accessory dock, the RI is an efficient way to integrate an iPod with this receiver. It keeps your iPod charged, routes audio through the system, and displays all iPod track information on your video screen.
The 605 has two assignable HDMI 1.3a inputs (the bare minimum in my opinion) and one HDMI output. The 1.3a standard accommodates both uncompressed HD video and uncompressed multichannel audio in all the HD formats including 720p, 1080i and 1080p. Of course, the receiver also sports all the soon-to-be-legacy I/O: three component video, five S-video, and five composite video inputs. There are five digital audio inputs, as well. The receiver upconverts composite and S-video inputs to either HDMI or component video (when the HDMI connection is not engaged). Onboard Faroudja DCDi de-interlacing converts 480i signals to progressive scan.
The 605 also features RIHD (Remote Interactive over HDMI), Onkyo's version of HDMI-CEC (consumer electronics control), a protocol that allows the receiver to send commands to other compatible HDMI-connected components like TVs or disc players. For example, one button could operate system on/standby, and the system could automatically select the correct receiver input and begin playback of source components.
Okay, so much for familiarization. It was time to fling some wires. With HDMI, that doesn't take long. I ran an HDMI cable from my DVD recorder to the receiver, and another from the receiver to my DLP display. With 1.3a, digital audio received at the inputs is output by speakers (and headphones). I connected my satellite receiver via RCA cables. Satellites and sub followed the usual 7.1-channel routine.
For the heck of it, I later switched to 5.1 in the main room, and connected stereo speakers to Zone 2. The receiver can simultaneously process separate multichannel and stereo sources for the main room and Zone 2 (I guess that's like patting your head and rubbing your tummy) or process a single source for both.
Next up was speaker setup. The Audyssey 2EQ is a useful tool for configuring the receiver and more importantly, blinding your friends with science. I placed the supplied microphone at the first listening spot (the system averages three different locations - a big improvement from single-point systems) and stepped back as the receiver did its sweep-tone thing. I ended up with settings for speaker crossover frequencies, distance, level, and equalization. I could review and accept the settings, or modify them over a wide range of values; however, you cannot view or modify the EQ settings. In this case, I was completely happy with the system's level and distance settings, but dared to rage against the machine and tweaked some of the crossover points (from a menu offering nine selections); I know from experience what sat/sub blends work best for me in particular channels. I was also not completely happy with the equalization; I used the menu to manually enter some nips and tucks in the five-band equalizer. It probably won't matter in most playback systems, but your EQ choices are limited to front, center, surround and surround back; you can't individually nudge the left and right channel sides. Another small limitation: you can only adjust bass and treble in the front speakers.
It's worth noting that the auto set-up does not set the low-pass filter cutoff for the LFE channel; you need to do this manually. The set-up includes an interesting feature called Double Bass; you can manually configure the system to simultaneously apply low-frequency content from the front left and right channels to the subwoofer. And as with other Onkyo receivers, this one lets you trim individual channel levels; changes automatically revert to the calibrated defaults when you power down.
|
| |||||||||


| Displays Electronics Speakers | Sources Other Gear Software | Top Picks of the Year Top Picks | Custom Install How To Buy How To Use |
Tech 101
|
Latest News Features Blogs | Resources Subscriptions |
WHERE TECHNOLOGY BECOMES ENTERTAINMENT
 © 2025 Sound&Vision
AVTech Media Americas Inc., USA
All rights reserved

