- REVIEWS
Displays Electronics 
Speakers Sources Other Gear Software - HOW TO
How To Buy How To Use Tech 101
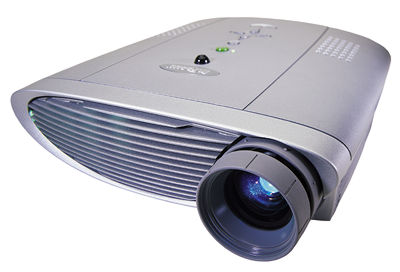
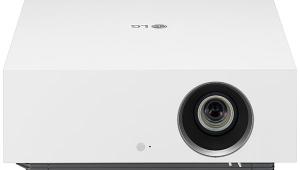
InFocus ScreenPlay 110 DLP video projector
Now, however, makers of business projectors have discovered home theater. First it was Plus, with their $3000 HE-3100 Piano (reviewed in SGHT, December 2001). Now InFocus, a major player in the boardroom market, has released the ScreenPlay 110. At $4999, the 110 can hardly be called "cheap," but in the video game, everything is relative. Add a screen to the package and you can have a video projection system for about the cost of a high-end rear-projection television.
Looking it Over
The ScreenPlay 110 uses Texas Instruments' dual-mode chip—the same as is used in the Plus Piano and the Sèleco DM200 (reviewed in SGHT, October 2001). It operates with a resolution of 848x480 or 800x600. One important limitation of this chip is that it will not display high definition in its native form. It will accept a hi-def input (720p or 1080i), but rescales it to the panel's 848x480 widescreen mode.
The dual-mode chip gives the user the option of setting up the ScreenPlay 110 for use with a 4:3 or a 16:9 screen. The 4:3 option gives you a higher pixel count with a 4:3 source (800x600 = 480,000) than a 4:3 image centered on a 16:9 screen (640x480 = 307,000). But if you set up the ScreenPlay for a 16:9 screen, you'll get higher resolution with a 16:9 image (848x480 = 407,040) than you'll get from the same image with a 4:3 screen setup (800x450 = 360,000). The choice is yours. You could also use a 4:3 screen and reconfigure the projector for 16:9 whenever you wanted to watch widescreen. This would give you full pixel resolution in each mode, but would require that you zoom the picture size slightly, and possibly adjust both the focus and the projector's vertical tilt, whenever you change formats. I did all of my viewing on a 16:9 screen, primarily with widescreen material.
The 110 incorporates Faroudja's DCDi (Directional Correlational Deinterlacing) technology for use with 480i material, including 3:2 pulldown for film-based sources. The input options can accommodate most video and computer sources, including component and RGB. The inputs are located on the Enhanced Connectivity Module (included), which snaps onto the projector's back. Without this module, the projector has only parallel computer, S-video, composite video, and audio inputs—one of several clues suggesting that the 110 sprang from a projector originally designed for business use. For computer applications, the 110 will accept any input up to 1024x768 and scale it down to SVGA. There's also a digital video (DVI) input with HDCP decryption, but I had no source compatible with it. I used the component-video inputs for most of my viewing.
The InFocus can be configured to automatically lock on to a currently active input, or you can select inputs directly. The 110 is compatible with most major video systems, including all the commonly used NTSC, PAL, and SECAM formats, but most PAL and SECAM sources will not be automatically detected.

The ScreenPlay also includes a built-in speaker, another remnant from its prior life as a business device. The only time you're likely to hear it is the loud beep it makes when you first turn the projector on.
Setup
Point and shoot. Well, it may not be quite that simple, but, as with all fixed-pixel projectors, getting the ScreenPlay 110 up and running was relatively painless. The InFocus is designed for positioning just below or just above the projection screen. For less optimum locations, a digital control provides an artifact-free ±20° keystone adjustment, which corrects for the situation in which the top of the image is wider or narrower than the bottom. There is an elevator foot and a leveling control located on the bottom of the case, but neither is easy to use for precise alignment, nor would they be appropriate for a permanent installation. For that, you'll most likely want to use a ceiling mount. The ScreenPlay's image can be inverted for such a setup, and/or reversed for rear-projection applications.
Zoom and focus are adjusted manually. I was briefly confused by the Zoom control in the onscreen menus, but this proved to be one of those zooms that magnify specific parts of the image. It isn't designed to change the overall image size to fit the screen. For that you use the "real" Zoom control, located on the lens barrel just to the rear of the Focus adjustment. While both the Zoom and Focus controls lack the silky feel of those on more expensive projectors, they worked fine.
Onscreen menus are used for most setup and adjustment operations. The usual video controls are present on the Image menu (there are different Image menus for video and computer sources), and though they include both bar indicators and numbers, they're not programmed to stop on every number, but often jump several numbers with a single command. Nevertheless, they offer an adequate range of adjustment. That includes the Sharpness control, which has only five steps. I never used anything but the two lowest: Soft and Medium Soft.


| Displays Electronics Speakers | Sources Other Gear Software | Top Picks of the Year Top Picks | Custom Install How To Buy How To Use |
Tech 101
|
Latest News Features Blogs | Resources Subscriptions |
WHERE TECHNOLOGY BECOMES ENTERTAINMENT
 © 2025 Sound&Vision
AVTech Media Americas Inc., USA
All rights reserved

