- REVIEWS
Displays Electronics 
Speakers Sources Other Gear Software - HOW TO
How To Buy How To Use Tech 101
DIY Reader Home Theater: Mosby

Our Secondary System
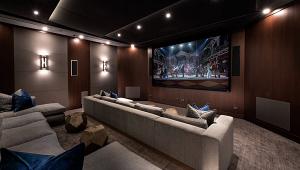
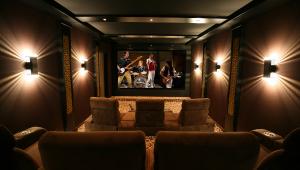
Our tiny 12-by-13-foot living room has seating for seven. It serves as our secondary media room, where we do the bulk of our daily TV viewing on an Onkyo 5.1 Pro Logic system. When we want to maximize our viewing experience, we head downstairs to our Small House Theater.

History, Research, and Planning
I've had the audio bug since my preteens. This intensified when I married my wife, Verna, as she also loves to listen to accurate sound. We've owned various systems over our 32 years of marriage, with each subsequent system being a step or two above our last system in quality. It was a joint decision to build our theater. With both of us now in our 50s, we decided to do it now, rather than miss out later.

Many inspiring examples came from reading both Home Theater and Audio Video Interiors magazines. A year of serious research went into the project prior to the start. The Web was an enormous resource. This research continued throughout the duration of the project. Various audio forums were an enormous help, such as the Klipsch Audio Web-based forum.
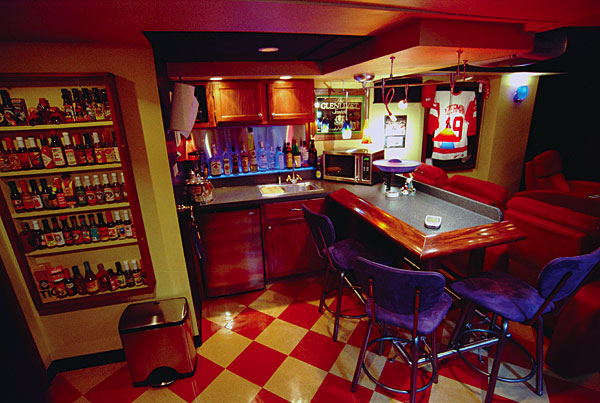
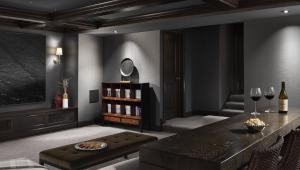
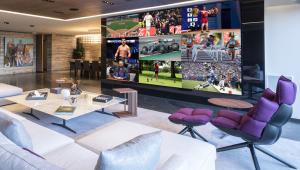
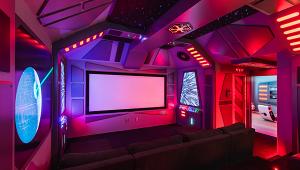
One caveat was that the room had to be multipurpose because of the limited space in this house. We use the theater for entertaining and conversation, with the audio system providing a musical backdrop. It includes a wet bar. Commercial-grade, dynamic club lighting adds to the excitement of listening to vibrant music or watching one of our favorite concert videos, giving guests the feeling they are seated in the front row of a live concert. Naturally, these lights remain off during movies.
We wanted the descent into our theater to be impactful, so we chose vivid colors to set the room apart from the rest of our mostly white home interior. We notice a lot of dropped jaws when guests hit the bottom step for the first time. Our scrolling sign at the bottom of the stairs boldly states: "Reality Ends Here!" Indirect lighting hidden beneath the large oak handrail illuminates the steps for safety.
Prior to construction, the basement was a typical recreation room. It had horrible-looking, old, resilient-tile flooring, and the walls were two-by-four-studded, insulated, and drywalled. There was a standard suspended ceiling. The terrible part was that the former owners finished the basement knowing that it leaked whenever it rained (a fact they failed to tell us). This resulted in a musty, damp, and unhealthy environment.
Our first step was to have the outside of the basement walls excavated all the way down to the footing and waterproofed. Our basement has not leaked since.
Home Office/Postproduction Studio
Construction of a home office for Verna and me to share was the first consideration. It was built in a 10-by-10-foot section of the room. Verna does geneological research, and I do video-production work on the side. This was to be our office/postproduction studio. It took six months from demolition to finish. This was my first experience in carpentry. Our son, Bill, helped. The office employs a false floor set on pressure-treated sleeper studs to level the room's floor (which slopes toward a floor drain). The office also has its own Klipsch ProMedia Ultra 5.1 surround system connected to my workstation for movie production. A floating wall isolates the office from the noise of someone walking down the basement stairs. With the door closed, nothing interrupts live voiceovers.

Demolition and Prep
With the help of our son and our daughter Sierra's boyfriend, Dan, demolition of the remainder of the basement began in late August of 2002. We sledge-hammered the walls and gutted the room and electrical setup. The demo job took one day. We paid the city to pick up the debris curbside and found this a cost-effective disposal alternative as compared with dumpster rental.
A clear 11-by-26-foot rectangular space remained in which to build a bath, a walk-in equipment closet, and a home theater with a wet bar. With the cinder-block walls exposed, it was obvious they needed lots of work. We thoroughly scraped, cleaned, and washed them with a water/bleach solution to kill any remaining mold. We tuck-pointed all cracks with mortar. We sealed larger cracks using hydraulic cement, and we sealed all of the block walls with two coats of Dry Loc waterproofing sealer.
The height from the bottom of the floor joists of the home's first floor to the basement floor is approximately 7 feet. Because we have some friends who are 6 feet 5 inches tall, our new ceiling had to be as close to the floor-joist bottoms as possible. We had to consider the placement of all forced-air heat ductwork. The ceiling in the center of our proposed viewing area had to be taller to accommodate our ceiling-mounted projector. This meant relocating a cold-air return duct from the middle of the room. We hired a heating and cooling crew we'd done business with before. They had the job completed in just one morning for $500.
A Second Bath
The back corner of the theater was to house our new bath and oversized shower. We hired out the primary plumbing work to a licensed contractor with whom we have a history. That team installed traps for the bar sink and the vanity, the shower, and the toilet drains and plumbed the hot and cold water supply drops. The job took three days, including repouring sections of the concrete floor, all for $2,500. Our son helped me install the drywall (over the newly studded walls), and I installed the ceramic tile floor (my first) and plumbing fixtures. We used pressure-treated lumber for all of the basement-wall sole plates.

Our Biggest Issue: Acoustics and Isolation
A significant problem was isolating the theater from the adjacent utility room that houses the furnace, washer, and dryer. I built a double-stagger-studded wall with a 2-by-6-inch sole plate. I threaded a very dense, rubberized membrane between all of the studs from end to end to provide sound-blocking potential. I covered the theater side of the wall with Homasote sound-deadening board and drywall. The utility room side uses plywood and drywall. The 32-inch entrance door to the utility room is a solid composite door covered in a red-oak veneer and sealed with an exterior-type, rubber-bulb weather seal (as are all three basement doors). I installed a special sound-blocking brush along the bottom of the door gap to prevent sound from bleeding through the bottom opening. When the appliances run on the other side of the wall, their sound is barely noticeable if at all in the theater.
I also installed the same rubberized membrane used on the utility-room wall over all of the theater wall studs from top to bottom and put drywall directly over the membrane using drywall screws. All drywall joints are sealed with elastomeric caulk. The result is that there are no perceptible buzzings or reflections of sound penetrating the theater's walls, which would be caused by sound hitting the cinder-block walls and then redirecting back into the theater. The speakers sound very direct and unrestrained.
A special suspended ceiling that uses 2-inch-thick, 2-by-2-foot melamine foam Sonex Harmoni tiles fortifies the directness of the sound. The tiles are fireproof. There is no audible reflection off the ceiling, which is hung 4 inches below the joists. The flat-black color of the tiles enhances our viewing experience, because there is no reflected light from the screen. The tiles also help isolate the theater from noise in the room directly above the theater.
My Budget
Couch and Tables $3,000
Entertainment Cabinet $2,000
Mitsubishi WS-55908 Diamond HDTV $4,500
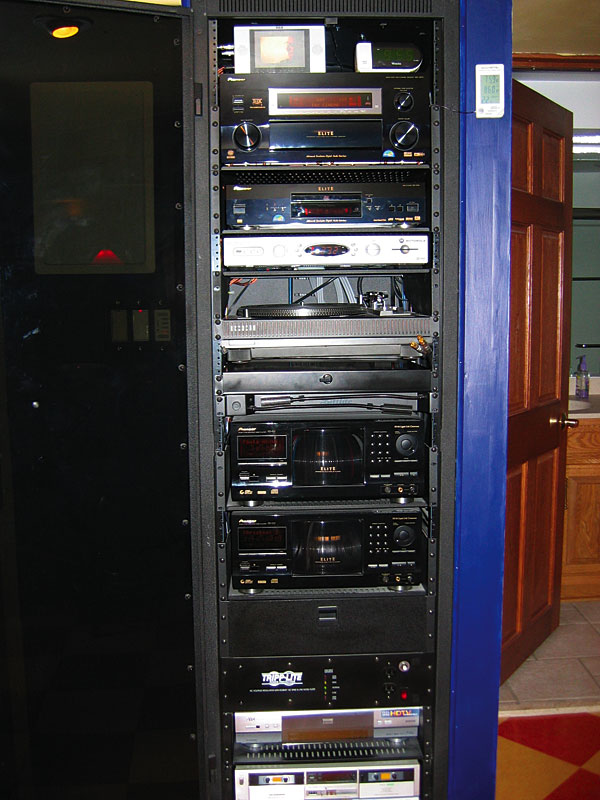
Denon AVR-5803 THX Ultra-2 A/V Receiver
$4,000 Polk Audio RTi200i Front, CS400 Center, FX500i Surround, and RC60i Rear Speakers $3,000
MartinLogan Descent Subwoofer $3,000
Pioneer Elite DV-47Ai DVD/SACD Player $1,000
Monster Power HTS3600 Surge Protector $500
Sony CDP-M555ES 400-Disc CD Changer $700
Monster Cables and Speaker Wiring $550
Lutron Dimmers $350
Columns, Plants, Paint, and Accessories $500
Polk Audio Atrium Outdoor Speaker $450
Polk Audio RC60i Speaker $300
Niles SPS4 Speaker Selector $100
Niles VCS2D Imp Volume Control $200
DVDO i-Scan HD Processing Scaler $1,250
Escient Fireball DVDM-100 Disc Manager $2,250
Sony DVPCX777ES DVD Changer $950
Universal Remote Control MX-3000 Remote $1,000
TOTAL $29,600
- Log in or register to post comments


| Displays Electronics Speakers | Sources Other Gear Software | Top Picks of the Year Top Picks | Custom Install How To Buy How To Use |
Tech 101
|
Latest News Features Blogs | Resources Subscriptions |
WHERE TECHNOLOGY BECOMES ENTERTAINMENT
 © 2024 Sound&Vision
AVTech Media Americas Inc., USA
All rights reserved

