- REVIEWS
Displays Electronics 
Speakers Sources Other Gear Software - HOW TO
How To Buy How To Use Tech 101
Speaking of Wire . . . Page 2
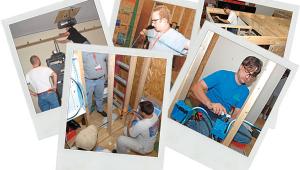
Here's a common scenario: Let's say you want to wall-mount a rear-channel speaker, and the cleanest way to run the cable is through the wall and either across the attic or under a foundation and then into built-in cabinets. If you precut a length of speaker wire, make sure you overestimate the amount you think you'll need. Unexpected twists and turns will take up more length than you may anticipate. If you're running quite a few lengths, it may pay to buy the cable in bulk spools.
 First, check out the path. Go into the attic or under the foundation and look for any obstacles. Bozo No-No Number One: Don't run speaker wire in close proximity to any other type of electrical lines, especially high-voltage and lighting lines. Keep your speaker wire as far from these lines as possible—at least 16 inches—and don't run them parallel to each other. If the twain must meet, cross them at a 90-degree angle. The speaker wire can pick up a 60-Hz hum and is susceptible to carrying all sorts of unwanted electrical noise. As Chico Marx would say, "At's a no good, boss."
Bozo No-No Number Two: Never tack speaker wire down with those hammer-down, little-horseshoe staples. The brads are sharp, and one slip will pierce the cable and short out the electronics. It's unsafe. Use plastic wire ties and wire-tie bases if you need to secure the cable periodically.
Speaking of safety, you really shouldn't use just any speaker wire for in-wall use. The National Electric Code and American National Standards Institute (ANSI) specify code levels for speaker wire (CL stands for code level). Cable with the highest rating of CL3 is considered the safest. It's fire-retardant, and it usually runs about $0.65 per foot for two-conductor and $0.90 per foot for four-conductor.
 You Con-Duit
It's a good idea to run the cable through PVC conduit, especially if you're running it under a foundation or through a garden for outdoor speakers. Rodents just love to chew up your cable. Conduit is also smart because you may want to add extra lengths later, which makes the job a slam dunk. PVC only costs about $0.10 per foot. At that price, I run it all over my house, even in places where I don't really need it. Make sure you use a large-enough diameter (at least 0.75 inches) to accommodate additions later. If you need to make a 90-degree turn in your conduit, make sure you
use two 45-degree elbows and join them with a small straight piece. That way, your wire and fishing rod won't get stuck when you pull them through. PVC makes it easy to run wire through walls. If you're running a line outside, keep the open end facing down to prevent moisture from collecting inside the PVC.
A Word About Positioning: Go with Your Gut
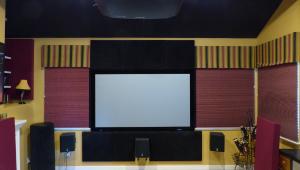
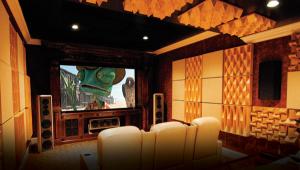
Although it's not strictly within the topic, speaker positioning is related to running wire. After all, once you've punched the hole in the wall and screwed in the brackets, it's depressing to discover that you're not happy with the sound due to poor positioning. A speaker might look good in a particular location, or it might be perfectly positioned according to the rule books; however, if you don't take into consideration your listening area and your room's acoustic properties, you can still end up with a null spot. This can be especially true of dipolar rear-channel speakers. Unless you're prepared to measure every spot and build a professional-grade room, you've got to use the force to some extent.
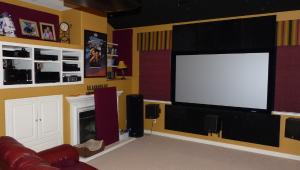
Wall-mounted speakers can make other things on the wall resonate: Framed artwork may rattle, lighting sconces may buzz, moose heads may bump, etc. So, before you start measuring and drilling, take plenty of speaker lead and position the speaker where you think it should go. Have someone hold it up while you listen. If you have a receiver with a pink-noise generator to gauge the volume, use it. Play music with a consistent beat and then play movie scores at different volume levels to judge whether the speaker sounds right in that position. Then move it around to confirm that the placement is optimal.
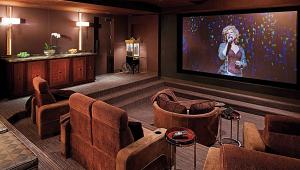
Despite all of the science and voodoo about proper formulae and seating distance, at the end of the day, you've got to live with the speakers in their positions. If you're not happy with a speaker's sound or appearance in a certain position, don't let any expert tell you you're wrong. Guilt and enjoyment of your system don't work well together. Even THX, the arbiter of strict parameters, recognizes the importance of practicality in most homes and has established more-relaxed standards of late. After all, the whole idea is to bring home entertainment to the entire population. The vast majority of rooms aren't built for sonic purity, but you can enjoy great sound in a less-than-perfect environment.
Before you start punching holes in walls, collect as much information as possible. Get into the attic or crawlspace under the raised foundation with a flashlight and see if you're about to drill into an electrical conduit or water line. Don't laugh. It happens to the best of them. Also check to see whether you'll have to drill through firebreaks or other tricky obstacles in the wall. The installation fees that professionals charge include any such extra labor. Presuming that it's a clean shot, you can see the path, and you know what you're doing, proceed. Lest this sound like a shameless plug for Labor Saving Devices, there are tons of special tools on their Website. Some of their submenus list the tool, as well as instructions: how to fish wire inside walls (with and without insulation), through a crawlspace, under molding (especially useful for tile or hardwood flooring), and dozens of other specific applications.
To prevent the cable from being visible, punch as clean a hole as possible behind the area that the speaker will cover. Take into account where you mount the wall brackets, which can hide the wire to some extent. Some speaker stands have channels through which you can run the cable, keeping it discreet. Attach the cable to flexible fish tape, and be prepared to run it in stages. For example, stage one may include running the tape up through the wall and into the attic or down under the foundation. Stage two may involve attaching a second piece of conduit and fishing the wire through it, and so on. It's easier to do in stages. You can also buy little plastic sleeves that fit inside the wall hole through which the wire runs. These sleeves have a collar that frames the hole on the outside of the wall and hides the unsightly jagged edges.
|
| |||||||||
- Log in or register to post comments


| Displays Electronics Speakers | Sources Other Gear Software | Top Picks of the Year Top Picks | Custom Install How To Buy How To Use |
Tech 101
|
Latest News Features Blogs | Resources Subscriptions |
WHERE TECHNOLOGY BECOMES ENTERTAINMENT
 © 2024 Sound&Vision
AVTech Media Americas Inc., USA
All rights reserved

