- REVIEWS
Displays Electronics 
Speakers Sources Other Gear Software - HOW TO
How To Buy How To Use Tech 101
Speaker Measurements 101

The advent of cheap audio measurement gear has made it easy for do-it-yourselfers to tweak their systems and even test their own speakers and amps. Unfortunately, it has also spawned a new generation of would-be technicians doing really bad speaker measurements.
You can see this phenomenon on various websites and forums, where the preferred speaker measurement technique is often to plop a measurement microphone 1 meter in front of the speaker, in a typical residential living room, and run a frequency response sweep at 1/24-octave resolution. As we'll see, this technique is like making a really good singer perform an audition in the same room with a guy running a chainsaw-it tells you something about the sound, but nowhere near as much as you could tell if you improved the test conditions.
I can sympathize, though. There's not a lot of material about speaker measurement out there. Famed speaker engineer Joe D'Appolito wrote a book about it, but that's a whole book you gotta read. Perhaps the best relatively brief explanation I've seen is in Chapter 14 of the manual (PDF) for the LinearX LMS audio analyzer. Still, there's no simple, accessible primer on how speaker measurements are done.
Until now. This article will take you through the various ways that speaker measurements are commonly done; explain the strengths and weaknesses of each one; and provide some helpful hints about how you can do reasonably good speaker measurements with simple, cheap gear you may already own.
I'll not only explain the different techniques, I'll actually show you the results of each technique on the same speaker. To do this, I measured the same speaker in various ways, using:
1) The techniques and equipment found in the world's finest audio labs
2) The kind of equipment most manufacturers and top audio reviewers own
3) The gear and techniques most enthusiasts employ, and doing it badly
4) The gear and techniques most enthusiasts employ, and doing it well.
We're dealing solely with frequency response here, which is the most important measurement of a speaker. Frequency response shows you how evenly a speaker reproduces different frequencies of sound. Generally, you want it to be "flat," meaning that the response is consistent from bass to midrange to treble. If a speaker's frequency response measurement reveals a big peak of, say, +4 dB at 4 kHz, up in the mid-treble range, the speaker is going to sound bright and thin. If the response gradually declines above, say, 2 kHz to the point where it's down -6 dB at 20 kHz, the speaker is going to sound dull. This is a simplification, of course; read my primer on frequency response for more info.
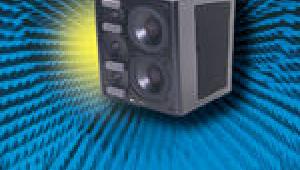
I couldn't have done this article without the help of Allan Devantier, manager of acoustic research at Harman International, parent company of JBL, Revel, Infinity, and numerous other pro and consumer audio brands. Allan is the guy in charge of speaker measurement at Harman, and also amuses himself with little side projects like calibrating the sound system at the Staples Center. He suggested using a Revel Performa3 F208 as the test speaker, and I agreed. So we'd be comparing the measurement techniques, rather than the results of different analyzers and microphones, we used the Harman Audio Test System (HATS) for all of the measurements instead of the Clio 10 FW analyzer I normally use.
I should also thank two engineers who've been especially generous in aiding my efforts to measure speakers, sharing their techniques while gently pointing out the errors in mine: Vance Dickason, author of The Loudspeaker Design Cookbook, and Paul Barton, founder and chief engineer of PSB Speakers.
One more note: This is a primer. For the sake of brevity, I've left out a lot of details. If you want to read something that tells you every last little thing about speaker measurement, try D'Appolito's book.
|
| |||||||||
- Log in or register to post comments


| Displays Electronics Speakers | Sources Other Gear Software | Top Picks of the Year Top Picks | Custom Install How To Buy How To Use |
Tech 101
|
Latest News Features Blogs | Resources Subscriptions |
WHERE TECHNOLOGY BECOMES ENTERTAINMENT
 © 2024 Sound&Vision
AVTech Media Americas Inc., USA
All rights reserved

