- REVIEWS
Displays Electronics 
Speakers Sources Other Gear Software - HOW TO
How To Buy How To Use Tech 101
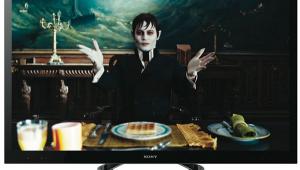
Sony BRAVIA KDL-46XBR2 LCD Digital Color TV

At that same time it was obvious that manufacturers would have to find a way to bring down those prices and increase image sizes. But could they do so without compromising image quality?
They clearly did. At $4,299.99, Sony's new 46" (diagonal), BRAVIA KDL-46XBR2 is a full 1080p set that may represent a new standard for what we should expect from flat panel LCD displays.
Walkabout
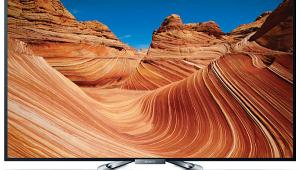
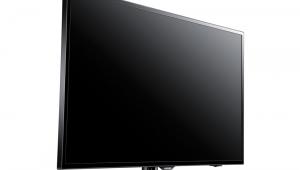
First impressions are important, and in the style department Sony has nailed it with its newest flat panel XBRs. The perforated, silver-colored bezel that surrounds the screen appears to be suspended in its glass frame, with an illuminated Sony logo at the bottom (and yes, you can turn it off!). And if you don't like the bezel's metallic look, for an additional $300 you can buy an optional bezel in one of five colors. While I'd recommend something neutral, like Sienna Brown, or even better, Velvet Black, knock yourself out with Arctic White, Pacific Blue, or Scarlet Red if you wish.
There are actually two new Sony XBR LCD flat panel lines, the XBR2, evaluated here, and the XBR3. In the 46" size, the XBR3 costs $300 more than the XBR2 (the cost of the latter's optional bezels) and comes with a non-interchangeable gloss black bezel. Gloss black is not available in the XBR2.
 Despite my best efforts in pouring over the specs for the two models, I could find absolutely no operational or feature differences between the XBR2 and XBR3. They're the same down to the last 0.1lb. If you want that fancy gloss black, pop for the XBR3. But if you want another color and/or a cheaper price, go for the XBR2. The latter should provide exactly the same performance, and you can always add a new bezel later (but not gloss black) if you want to save money now.
Whether or not you like the look (and I think it's a knockout) all the trim surrounding the 46" screen does have one downside: It results in a set that is physically larger than some 50" plasmas.
Style is fine, but we're here for the nuts and bolts. The BRAVIA XBR2 will accept all standard definition and high definition video sources, up to and including 1080p/60 (but not 1080p/24), and offers a wide range of inputs and outputs (see "Specifications") including three HDMI inputs and an RGB input for a computer.
One of the HDMI connectors, along with a headphone jack and a composite video jack with L/R audio, is mounted on the side, but the rest are recessed in back. Like most flat panel displays, if you plan to hang this set on the wall and want to avoid having to take it down again before its time, you should consider both present and future connectivity requirements before you mount it. The outboard video processors sold with Pioneer Elite's plasmas mean another box to squeeze into your rack, but that approach eliminates any need to dismount the set to change connections or add/change source components.
 Unfortunately, the connection diagrams provided in the manual suggest that you should use an RF cable to connect a cable box to the set, or run a composite or S-Video connection from a satellite box. But you cannot get HDTV from these sources with an RF, composite, or S-Video connection. Apart from an antenna connection to the set's Over-the-Air tuner, I know of no consumer source that can feed HDTV into a set through anything but a component, RGB or HDMI input. This is partially clarified in the written instructions that follow the diagrams, and also correctly shown in a separate fold-out poster included with the set. But the diagrams in the manual could be a source of confusion, and making the right connections from the start can't be emphasized enough, particularly if you're going to hang the set on the wall.
Before relying on an HDMI connection for DVD, satellite or cable, be sure that the HDMI from these sources works with the set. And, as I advised above, do this before mounting the TV to the wall!
Sony recommends professional installation if you plan to mount the XBR2 on the wall, and I second that recommendation. But I also recommend that you ensure that the installers take the precautions outlined in the above paragraphs. Don't assume that they know what they are doing when it comes to making the correct connections for various sources. And make sure all of the connected sources operate correctly before they leave. Most installers will do it right, but we've heard stories. . .
The set offers the usual array of features, including multiple aspect ratios, a code-programmable remote, Parental Lock, and the usual video adjustments. There is no picture-in-picture or picture-outside-of-picture mode, however, and the set does not have CableCARD functionality.
Like most manufacturers of pixel-based displays, Sony includes a disclaimer on bad pixels that's located, of all places, in the manual's safety instructions, just above where they tell you not to throw anything at the TV! It does not specifically state the number of missing pixels that constitute a defect under the warranty, but does say that 0.01% of the pixels can be bad and still meet manufacturing tolerances. Assuming that to include the separate red, green, and blue elements that make up each of the roughly 2,000,000 individual pixels on the screen, this means that 200 of the pixels could be defective in some fashion. But don't panic: I saw no defective pixels in the review sample from my normal viewing distance of under 10-feet.
Adjust Me
The XBR2's on-board audio system sounds leaner and more colored than the best big-screen TVs of the past, with their humongous cabinets. The laws of physics just don't allow for awesome, full-bodied sound from tiny speakers squeezed into an itty-bitty living space. There is no speaker-level output that may be used to drive larger, better speakers using the on-board 11Wpc amps.
But the set's audio is adequate for casual TV watching. Its limitations won't matter all that much for a home theater with an outboard sound system. There is a digital (optical) audio output to send the sound from the on-board HD tuner to your receiver or pre-pro, and fixed and variable analog audio outputs.
The XBR2 provides a wide variety of picture and sound adjustments apart from the usual Picture Mode, Picture (the traditional Sony name for the contrast control), Brightness, Color, Hue (tint) and Sharpness. Most of the adjustments, including the user accessible White Balance color temperature calibration adjustments, can be stored separately for each input. We've seen this flexibility in other sets, but never to quite this degree. Sony gets a Gold Star here.
Of the four settings for Color Temperature Warm 2 was by far the most accurate, though it was improved by a full calibration (see "Tests and Calibration"). A Color Space control provides Normal or Wide settings. Normal produced the most accurate results, particularly with green, which often looked cartoonish in Wide. A Live Color control, available only in the Wide Color Space setting, pushes this to even greater extremes.
One very useful feature is an adjustment for the set's WCG-CCFL backlight (Wide Color Gamut Cold Cathode Fluorescent Lamp—say that fast three times). This performs roughly the same function as an iris in a projection set. It allows you to tame the light output to something less than moth-blinding mode and at the same time improve one of the major weaknesses of LCD displays: black level. It definitely works in a way that reducing the Picture (contrast) control cannot. I found that a Backlight setting of 3 worked best for me in any ambient room lighting from dark (my preferred mode for critical evaluations) to bright enough to read by.
There are two other controls designed to improve the set's reproduction of black: Black Corrector and Advanced C.E. (Contrast Enhancement). Black Corrector is said to enhance the black areas of the picture. But turn it too high, and you merely crush the darkest grays into black, eliminating deep shadow detail, which pretty much limits its useful settings to either Off or Low. Advanced C.E. is said to dynamically adjust the backlight—roughly equivalent to the auto iris feature that is finding its way into more and more projection sets. Although I most often preferred the Low setting for Advanced C.E. control, and Off for the Black Corrector, the latter's Low setting occasionally looked better on uniformly bright material like sports in which subjective contrast is more important than the best shadow detail.
It was difficult to confirm that the Advanced C.E. control actually modulated the backlight. It never "pumped" visibly, which would have been distracting. But engaging it did produce a visible change in the picture, both with real program material and test patterns. In the latter, it darkened the low end of the brightness range; the higher the setting, the higher up the visible change extended. But unlike the Black Corrector, it retained the differentiation between various levels of dark gray and did not crush them into solid black.
The Light Sensor feature is designed to automatically adjust the backlight for both the picture brightness and the brightness of the room. It did function as advertised, but I left it off for my evaluations.
A multi-level Gamma control noticeably improved image punch without compromising other characteristics, such as black level. On most material I preferred it on the Low setting.
The set's Noise Reduction has five settings including Off. The Auto mode is not available when using component or HDMI inputs, though the other modes are. I found that the control provided useful noise reduction in Low or Medium on the worst looking standard definition sources, but wasn't quite as effective as the noise reduction on the Mitsubishi WD-57731 DLP rear projection set I tested recently. The latter did a better job of reducing noise without noticeably softening detail. A Clear White control did whiten the whites subtly, much like laundry detergent. But it produced no apparent benefit and certainly no greater accuracy. I left it off.
Sony's long-established Digital Reality Creation Multi-Function video processing is now in v2.5 form, which works with both interlaced and progressive sources—480i/p, 720p, or 1080i (but not 1080p). The previous versions of DRC functioned only with 480i sources, making this newer iteration far more useful.
In addition to fixed modes, plus Off, DRC also provides a customizable DRC Palette. The latter lets you select a setting on a two-dimensional graphic display in which the vertical (y) coordinate is labeled Reality (detail) and the horizontal (x) Clarity (smoothness). If these designations sound confusingly named, they are. Using a combination of test patterns and real-world program material, I determined that the Clarity adjustment produced no visible effect, so I left it on its lowest setting of 1. Reality, however, provided a sharpening that began just below 5MHz and could be clearly seen on test patterns. But in practice its effect was not only very subtle but, used moderately (up to a setting of 30 out of its maximum range of 100) it produced a small but welcome degree of detail enhancement without obvious side effects on real program material. I found it more useful and less intrusive than two other available special sharpening controls, Edge Enhancer and Detail Enhancer, which I turned off.
The feature labeled Display Area is actually an Overscan control. It's best used in either the Full Pixel or Normal settings. But Full Pixel is, unfortunately, available only with 1080i or 1080p sources. It produces less than 1% overscan. The Normal option, available for all resolutions, varied from 2.5% for high definition sources to a maximum of 3.5% for 480i/p standard definition.
- Log in or register to post comments


| Displays Electronics Speakers | Sources Other Gear Software | Top Picks of the Year Top Picks | Custom Install How To Buy How To Use |
Tech 101
|
Latest News Features Blogs | Resources Subscriptions |
WHERE TECHNOLOGY BECOMES ENTERTAINMENT
 © 2024 Sound&Vision
AVTech Media Americas Inc., USA
All rights reserved

