- REVIEWS
Displays Electronics 
Speakers Sources Other Gear Software - HOW TO
How To Buy How To Use Tech 101
Sharp XV-Z20000 1080p DLP projector
At first it looked like the prices of these higher-tech designs would save vendors from the slowly collapsing profit margin that had begun to afflict 720p models. But it wasn't long before the floodgates broke. Sony started the slide with the introduction of the $10,000 VPL-VW100, or "Ruby" as it has come to be known. Then, at the 2006 CEDIA EXPO, the bottom fell out. Mitsubishi, Optoma, Cinetron, Panasonic, and Sony, all demonstrated 1080p projectors selling for much less than $10,000—some for less than $5,000.
While this is, at first blush, a boon for consumers, it's a mixed blessing. Something has to give when prices plummet. You can make up for it in volume, as the saying goes, but the home projector market is still a tiny slice of the video landscape. Economies of scale don't always apply. Corners must be cut. A company like Sony can amortize the investment it has made in SXRD light engines for its wildly popular rear projection sets. Moving this technology into a front projector is gravy for them.
But what about companies whose main market is in a different technology than that required for a video projector? Sharp's bread and butter, for example, is the flat panel LCD. Can Sharp make it with an expensive, single-chip 1080p projector?
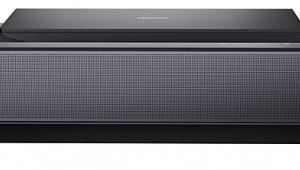
It can. Sharp has years of experience in building top quality 720p front projectors. Its new XV-Z20000 is the third 1080p single-chip DLP projector to pass through our doors. While at $11,999 it's not among the bargain leaders, it's still far lower in price than the $20,000 Marantz VP-11S1. And it offers a lot for the money.
Outside and Inside
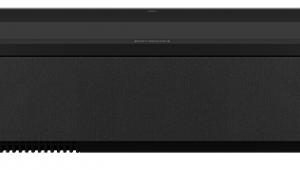
Anyone familiar with Sharp's 720p DLP projectors will immediately recognize the new design. Apart from its shiny black suit, its shape is identical. So are many of its features.
The XV-Z20000 offers two HDMI inputs plus a DVI input. The HDMI inputs may be set for RGB, YCbCr 4:4:4, YCbCr 4:2:2, or the Auto mode that I used. The DVI jack may be set to operate in either PC or video mode, and in either RGB or component. It may also be set to accept an analog RGB or component connection. This is the best selection of digital video connections, and the best flexibility for those connections, that I've seen yet on a projector.
While the Sharp will accept and display most standard definition and HD video resolutions, including 1080p/60 (the latter from HDMI only), it will not accept the 1080p/24 output setting that is now available from a few new Blu-ray players.
Open the video adjustment menus and you'll find a variety of video controls similar to those on previous Sharp projectors. Tech Editor Shane Buettner, who reviewed the recent Sharp XV-Z12000 Mark II, criticized these menus as being too busy, and for the average owner I can't disagree. But they do offer a lot of flexibility to the obsessive power user.
 Most of the adjustments you'll use regularly are in the Picture menu, shown in the screen shot (Fig.1). There are, of course, the usual controls (Contrast, Bright, Color, Tint, Sharpness). A Mode selection offers one of five preset options plus Memory for each mode. I began with the Standard mode, but modified it significantly. The Movie1 mode (6500K, Iris Medium, lamp Eco+Quiet) would have been a better place to start, but with the right adjustments I ended up in the same place starting from Standard.
There's also a color temperature control in 1000K increments (not nearly precise enough) from 5500K to "Am I Blue?" The 6500K setting measured about 500K too high (see "Tests and Measurements"). A Gamma Position control here duplicates the Gamma Position control in the separate Gamma menu (more on that below).
The Iris control offers three fixed settings. The Medium setting is somewhat closer to the High Contrast (minimum) than to the High Brightness (fully open) position. I'd like to see more steps. The fully open, High Brightness setting offers plenty of output to compensate for the loss of light as the lamp ages, but more steps would be helpful to allow for a setting that will optimize brightness and black level at each stage of the lamp's lifespan.
There are also two lamp settings. I did most of my viewing in the Eco+Quiet position, which produced plenty of light output on my modestly sized, 78-inch wide Stewart Studiotek 130 screen (white, 1.3-gain).
The projector's fan noise is clearly audible in a quiet room, even in the lamp's Eco+Quiet mode, which is noticeably quieter than Bright mode. But it's only "loud" in comparison to the near silence of the quietest of today's projectors. In Eco+Quiet the fan noise is acceptable and largely masked by a film's soundtrack in all but the quietest scenes.
The fun begins in the Advanced section of the Picture menu. The C.M.S. (Color Management System) offers a wide range of adjustments in its submenu, with Hue, Saturation, and Value controls for each of the primary (red, green, blue) and secondary (yellow, cyan, magenta) colors. The manual is not at all clear on how the Value adjustment differs from Saturation, though the difference is quite visible on-screen.
This type of color adjustment has become a popular feature in many of today's video displays. While I did find that it could be used to shift the primary and secondary color points (using the right test tools), the result was not satisfactory. While the controls moved the color points closer to the theoretically correct coordinates, they simultaneously degraded other aspects of the image, such as the intensity of the individual colors. The bottom line, in my judgment, is that the C.M.S. juggles too many variables at once to be of value to the user. I obtained the best picture when I left all the C.M.S. controls at zero—the factory default.
BrilliantColor, on the other hand, is a technology from Texas Instruments that I did find useful. It added significantly to the dimensionality of the image, without adverse effects. I used it for most program material, and the post-calibration measurements in the "Tests and Calibration" section were made with it turned On. That's important. In my measurements, engaging BrilliantColor raised the color temperature by 200K-400K—the maximum change coming at lower brightness levels where the eye is most sensitive to such a color shift. If you're going to use BrilliantColor, the projector should be calibrated with it turned On.
I left the three-position Progressive Mode control at 3D Fast, the Film Mode at Auto. I also left the two noise reduction controls (Digital Noise Reduction or DNR and Mosquito Noise Reduction or MNR) Off, though each offers three levels of operation and do a good job cleaning up noisy sources without seriously degrading the image. The Unveil control, however, did little but add artificial edge enhancement. Its effect ranged from subtle and perhaps occasionally useful at Level 1, to hideous at Level 3. I left it off.
Normally I like to ignore controls with names like Automatic Contrast, but in the Sharp this control actually proved useful, particularly in its maximum setting, Level 3. It is not a dynamic iris, as the name might suggest, but instead involves some sort of video processing. It did add a noticeable punch to the image, though my static measurements didn't suggest why. As with BrilliantColor, the final post calibration measurements reported in "Tests and Calibration" include this control in its Level 3 setting.
 Directly adjacent to the Picture adjustments in the on-screen menus is Gamma (Fig.2). At the top of this menu is the Gamma Position control, which as noted above performs the same function as the Gamma control in the Picture menu. It provides a selection of five different gamma curves. One of these options is Custom, which can make use of special Sharp software to adjust the gamma via computer (not tested).
As you can see in Fig.2, there are also nine additional controls in the Gamma menu that may be used to separately tweak each of these gamma curves: three controls each (R, G, and B) for Gamma, White Detail, and Black Detail. For clarity here, I'll refer to these nine adjustments as the Gamma menu sub-controls.
I suspected from my experience with earlier Sharp projectors that the nine sub-controls in the Gamma menu might affect the color temperature. And they did. This makes it dicey at best to adjust them casually. Oddly, however, the main Gamma Position control did not significantly alter the color temperature.
But the sub-controls do offer an important benefit. With those previous Sharp projectors I had used the White and Black Detail settings in this menu not to fiddle with gamma, but to calibrate the gray scale, and they worked well. (In those earlier projectors, the White and Black Detail sub-controls were called Gain and Offset, but these appear to have been identical to the new projector's Black and White Detail adjustments. The names have been changed; the functions remain the same).
In my sample of the XV-Z20000, however, the White Detail sub-controls worked, but the Black Detail sub-controls did not function at all. They had no effect on the measurements. Then I discovered that adjustments to the red, green, and blue Gamma sub-controls in the Gamma menu, combined with the White Detail sub-controls, could bring the color temperature into reasonable alignment.
This wasn't an ideal solution. But it worked to get the color temperature very close to the standard D6500, apart from an increase at the very top and decrease at the bottom . While I later received information on how to access the code-protected service menu, it proved useless for calibration (more on this in "Tests and Calibration"). I recommend using the sub-controls in the Gamma menu to calibrate color temperature and ignoring their gamma function. But it's important to select the best of the fixed gamma curves (as listed in the Gamma Position control) before calibration. I definitely preferred the Standard setting (though the Custom setting might work for you if you want to experiment with Sharp's gamma software). The gamma in this setting hovered around 2.2-2.3, though did drop to as low as 2.0 at low light levels (30IRE). Natural, my second favorite setting, gave the image more subjective contrast, but often looked too dark.
Highlights from the other menus include special settings for computer use, Overscan (it degrades resolution, so leave it Off unless you really need it to eliminate noise at the border of the picture), Color Space for selecting between standard definition ITU601 and high-definition ITU709 (I left it in the default Auto setting), Dynamic Range for black level via HDMI (Auto, Standard, and Enhanced—I left this in Auto also), Auto Power Off (if selected, turns the projector to standby mode if no signal is detected within 15 minutes), and the usual array of image reversing and inverting functions.
The remote is very similar to previous Sharp remotes, with additional buttons where needed. It's backlit, and while most of the buttons are marked with small icons rather than the name of the function (which appears, unlit, on the body of the remote) at least this offers a way to identify them through the backlighting. It's a good remote, easy to use and without ergonomic quirks.
A Resize mode offers eight different aspect ratio settings. The Big Three are Stretch (the 16:9 mode for high-definition and 16:9 enhanced DVD sources), Side Bar (for 4:3) and Cinema Zoom (non-enhanced letterboxed images). The others include various computer and creative stretch modes, plus a Dot-by-Dot mode that displays the source signal without scaling.
The physical setup of the Sharp was as simple as with most digital projectors. For a 100" diagonal, 16:9 screen (a bit larger than we typically recommend at 87" wide) the Sharp may be used at any throw distance between 13' 5' to 18" 2'.
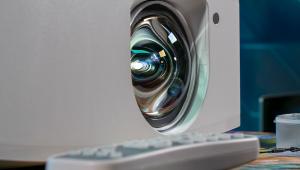
The projector's zoom, focus, and vertical lens shift are all manual. While there are advantages to the motor drives provided for these functions on some projectors, manual operation often makes it easier to perform precise adjustments without the overshoot that often occurs with auto drives. That can be particularly important for 1080p, where the pixels are tiny and you want to get them as tightly focused as possible. The disadvantage, of course, is that you can't get up close to the screen while making a manual adjustment. (In the CRT days, when all such focus adjustments were manual, someone suggested using a good pair of binoculars for this. The binoculars themselves, of course, have to be properly focused on the screen!)
- Log in or register to post comments


| Displays Electronics Speakers | Sources Other Gear Software | Top Picks of the Year Top Picks | Custom Install How To Buy How To Use |
Tech 101
|
Latest News Features Blogs | Resources Subscriptions |
WHERE TECHNOLOGY BECOMES ENTERTAINMENT
 © 2024 Sound&Vision
AVTech Media Americas Inc., USA
All rights reserved

