
I wish to know more detail on air conditioning. I could not see any examples how to soundproof the room in combination with the air conditioning.Otherwise good and helpful reading
- REVIEWS
Displays Electronics 
Speakers Sources Other Gear Software - HOW TO
How To Buy How To Use Tech 101
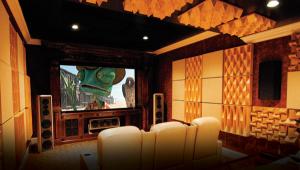
Layout and Design
 In this installment of tips for building your home theater, we look at ways to keep sound isolated.
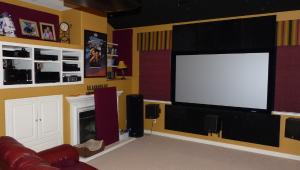
Well, you're finally building your home theater and are really looking forward to those movie nights. Your neighbors, on the other hand, probably don't want to hear a red-tailed P-51 roar overhead as you watch Hart's War for the 25th time. Come to think of it, you probably wouldn't be too thrilled to hear them yell at their kids while you and your significant other enjoy a romantic, Saturday-night movie, either.
So, what can you do to keep all of that fantastic soundtrack inside your theater, while keeping obnoxious, intruding noises out? Isolating the sound in your home theater will enable you to enjoy it much more often, at the volume God and George Lucas intended, without disturbing the rest of your family. The best solution is to build a home theater with thick, concrete walls and heavy, sealed doors. Failing that, a great solution is to use double-wall construction, basically creating a room within a room. In addition to the interior wall construction, you can use various techniques on the interior surface of your theater to substantially reduce noise transmission, as well.

Your goal is to have a high STC rating. STC is the sound-transmission class, a measure of how well sound passes through a barrier from one surface to the next. The higher this number is, the better. A 6-inch, solid-concrete wall has an STC rating of approximately 56. With good, double-wall construction and some interior-wall techniques, you should be able to approach that number.

There are two basic methods you can use for double-wall construction. The first is to use two complete wall structures. If you are doing a complete remodel or a new construction, you will obviously have much more freedom in this regard. Design the space you are allocating for your theater to be about 10 inches to 1 foot larger in every dimension than you would like the inside room dimensions to be. This will leave room for the second room to be built inside of the main structure. The two structures can use a common floor, or you can float a second floor inside of the first on acoustic isolators.
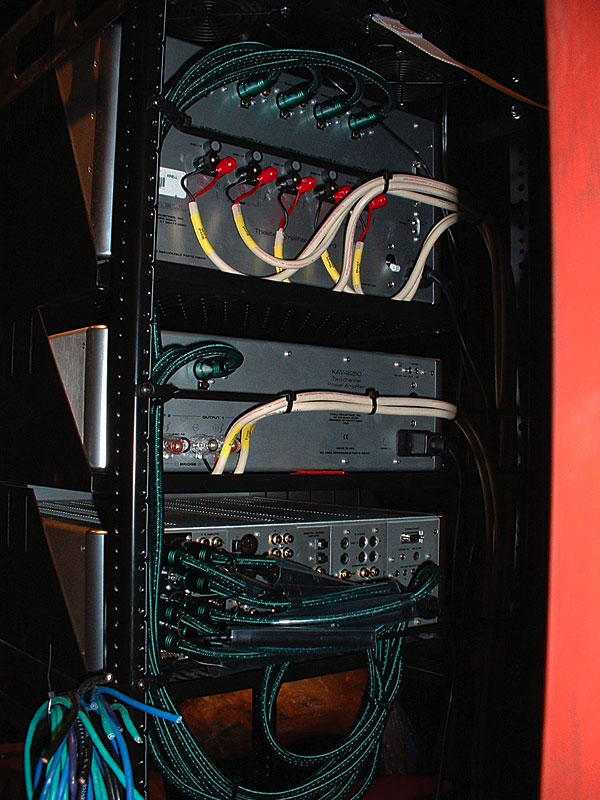
First, your contractors will build the room with the larger dimensions. After they've completed the main construction through the drywall stage, insulated the outer wall, and covered it with drywall, they will then frame a complete, second room within the first one. There's no need to do anything beyond putting mud and tape on the interior surface of the outer wall. You don't even need to sand the mud or paint the wall, because you'll never see any of it. The outer shell will have no interior surface that will be accessible from the inside when construction is complete, so don't put any penetrations in it, such as electrical or cable outlets. These will compromise the structure's acoustic integrity by creating flanking paths. Flanking paths are ways sound can get around sound-isolation measures that you employ.
Your electrician should provide adequate wire, stubbed out into the room, in a spot where you can pull it through the yet-to-be-built inner wall. Remember, building codes dictate that you have a certain number of wall outlets around the room, even if you never plan to use them.

Covering multiple wall surfaces with drywall dramatically increases the mass of the wall. As a result, sound will have a reduced ability to pass from one room to the next. The greater the mass of the surface, the greater the acoustic energy it takes to excite that surface into motion, which can transmit to the next wall. With a traditional wall, the sound hits the inner wall surface and transmits a portion of its energy to the wall stud (vertical framing member). There is drywall on both sides of the stud, so any sound energy that transmits into the stud will transfer into the drywall on the other side of the wall. The sound will then re-radiate into the adjoining room.

When you're building the inner wall, you should insulate the spaces between the two walls and between the studs. It is important that you completely seal any wall penetrations—such as those for lighting fixtures, electrical outlets, or speaker jacks—to prevent sound from passing through. If you are using can lights—and I recommend that you do—be sure to use sealed light cans that are suitable for insulated ceiling applications. For even greater isolation, you can box the cans in the ceiling to prevent the transmission of any sound that may pass through the fixture.

To further increase the effectiveness of the inner wall, you can use additional methods. You can use an acoustic-barrier material between the studs, the ceiling joists, and the drywall. There are several variations of these. Mass-loaded vinyl, such as that used in automotive applications, is now available in large sheets that you can staple over the wall's interior surface before you install the drywall. This adds substantial mass and damping to the wall and decreases the transmission of low-frequency energy through the wall. Another material to consider is soundboard. This material is made from recycled cellulose fiber and comes in 4-by-8-foot sheets.
In addition to acoustic-barrier materials that you can add to the face of the studs before you install the drywall, there are new drywall materials that have substantial sound-dampening capabilities. These are heavy and also have viscoelastic properties that convert the acoustic energy into heat and dissipate it harmlessly away. Don't be alarmed—it's not a fire hazard, even if you have the most radical new subwoofers. The level of heat is very low, and you won't gain any energy savings from it, either. In fact, you can't even feel the difference if you place your hand on the wall after hours of very high sound-pressure levels. These new drywall materials are very expensive compared with traditional drywall, but they're very effective.
A lower-tech alternative to acoustic-absorbing drywall is to use two layers of drywall. This will increase the wall's mass and lessen sound's propensity to pass through it. Should you choose the double-layer method, you should use different thicknesses of drywall—for instance, 0.5 inches and 0.625 inches. This will prevent sympathetic resonant frequencies between the two layers. When the two layers have the same resonant frequency, that particular frequency will pass through the wall much more easily. You can use a layer of acoustic barrier between the layers to further increase this technique's effectiveness. Unfortunately, that will also bump up the cost.
Another acoustic-isolation method to consider is the use of resilient channel to decouple the drywall from the framing members. Resilient channel, also called r-channel, c-channel, or hat channel, is basically a sheet-metal strip that mounts to the framing members. You would then mount the drywall to the channel instead of connecting it directly to the studs or joists. As a result, sound energy will not transfer directly from the drywall to the framing, where it can transfer to other wall surfaces and re-radiate into adjoining rooms.
If you don't have the space or budget to use a complete room-within-a-room system, you can use the second technique, staggered-wall construction. You will still get substantial sound-isolation benefits. In traditional wall construction, the top and bottom plates would be the same size as the studs. For example, if you were using 2-by-6 studs, you would use 2-by-6s for the top and bottom plates.
With staggered-stud construction, your top and bottom plates will be at least one size larger than the material you use for the studs. For example, a 2-by-6-stud wall would use 2-by-8 or 2-by-10 top and bottom plates. Rather than sharing common studs, as with traditional stud wall construction, the inner and outer drywall hangs on different studs. Because there are separate wall studs for the wall's inner and outer surfaces, sound energy that transfers from the inner wall surface to the stud will not transfer to the outer wall surface. You should place the studs so that they are not directly lined up with the studs on the opposing wall, hence the name, "staggered-stud wall." Then, you would weave the insulation batt horizontally through the wall between the inner and outer studs.
The same techniques apply for creating an effective sound barrier as with true, double-wall construction. You can (and should) use all of the techniques that you can fit into your budget. In addition, with staggered-stud walls, it is even more important that you completely seal all of the wall penetrations, because the entire wall shares a common cavity. The shared wall cavity, unobstructed by stud bays as in a traditional wall, will allow any sounds on one side of the wall to pass directly through to the other side via the penetrations.
With either technique, no matter how much you seal the penetrations, you will still need to get in and out of your home theater. That leaves a huge hole smack in the middle of the wall. At the very least, use an exterior door with heavy weather stripping. This will be much more effective at reducing sound—both inside and outside of your theater—than a standard interior door. Look out for special doors that are made for recording studios and theater applications. These are even better at keeping sound where it belongs, and you should use these wherever possible to ensure the space's acoustic integrity.
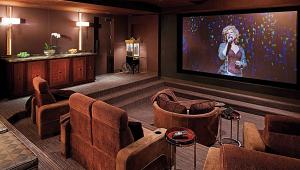
By taking advantage of either the full double wall or the staggered-stud construction technique, you can enjoy your home theater more often and maintain peace and tranquility in your household and neighborhood. OK, it's time to go to the movies!
Tip #1: Make the Air Quiet
Your home's heating, ventilation, and air-conditioning (HVAC) system can be a significant but overlooked source of ambient noise in your home theater. In many cases, this might be the first place to make improvements. Here are some suggestions for reducing HVAC noise:

1. Position the machinery as far away from the room as possible and isolate the equipment against the structure-borne vibration.
2. Use a low-air-velocity system that will allow 10 to 15 air exchanges per hour, depending on the size and heat load within the room.
3. Use dedicated sends and returns.
4. Place intake and outtake vents away from the listeners and speakers.
5. Use duct liner board, or round metal ducts lined with glass fiber.
6. Include a plenum silencer near the fan discharge.
7. Introduce right-angle bends downstream from the fan and upstream from the outlet.
8. Use isolation hangers to suspend ductwork when possible.
9. Use large, non-tympanic air-terminal diffusers. Avoid multilouvered vents.
10. Apply liberal amounts of acoustic caulking to seal penetrations made to the structure.
11. Eliminate as many obstacles from the air's path as possible.
Where possible, employ a number of these suggestions, including building a plenum silencer. The silencer consists of a duct-lined box that's larger than the duct that feeds it. It's like a car muffler, only bigger. It has a vent that supplies air at one end and an output, which then feeds the room, at the other.
The main concept is that velocity creates noise. Less velocity but more quantity (i.e., more ducts move more air more slowly) will create less noise in the system. Try to use ducts that consistently get larger or break off into multiple outputs so that more air can travel through them with lower velocity.
Tip #2: Add a Door
If your home theater resides in an area that has open archways to other parts of the house, you should add a door. Even double French doors enclosing an archway can make a huge improvement. Pre-hung, exterior-grade, solid-core doors include weather stripping around the edges and start at around $200 to $300 (not including installation). Placing a threshold across the bottom creates an airtight seal around the door. A solid-core door placed on a hollow core's frame may eventually rip itself off its hinges. Enclosing the room will not only improve noise isolation, but can substantially improve bass output, as your subwoofer will no longer try to pressurize air throughout your entire house.
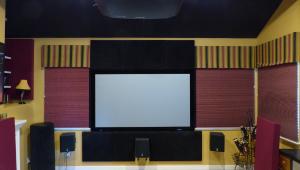
Tip #3: Finding First-Order-Reflection Points
The fancy way to find first-order reflections is with a CAD (computer-aided design) program. In the program, draw a line from each speaker to each wall (including the ceiling) and then to the listening area, making sure the program keeps the angle of incidence to the wall equal to the angle of reflection from the wall. If you don't have one of these handy, multithousand-dollar computer programs, grab a friend and a mirror. Have the friend slide the mirror along the walls around the home theater while you sit in the listening position. Mark the point on the walls where you see each speaker's reflection. These are the primary (first) reflection areas. If the distance between you, the mark on the wall, and the speaker is less than 40 feet, there's a good chance you'll want some form of acoustic treatment at that mark.

- Log in or register to post comments


| Displays Electronics Speakers | Sources Other Gear Software | Top Picks of the Year Top Picks | Custom Install How To Buy How To Use |
Tech 101
|
Latest News Features Blogs | Resources Subscriptions |
WHERE TECHNOLOGY BECOMES ENTERTAINMENT
 © 2024 Sound&Vision
AVTech Media Americas Inc., USA
All rights reserved

