- REVIEWS
Displays Electronics 
Speakers Sources Other Gear Software - HOW TO
How To Buy How To Use Tech 101
Going Retro
 I’ve always lived in a used house. “Existing home” is the euphemism real estate people like to use. Life is good—until you realize that there are no phone jacks close to the spots where your bed or desk should go. And why are there no Ethernet jacks in the house? And no wiring for TVs anywhere but the living room? Needless to say, you can’t find in-wall speakers, volume controls, or multiroom A/V distribution of any kind. Maybe you should have guessed from the horse and buggy parked in the garage when your real estate agent showed the house that the previous owners weren’t interested in keeping up with the more technologically advanced Joneses across the street.
Now what? Since there are no phone jacks handy, you can use your cell phone to call your local home remodeler and a custom home A/V installer. Oh, wait, you’d rather not spend money remodeling a home you just spent a lot of money on acquiring? Well, guess what? You don’t have to hire professionals to remodel your home in order to bring it into the modern, digital era of home entertainment and info enrichment. Doing it yourself is entirely doable. And if you’re clever, handy with a hammer (plus a few other basic tools), and don’t get queasy at the sight of drywall dust, you can integrate a lot of today’s high-tech gear and technology into your used home and make it look and feel like it was there from the beginning. If you’re really good, you can make it look like the stuff isn’t there at all.
Before I go any further, let me say unequivocally that there’s no substitute for a professional A/V installer. These guys are like orthopedic surgeonsŃthey have the know-how and the tools to poke and prod inside your home’s walls and ceiling in ways that will leave minimal scarring. But if you’re like me and want to do it yourself, what follows is a series of tips, techniques, tools, and products that’ll make the task of retrofitting your 20th-century (or older) home for the 21st century a little more achievable.
Wired, No New Wires, or Wireless?
With the current state of technology, you have three options for connecting the various components located in multiple rooms of your home: wired, no new wires, and wireless. Oh, what joy there would be if everything were wireless! Peace would reign on earth, and custom-installing a 12-zone system would be much quicker. Unfortunately, the A/V world isn’t close to being a completely wireless one. There’s a variety of non-compatible wireless formatsŃstandardized ones like ZigBee and Z-Wave, the IEEE 802.11 alphabet soup, and others that are strictly proprietary. Wireless devices and media streaming systems can be maddening to set up, difficult and inconvenient to use, and darn near impossible to troubleshoot. (“Uh, try unplugging everything and rebooting. If that doesn’t work, sprinkle some chicken blood around.”)

i2i Stream’s Tramseivers and Amphony 1500 Audio Transmitter
Wire Not
There are some excellent wireless systems and devices that can stealthily modernise your home without resorting to voodoo, as long as you pick the appropriate ones
for the task and understand their limitations. For example, if all you need is to get an audio signal from your A/V receiver in the front of the room to the surround
speakers in the back, you’ll have little trouble finding a wireless (analog) audio transmitter for less than $50. Of the better digital options, there’s i2i Stream’s unamplified transceiver two-pack with a 30-foot range ($119) or Amphony’s 1520 ($129), which includes a wireless amplifier and claims a 50-foot line-of-sight range. SoundCast’s SubCast SCK541 ($169) is designed to wirelessly send the LFE or subwoofer out signal from your AVR to your powered sub.
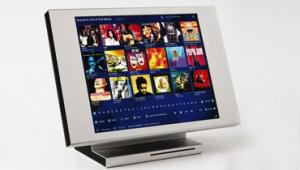
If multizone audio is more what you had in mind, two standouts immediately come to mind. The first is the Sonos multiroom music system (see page 48), which is designed to provide easy and reliable access to all of your digital music, as well as Internet radio stations and local source components, in any location where you install a wireless (or wired) ZonePlayer. The other is Control4’s home entertainment/automation system. In addition to acting as one uber-universal remote control for your home theater, you can easily expand it to provide wireless multiroom audio and handle all kinds of home automation tasks, including lighting and power management.

Sonos Bundle 250
It’s hard to distribute video wirelesslyŃespecially high-def videoŃand keep the quality pristine. And, of course, there are copy-protection (HDCP) issues to deal with. Wireless analog NTSC video transmitters have been around for ages, though. Fifty bucks (and a sedative to calm your nerves while you navigate the frantic X10 Website) will get you a wireless video transmitter and a receiver that X10 says will give you DVD-quality image with no quality loss up to 100 feet away. Actual results may vary. Belkin and Gefen have been touting wireless HDMI systems primarily designed for transmitting HD video wirelessly within a single roomŃsay from a surround processor to a projector or flat panel at the other end of the room. Until recently, these have only been seen in prototype form. Gefen’s Wireless HDMI Extender costs $999; Belkin’s Flywire is slated to be $1,499 when it’s available. That kind of money will buy a lot of wire and plenty of professional install time, so for the highest-quality and lowest-cost DIY retrofitter, hard-wired connections for video are the best way to go.
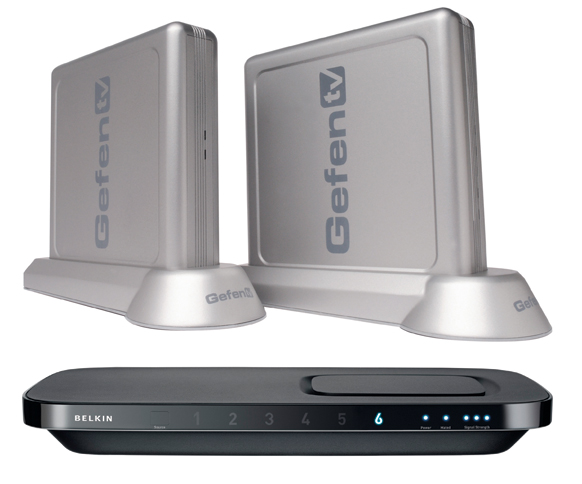
Gefen Wireless HDMI Extender and Belkin Flywire HDMI
Since virtually every house is wired for electricity and many have multiple cable TV outlets, any technology that uses those existing wires is a welcome thing. Technically, though, it’s not really wireless; it’s more like a “no new wires” solution. Products that incorporate Powerline technology utilize the AC wiring to distribute signals. There are a limited number of A/V-oriented devices that use the electric wiring to replace the HDMI cable that would normally connect your AVR to your HDTV; but most are designed to help create or extend a home LAN. Unfortunately, none of these solutions is perfect. One problem is that your outlets need to be electrically connected in order for powerline devices to establish a network connection between them. Maintaining consistent video signal quality is another challenge that has yet to be overcome. The final result is that sometimes it’s just better and easier to use a good old-fashioned hard-wired connection.
Run, Wires, Run
In years past, putting together and installing a multizone audio system meant running lots of wires for the speakers, keypads, and IR repeater system. Things are different today. On the most basic level, a surprising number of relatively affordable AVRs, such as Onkyo’s TX-SR507, include powered Zone 2 outputs. All you need to turn that $399 AVR into a multiroom control center is speaker wire, speakers, and some gumption. A simple speaker selector will expand the system to even more rooms.
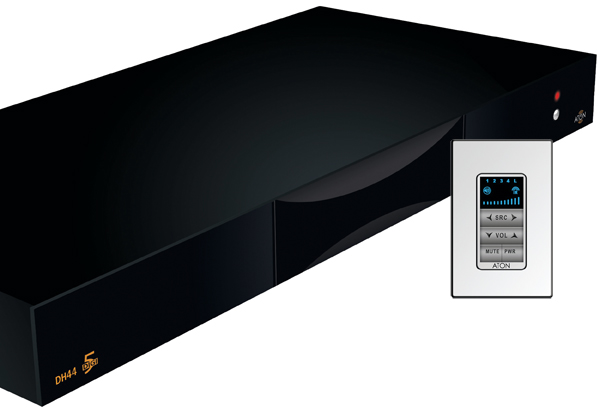
Aton DH44 Audio Router
Many wired multiroom audio systems are extremely retro-friendly, too. Aton’s four-source/four-zone DH44 Digi-5 digital audio router ($799, plus $199 for the keypad) only requires a single Cat-5 cable run to each amplified keypad plus speaker wire to run directly from the keypad to that zone’s speakers. The system is so simple to set up that the quick-guide instructions fit on a 17-by-30-inch poster (with nice large illustrations). Other systems, such as Russound’s CA44 four-source/four-zone system ($1,999), require a Cat-5 cable to each keypad and a separate run of speaker wire from the amplifiers in the CA44 controller to each of the speakers. Video products that can distribute HD using either single or dual Cat-5 runs are available from Gefen, Xantech, Aton, and others.
I’ve tried to convince my wife that long stretches of Cat-5 and speaker wires draped across the room from nails in the wood trim and running down the hallway is an up-and-coming decor trend, but she doesn’t buy it. Here are some ways you can hide your wires until it does become chic to leave them lying in the open.
1. Stop, Hammer Time
If all you need to do is get a speaker wire out of the way, perhaps to keep from tripping over it or getting it caught in the vacuum cleaner, one of the most cost-effective ways of doing this is to tack the wire to the wall along the baseboards or around the door trim with wire clipsŃlittle plastic hooks that hold the wire snug when nailed down. RadioShack and virtually every hardware store in the northern hemisphere carry wire clips of one sort or another. Most clips are designed to hold one or two wires in place. They’re often available in white or black and cost pennies per clip. When all else failed and time was short, I used wire clips (a lot of them) to secure a Cat-5 cable that needed to run up a flight of stairs. It was functional, but like other long runs and/or large bundles of wires secured with wire clips, it was unsightly.
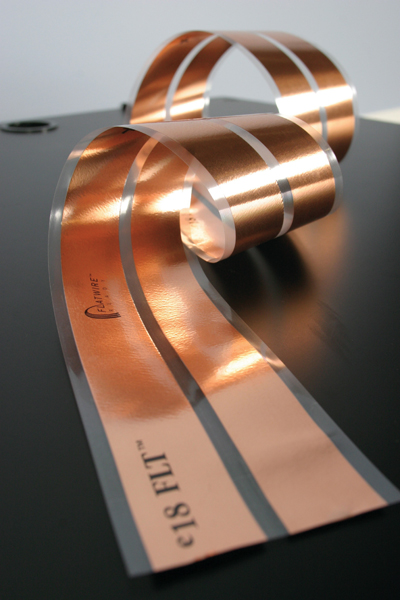
FLATWIRE Speaker Wire
As my wife continually reminds me, “Beauty isn’t cheap.” So instead of run-of-the-mill low-cost round wire, you can use Acoustic Research’s PR360 flat speaker wire or Monster Cable’s SuperFlat Mini speaker wire to pretty things up. Neither of them is super flat, but they are flattenedŃand paintable. Expect to pay at least 60 cents per foot. It’s not the easiest stuff to work with when it comes to making right-angle turns at the corners of doors and windows, however. Acoustic Research calls its PR390 ($79 for 50 ft) speaker wire “MicroFlat,” and at 0.5 mm thick, it is pretty darn flat. It also includes an adhesive backing, so no wire clips are necessary.
2. Hide It in Plain Sight
Baseboards, crown molding, as well as door- and window-frame trim were invented to cover gaps and other imperfections in a building’s structure. There’s no reason why you can’t use them to hide a few wires, too. In the older sections of my home, there’s plenty of space behind most of the baseboards. It’s simply a matter of gently prying the baseboard away from the wall, tucking in the wire, and hammering the baseboard back in place.
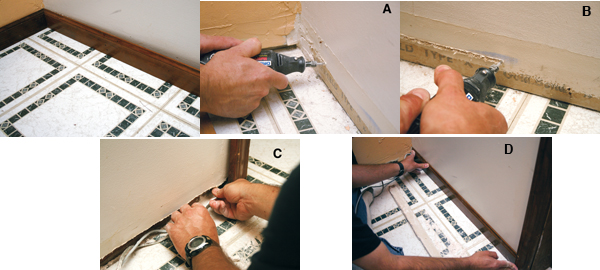
To conceal wires in a baseboard, Darryl used a Dremel tool to remove a strip of drywall (A and B). He then inserted the wires (C) and replaced the baseboard (D). The finished job is shown in the image on the upper left.
In newer homes where the tolerances are tighter, you’ll need to do a little drywall modification. Carefully pry the baseboards away from the walls. If there’s caulk, paint, or wallpaper to contend with, you may need to use a utility knife to separate the top of the baseboard from the wall. Once you’ve removed the baseboards, cut through the drywall and remove a strip along the bottom that’s wide enough to contain the number of wires you need to conceal. (Make sure, of course, that the width of the drywall you remove is less than that of the baseboard you’ll be covering it with.) A drywall saw works well, but a Dremel tool with a drywall bit is much faster.
At this point, since you already have the bottom of the wall open, you can take the opportunity to run wires through the wall up to an in-wall or on-wall speaker. Consider buying fish tape or a push rod from the hardware store first. If there isn’t any attic spaceŃwhen there’s a second floor above the room, for exampleŃthis may be the best way to invisibly get wires to an in-wall speaker.

Darryl uses a surface raceway to conceal wire he ran along a door frame.
3. Cut a Rug
You can also co-opt wall-to-wall carpet to conceal wires. It’s extremely helpful to use a special install tool called under-carpet tapeŃessentially a long strip of 0.75-inch-wide stainless steelŃto snake the flattest wire you can afford between the carpet and the pad. It can be easy to get the tape caught on the pad and twist the wire as it goes through, so you’ll need to take your time. Try to avoid running the wire under high-traffic areas for the obvious reason of excessive wear and tear.
4. Your Insurance Doesn’t Cover Molding? So you’re not handy with a drywall saw, and you removed all the carpets in your house after the cats kept peeing on them. Surface raceways or wire molding might be your answer. These are essentially paintable channels with removable covers that mount on the surface of the wall. They come in sizes for single or multiple wires. Some are designed to be used vertically in corners, while others are horizontal, to be used along the ceiling like crown molding or along the floor like a baseboard. There’s even a chair rail version. It’s more aesthetically appealing than using wire clips and often easier to install, especially if you use the kind with an adhesive strip on the back. Since the channel covers are removable, you can add additional wires in the future if your system changes, something that’s much more painful to do with other methods. Raceways are an especially helpful and painless way of hiding the wires for wall-mounted flat-panel TVs and on-wall speakers.

Wire molding can be a great way to conceal wire runs in a corner of your room without needing to cut into the drywall. Just run your wire (A) and cover the molding (B). Then pull the wire out of the corner connector (C), run along the floor, and cover with another piece of molding (D).
Wiremold, CableOrganizer, and Panduit offer a variety of raceways and accessories, such as corners, T-junctions, and even matching surface-mount outlet boxes that you can use to mount wall plates and keypads. Unfortunately, the channels themselves typically start at more than a dollar per footŃand that’s not counting the additional parts and pieces you may needŃso wiring a large room (or house) can be pricey.
5. Does My Wire Look Flat to You? If you want a truly invisible install and can’t or don’t want to put wires in your walls, Flatwire makes incredibly flat speaker wire (0.1 mm thick) that can be glued to any wall, plastered, and then painted or wallpapered over. When done properly, the stuff is virtually invisible. Flatwire also makes flat component video cables, Ethernet cables, and has ultra-flat HDMI cables in the works. Spools of 18-gauge speaker wire sell for around $2 per foot. Flatwire also makes 14- and 12-gauge wire at $2.50 per foot and $3 per foot, respectively.
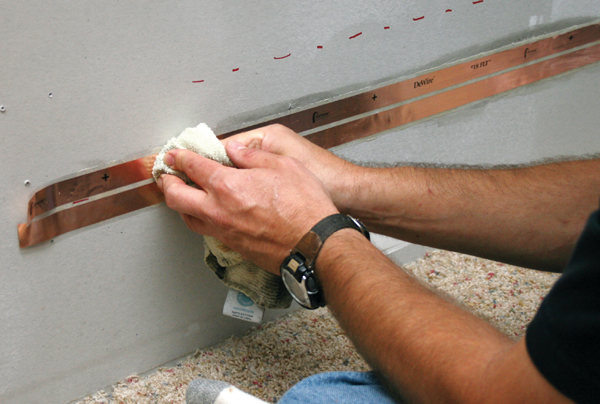
Darryl attaches Flatwire’s 0.1mm speaker wire directly to the drywall. It’s designed to be virtually invisible under plaster, paint, or wallpaper.
Seeing Is Unbelieving Hopefully you’ve come to the conclusion that it’s possible to retrofit your old home with plenty of A/V technology without totally destroying its original looks or spending big bucks on remodeling or installation. Sure, it’s something you’d wish the previous owners would have done, but then if they had, they might not have wanted to move out of the house. After it’s all done, even though you’ve increased the value of your home, you probably won’t ever want to leave, either.
- Log in or register to post comments


| Displays Electronics Speakers | Sources Other Gear Software | Top Picks of the Year Top Picks | Custom Install How To Buy How To Use |
Tech 101
|
Latest News Features Blogs | Resources Subscriptions |
WHERE TECHNOLOGY BECOMES ENTERTAINMENT
 © 2024 Sound&Vision
AVTech Media Americas Inc., USA
All rights reserved

