- REVIEWS
Displays Electronics 
Speakers Sources Other Gear Software - HOW TO
How To Buy How To Use Tech 101
Garage Home Theater: Part II

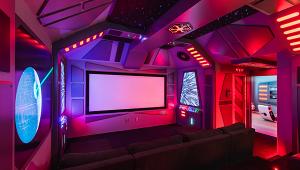
We overcame many challenges, and the theater is finally roughed out. Most of the heavy lifting is behind us, and we can look forward to putting on the finishing touches that will turn this space into the room of our dreams. With the platforms, lighting, walls, and wiring in place, you can start to really visualize this space as a theater.
Details, Details, and More Details
The team will overlay every square inch of surface—from wall to wall and ceiling to floor—with a wide variety of textures and materials, ranging from carpeting and acoustic panels to a fantasy twinkling-starlight ceiling.
The first phase of construction was very intense due to various structural problems, and phase two will be equally intense because of the fine detail required. We turned over the interior designs to the Acoustic Smart wood shop. These professional craftsmen are handcrafting frames to hold together our acoustic panels and treatments, pillars to house the speakers, decorative moldings, and more. Much of our design called for custom millwork, which is also performed in our shop. We also selected, matched, and applied the finest furniture stains.
Piece by piece, these wood components were delivered to the theater for installation. We made the final adjustments on site, thus assuring a seamless, tight fit.
A Team Effort
A wide variety of skills were required to guarantee the perfect environment for enjoying a true theater experience. Many professionals spent countless hours in our home. At any given time, you might find electricians, carpenters, audio engineers, video engineers, and carpet/seat/panel installers. We left nothing to chance. A great theater depends on everything working together as a unit. It is not enough for the A/V components to function properly. The room itself has to work in harmony with the premium electronics to allow these components to achieve their maximum potential.
At the same time, I wanted an environment where I could be totally relaxed and comfortable so I could fully appreciate the benefits of all the great A/V equipment we have on order. It pays to assemble a team of experts if you want to achieve exceptional results.
Piece by Piece—Putting It Together
Outlined below are some of the areas we addressed while finishing the interior. The order in which these appear in this article is not necessarily the same order in which we completed them. We accomplished some of the tasks simultaneously.
Wall Panels and Frames
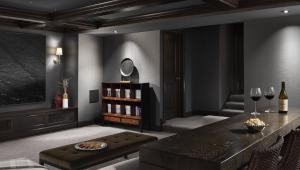
The minute we started installing the wall treatments, the theater came alive. We can now see what the theater will look like, and we're anxious to start using it.

Acoustic Treatments
Each of our acoustic panels is 2.5 inches thick and consists of 0.5 inches of sheetrock surrounded by 1 inch of sound-absorbing material. (A) Some panels are a combination of absorptive and reflective materials. (B)

Diffusers
It is important for the sound to reach all parts of the room. Our diffuser on the back wall disperses the sound from side to side, up and down.

Sound Pillars
We will use a special acoustic caulk to seal the speaker wire entering the sound pillar. The inside is lined with our Acoustic Smart "Sound Shaper" product. Both of these products prevent sound leakage and eliminate unnecessary bouncing of sound in the cabinet.

Fabrics
You can now see how the speaker pillar looks after installation. The lower portion contains an acoustic panel. All of the panels are covered with our own breathable fabric that looks richly woven but allows sound to easily flow through.

Rack
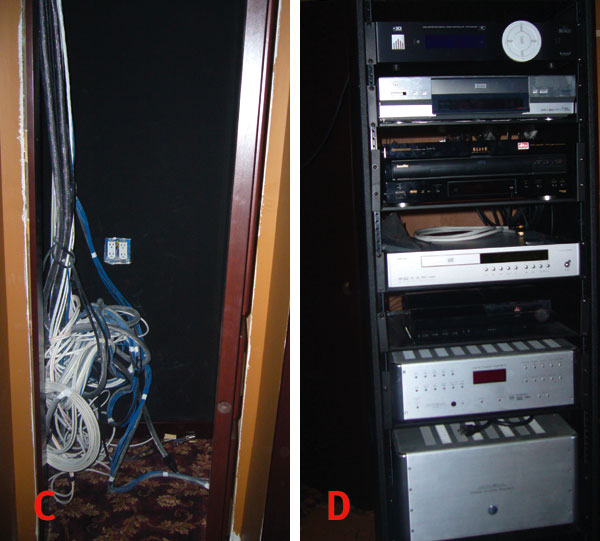
In phase one, we pre-wired the room with the help of Acoustic Interiors. Most of the wires culminate in the rack closet. (C) After the rack is assembled and the wiring is attached, we'll roll the whole unit into the closet. (D)
Door
In order to seal the room, we installed a 300-pound acoustic door using special hinges. This unique type of door is used in professional recording studios. (E)
We applied cherrywood moldings and custom staining to the door, so it now blends in. (F)

Projector
While we were finishing the ceiling, we built the projector mount. It's very secure, properly aimed, vibration free, and capable of sustaining the weight of the Runco projector. More about the projector in our next installment.

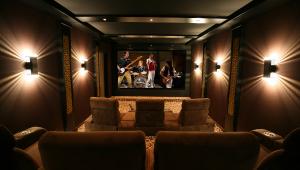
Fiberoptic Ceiling
The finished ceiling will contain an array of stars created with fiberoptics. For the most dramatic effect, we used two illuminators, one to create twinkling stars and the other to generate shooting stars. The result is amazing.

- Log in or register to post comments


| Displays Electronics Speakers | Sources Other Gear Software | Top Picks of the Year Top Picks | Custom Install How To Buy How To Use |
Tech 101
|
Latest News Features Blogs | Resources Subscriptions |
WHERE TECHNOLOGY BECOMES ENTERTAINMENT
 © 2024 Sound&Vision
AVTech Media Americas Inc., USA
All rights reserved

