- REVIEWS
Displays Electronics 
Speakers Sources Other Gear Software - HOW TO
How To Buy How To Use Tech 101
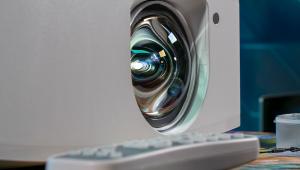
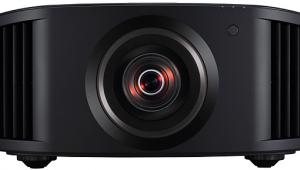
DreamVision Dream’E SXRD Projector Page 2
Unfortunately, the remote doesn’t have enough power to bounce its IR commands off the screen and back to the projector from 10 feet away. I had to get about 5 feet from the screen before I could reliably control the projector while I pointed the remote at the screen. Since the couch in our studio’s theater room is about 10 feet from the screen, I had to point the remote back toward the projector itself, raising my arm fairly high so the IR receiver could see the beam.
 For the most part, the menu system is simple and well organized. Each time you go into the system and press the Enter button, it follows the path to the last control you adjusted, which is very nice. Also, when you select a parameter to adjust, the rest of the menu disappears and drops the parameter to the bottom of the screen, just as it should be.
Still, there are a few odd things in the menu system. The first is the organization of the Picture menu, which includes three submenus—Picture Mode, Picture Adjustment, and Advanced Picture Settings. The Advanced submenu has only two items—Lens Aperture and Blue Only mode. Everything else, such as Gamma and Color Temperature, is in the main Picture Adjustment submenu. Why even have an Advanced submenu?
Another weird thing is the presence of Black Level and White Level controls in the Input Signal menu. These are in addition to the Brightness and Contrast controls in the Picture menu. I was glad to have the White Level control once I got into setting up the projector, as I’ll discuss in a moment.
Finally, the aspect-ratio modes for use with the anamorphic lens—Cinemascope and Converted 16:9—provide unique variable controls. You can set Cinemascope anywhere from 1.78 to 2.50, while you can set Converted 16:9 from 1.30 to 1.78. This seems like it would be a good thing, but the Cinemascope setting did nothing at all. I had to set the Converted 16:9 setting to 1.33 for 16:9 material in order to display correctly. When I set it to 1.78, it stretched the image to the width of the 2.35:1 screen, which hardly seems intuitive.
Setup and Testing
The first thing I noticed when I set up the Dream’E is that the horizontal and vertical lens-shift controls are buried deep behind the front fascia, which makes them very awkward to reach and adjust. If the projector is set on a surface, you must lift the front, find the thumb wheel, adjust it, set the projector back down, reposition it, and see if you got it right. What a pain in the butt! I realize that if DreamVision put these wheels on the outside of the case, it would spoil the graceful lines, but form must follow function, if you ask me.
As I started setting the Bright-ness and Contrast controls, I could see below black from a Blu-ray test disc, but not from the AccuPel test-signal generator, no matter where I set the Brightness or Black Level. Also, the Black Level control behaves backward—when I increased its value, it lowered the black level. However, the Brightness control worked as I expected.
Next, I found that the projector totally clipped whites no matter where I set the Contrast. I soon discovered that I had to reduce the separate White Level setting quite a bit to eliminate clipping. After that, I looked at the Contrast control again only to find that it behaves backward as well—when you increase the value, it lowers the white level. Very strange.
The Dream’E offers two lamp modes—Normal and Economic. I normally try to use a projector’s lowest lamp setting to extend its life and reduce power consumption, but in this case, the Economic mode wasn’t as consistent in terms of gray scale across the brightness range as the Normal mode. Both modes achieved a peak-white level of about 16 foot-lamberts on my 100-inch-wide, 2.35:1, 1.0-gain screen with and without the anamorphic lens.
It was fairly easy to install the Panamorph lens. The lens bracket has some horizontal range of motion, which you should use instead of the main horizontal lens shift if possible. The lens itself can be shifted up and down and tilted a bit to minimize pincushioning, in which the top and/or bottom of the image bow inward.
DreamVision recommends a throw distance of at least 5 meters to avoid pincushioning on a flat 2.35:1 screen; otherwise, the company recommends using a curved screen to compensate. That’s all well and good, but curved 2.35:1 screens are very expensive, typically more than the projector itself, even with the anamorphic lens. The longest throw distance I achieved was 14.5 feet, which isn’t that shy of 5 meters. However, there was still some minor pin-cushioning that I could see.
As I was looking at various bright test patterns, I noticed a band of blue discoloration along the top few inches of the image. The discoloration remained even after I made sure the horizontal and vertical red and blue alignment controls were optimized. This was the first that DreamVision had heard of it. They assured me that if any owner had this problem, the company would repair or replace the projector, so I’m not really worried about it.
I ran through various test discs at 480i and 1080i, and the Dream’E performed very well overall in terms of deinterlacing, scaling, jaggies, and so on. With the anamorphic lens in place, I was concerned that the Cinema-scope and Converted 16:9 aspect-ratio modes, which respectively scale the image vertically and horizontally, would degrade the performance in these areas. They did, but it was much less than I expected.
I also took a look at some test patterns that reveal any misalignment of the three imaging panels and chromatic aberration in the lens. Overall, the projector performed well in this regard, with very little color misalignment. However, there was some chromatic aberration, which caused white lines to exhibit color fringes, especially in the corners of the screen. As I expected, the anamorphic lens exacerbated the chromatic aberration a bit, but this wasn’t particularly evident on the real-world material I watched.
Real-World Performance
I did all of my real-world viewing with the anamorphic lens in place. I switched back and forth between the Cinemascope and Converted 16:9 aspect-ratio modes depending on the material. Fortunately, you can set up the projector to toggle between these two settings with the remote’s Aspect button, which is much more convenient than cycling through all the modes each time you want to watch something in a different aspect ratio.
|
|
| ||||||||||
- Log in or register to post comments


| Displays Electronics Speakers | Sources Other Gear Software | Top Picks of the Year Top Picks | Custom Install How To Buy How To Use |
Tech 101
|
Latest News Features Blogs | Resources Subscriptions |
WHERE TECHNOLOGY BECOMES ENTERTAINMENT
 © 2024 Sound&Vision
AVTech Media Americas Inc., USA
All rights reserved

