- REVIEWS
Displays Electronics 
Speakers Sources Other Gear Software - HOW TO
How To Buy How To Use Tech 101
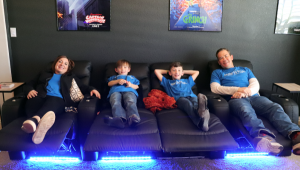
DIY Reader Home Theater: A Dream Come True

The dream of one day having a movie theater in my home was born in the summer of 1976. I was impressed by my friend Brian's dad's theater. It had a dozen or so of those old wooden seats that you'd find in a school auditorium. It had a separate projection booth for the Bell & Howell 16mm projector, and it had an actual stage, with speakers built into the walls.
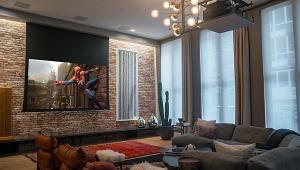
Flash forward to 2001. My wife Ellen and I were shopping for a home, and my only criteria for the house was an unfinished basement with ceilings at least 8 feet high. Ellen was interested in the kitchen, a dining room, bathrooms, and so on. We found a beautiful, five-bedroom colonial that fit the bill perfectly.

I immediately began designing the basement. I built a scale model of what it would look like—theater and all—so Ellen could clearly see what was in my mind's eye and green-light my project.
Using Home Theater magazine and the Internet, I researched and gathered my materials. I purchased my A/V equipment piece by piece whenever an electronics retailer had a sale. Patience truly is a virtue—I saved a lot of money by waiting for those sales.

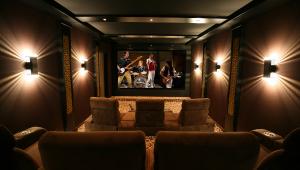
The basement was one large open space, so I decided to make it into five rooms: a laundry room, a recreation room, a gym, a storage room, and finally my home theater. The theater's dimensions are 12.5 by 19 by
8 feet. Because the room would be constructed on a concrete slab, we needed to build up the floor. After all, subwoofers don't really work well on concrete. I started by laying pressure-treated one-by-threes, face down, spaced every 12 inches, and running length-wise from the front of the room to the back. Then I placed 0.75-inch plywood sheets on top to create a floor with hollow chambers running the length of the room. In effect, this created a drum that would vibrate and transmit the sound from the Velodyne CHT-12 subwoofer. The floor does not come into direct contact with the walls. There is a 0.5-inch space separating them. This prevents the low frequencies from transferring to the rest of the house.

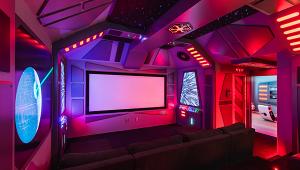
I constructed the interior walls using the staggered-stud method for framing and included R14 insulation, as well as 0.625-inch sheetrock. I used coarse-thread drywall screws instead of nails to put up the sheetrock. Eventually, from the sound vibrations within the theater, the nails could have pulled out of the studs. Again, I did not want to transmit sound from the theater to the adjoining rooms. The interior walls of the theater are covered by 110 custom-made acoustical tiles. I made each tile using 0.5-inch Homocote board and 0.25-inch self-adhesive open-cell foam. I wanted to cancel the first-point reflections from the main speaker towers, so I constructed the first 4-by-8-foot sections of wall tiles using the foam over the Homocote, and then I upholstered the tile. This allows the tile to absorb both low and high frequencies. However, as you move toward the back of the theater, the tiles are more reflective (because they have no foam). This enhances the sound from the rear and side speakers by allowing greater reflection.
I upholstered each tile with a material called Prelude fabric. This stuff is like carpeting for walls. Once I explained to Ellen that brighter colors could reflect light back to the screen, she chose the blue, black, and purple combination.
I glued almost all of the tiles in place with contact adhesive. The tiles that frame the four Polk Fxi30 surround speakers are held in place by Velcro. I ran the Monster cables through a network of PVC conduit that I built into the walls. The tiles are removable just in case the speakers need servicing or replacement. Access to the Polk i150 towers on the stage is easy. I just open the front speaker panel doors on either side of the stage.

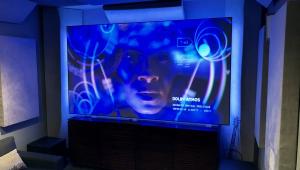
The screen is a story unto itself. A company called Goo Systems manufactures a highly reflective paint used to create movie screens. I bought a sheet of Sintra board, a non-porous, rigid plastic, to use as a screen. I mounted a 4-by-7.5-foot sheet to a wooden frame. Then I placed the frame on a track—like a big window. I needed access to the basement window located just behind the screen. This arrangement makes getting to the window a breeze. Total cost for the screen was $225, and the picture is amazing!

The projector was the last piece of equipment I purchased. I decided to go with Hitachi's PJ-TX100 HD LCD projector. I mounted the projector using a Vogel Evolution EPC-4010 projector mount. Because I planned to mount it to the ceiling, I needed to attach it to a joist. There was no joist in the exact spot I needed, so I extended the closest joist by building a series of interlocking blocks. The entire system comes together with the Onkyo TX-DS898 7.1-channel A/V controller.

Designing, building, and calibrating the theater in my spare time took exactly nine months. Therefore, I guess you could call it my baby. Ellen and I prefer to call it the Robelle. We love nothing more than our friends and family filling the seats and watching the latest releases on DVD or something in high definition on cable. With a little ingenuity, patience, and perseverance, dreams really can come true.
Equipment List:
Note: Everything on this list was purchased on sale.
Commercial-Grade Carpeting (Installed) $600
Hitachi PJ-TX100 HD LCD Projector $2,900
Homemade 7.4-by-4-foot Screen $225
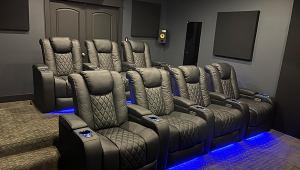
Marquee Theater Seats (8) $1,400
Monster HTS-3600 Power-Management System $300
Monster THX SP16 Speaker Cable $250
Monster Gold-Plated THX-GP Connectors $50
Onkyo TX-DS898 A/V Receiver $900
Polk i 150 Tower Speakers (2) $1,000
Polk FX i30 Surround Speakers (4) $300
Polk CS i40 Center-Channel Speaker $200
Prelude Fabric, Homocote, and Foam Padding for Acoustical Wall Tiles $1,000
Sony DVP-NC675P F-ive-Disc Player $140
Velodyne CHT-12 Subwoofer $350
Vogel Evolution EPC-4010 Projector Mount $120
TOTAL BUDGET $9,735
- Log in or register to post comments


| Displays Electronics Speakers | Sources Other Gear Software | Top Picks of the Year Top Picks | Custom Install How To Buy How To Use |
Tech 101
|
Latest News Features Blogs | Resources Subscriptions |
WHERE TECHNOLOGY BECOMES ENTERTAINMENT
 © 2024 Sound&Vision
AVTech Media Americas Inc., USA
All rights reserved

