- REVIEWS
Displays Electronics 
Speakers Sources Other Gear Software - HOW TO
How To Buy How To Use Tech 101
Atmos Makeover: A Space Odyssey, Part 1 Page 2

Gentlemen, Start Your Skil Saws!
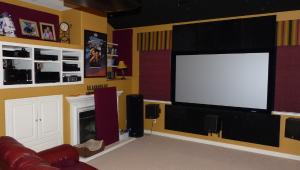
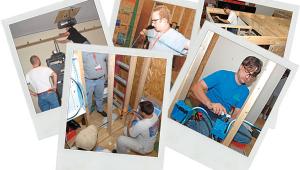
I’ll skip the full blow-by-blow description of the construction process and give you the basics. (Scroll down for a series of photos.) My existing room was treated with acoustic panels, which all had to be removed to begin the process. In order to secure the new ceiling properly, I also needed to remove a 7-inch band of drywall from around the room to install 2x6 headers for my beams to connect to. If you’ve never worked with drywall before, it’s about the messiest substance known to man, with fine particles of dust that were impossible to keep from spreading around the house, despite my best efforts. As you can see by the various pictures of the construction, it wasn’t an overtly complicated process and the framing and wiring of electrical took about a day and a half to complete.
The only part of the project I hired out was the hanging and texturing of the drywall. The thought of schlepping 4x8 sheets of drywall up to the 127-inch ceiling without the proper tools was too much to bear, so I arranged for that work to be done by someone else. It took the dry wall guy two days to complete his portion of the project and I gave the newly textured surface an additional two full days to dry before commencing with my painting.
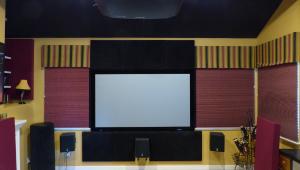
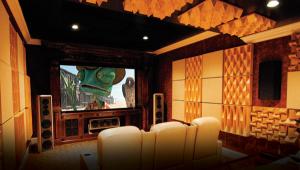
In lieu of redecorating the entire room I chose to go with the existing colors—except for the ceiling which would be as black as the moonless sky. The front, right and left walls were previously painted in Benjamin Moore’s HC-7 Bryant Gold and the rear wall is HC-20 Concord Ivory. I primed all of the newly textured surfaces then commenced with two coats of finish in order to achieve consistent coverage. With black going over the white primed ceiling, I was concerned that two coats wouldn’t be sufficient, but fortunately it was.
With the construction essentially complete, it was time to put my theater system back together, including, of course, the installation of Atmos ceiling speakers. Click here for Part 2 of my Atmos upgrade diary.
Construction of the Lowered Ceiling


Finishing the New Ceiling

|
| |||||||||
- Log in or register to post comments


| Displays Electronics Speakers | Sources Other Gear Software | Top Picks of the Year Top Picks | Custom Install How To Buy How To Use |
Tech 101
|
Latest News Features Blogs | Resources Subscriptions |
WHERE TECHNOLOGY BECOMES ENTERTAINMENT
 © 2024 Sound&Vision
AVTech Media Americas Inc., USA
All rights reserved

